> ## Documentation Index
> Fetch the complete documentation index at: https://docs.monad.xyz/llms.txt
> Use this file to discover all available pages before exploring further.
# How to connect a wallet to your app with Reown AppKit
This guide shows you how to use [Reown AppKit](https://reown.com/appkit) to enable wallet connections and interact with the Monad network. AppKit provides seamless wallet connections, including email/social logins, smart accounts, one-click authentication, and wallet notifications.
For this tutorial, we'll be using Next.js, though you can use any other framework compatible
with AppKit.
AppKit is available on eight frameworks, including React, Next.js, Vue, JavaScript, React
Native, Flutter, Android, iOS, and Unity.
**What you'll learn:**
* Set up a new project using AppKit CLI
* Configure the project for Monad Testnet
* Connect wallets to your application
**Time to complete:** \~5 minutes
## Prerequisites
* Node.js installed on your system
## Step 1: Create a New Project
Run the AppKit CLI to create a new project configured with Reown AppKit:
```bash theme={null}
npx @reown/appkit-cli
```
When prompted, provide:
1. **Project Name**: Choose a name (e.g., `my-monad-appkit-app`)
2. **Framework**: Select `Next.js` (or your preferred framework)
3. **Blockchain Library**: Choose whether you want to install Wagmi, Ethers, Solana,
or Multichain (EVM + Solana). In this case, you need to either pick `Wagmi` or `Ethers` since
Monad is an EVM compatible blockchain. We will be choosing `Wagmi` for the sake of this
tutorial.
The CLI will create a minimal AppKit example with your selected configuration.
## Step 2: Set Up the Project
Navigate to your project directory and install dependencies:
```bash theme={null}
cd my-monad-appkit-app
npm install
```
You can also use other package managers such as `yarn`, `bun`, `pnpm`, etc.
## Step 3: Get Your Project ID
The example is pre-configured with a `projectId` that will only work on `localhost`. To fully configure your project, you will need to get a `projectId` from the [Reown Dashboard](https://dashboard.reown.com/?utm_source=monad\&utm_medium=docs\&utm_campaign=backlinks), as described below:
1. Go to [dashboard.reown.com](https://dashboard.reown.com/?utm_source=monad\&utm_medium=docs\&utm_campaign=backlinks) and sign in
2. Navigate to your team's Cloud Dashboard
3. Click "+ Project"
 4. If prompted to choose a product type, select "AppKit" (otherwise ignore this step)
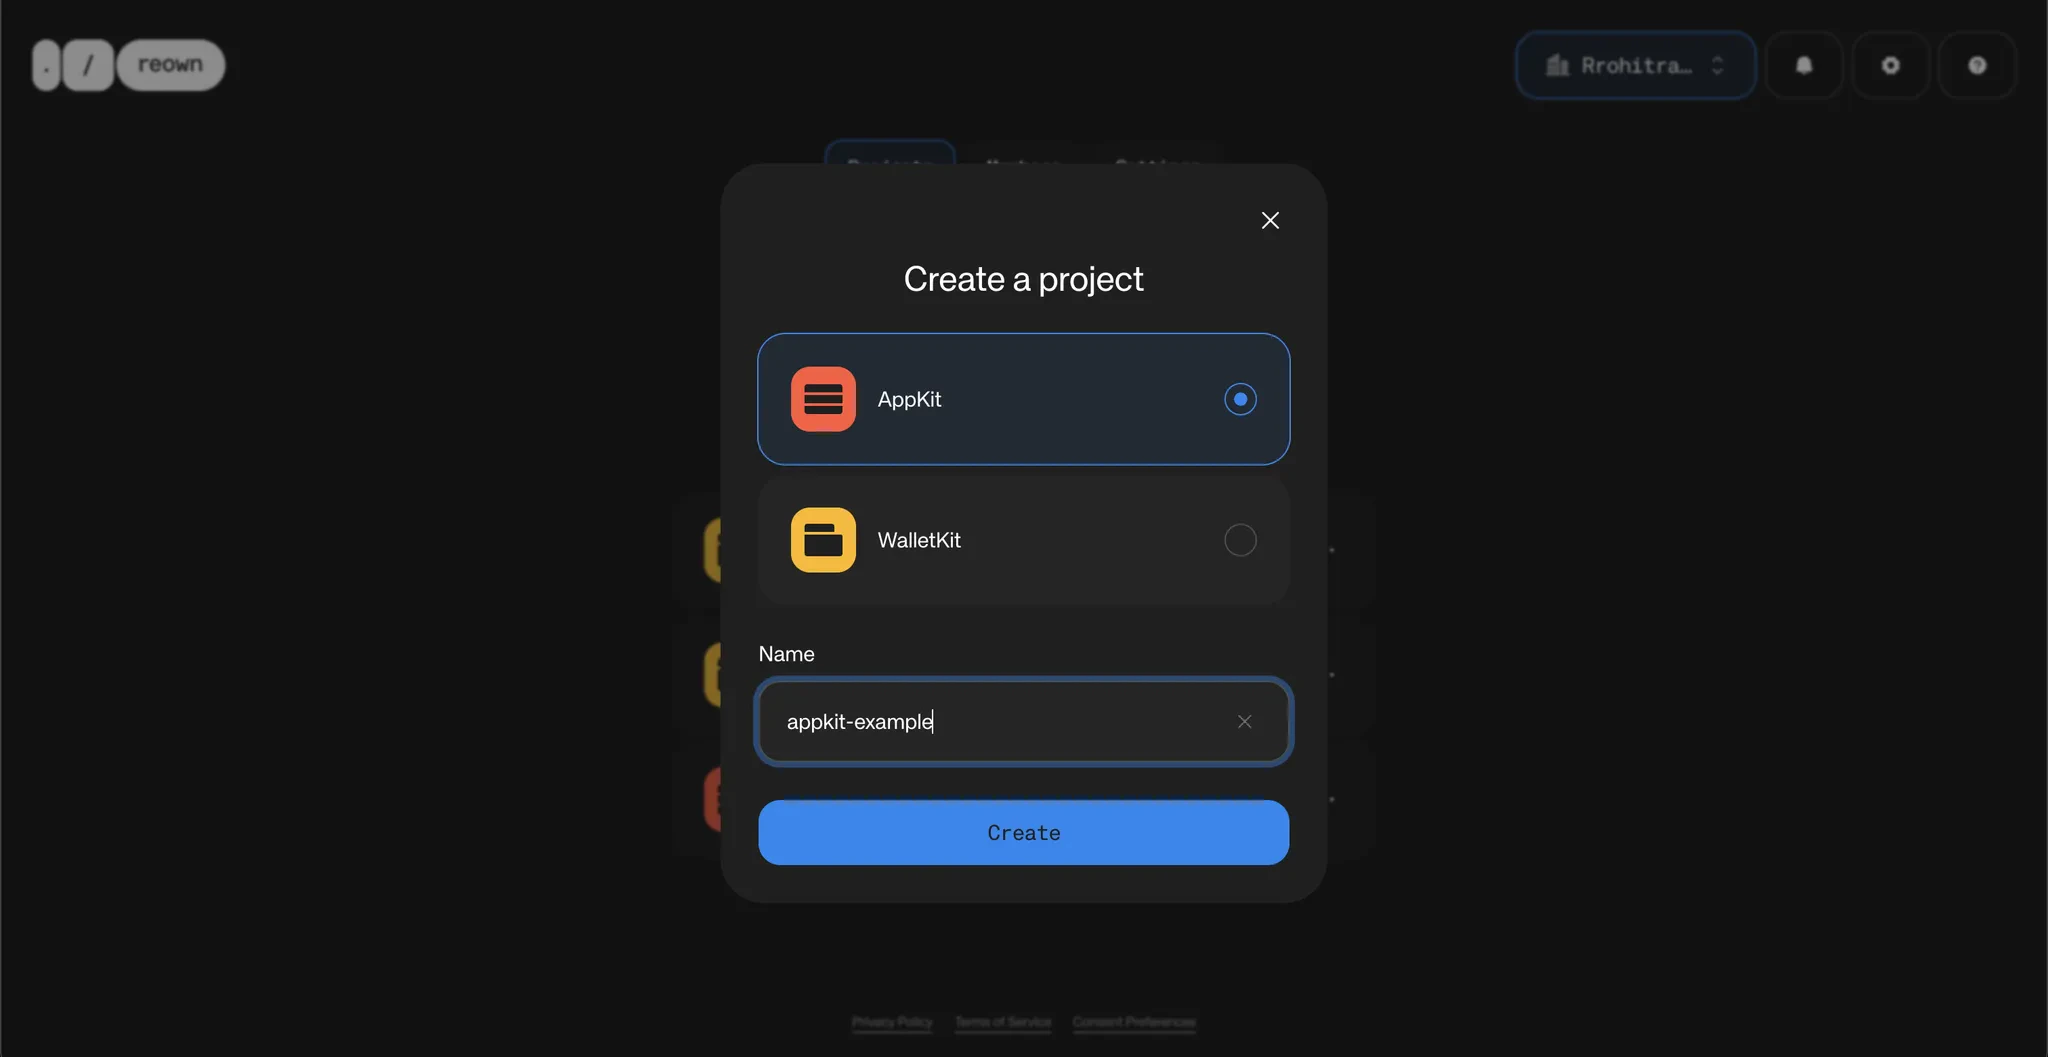 5. Choose a project name
6. Click "Create"
5. Choose a project name
6. Click "Create"
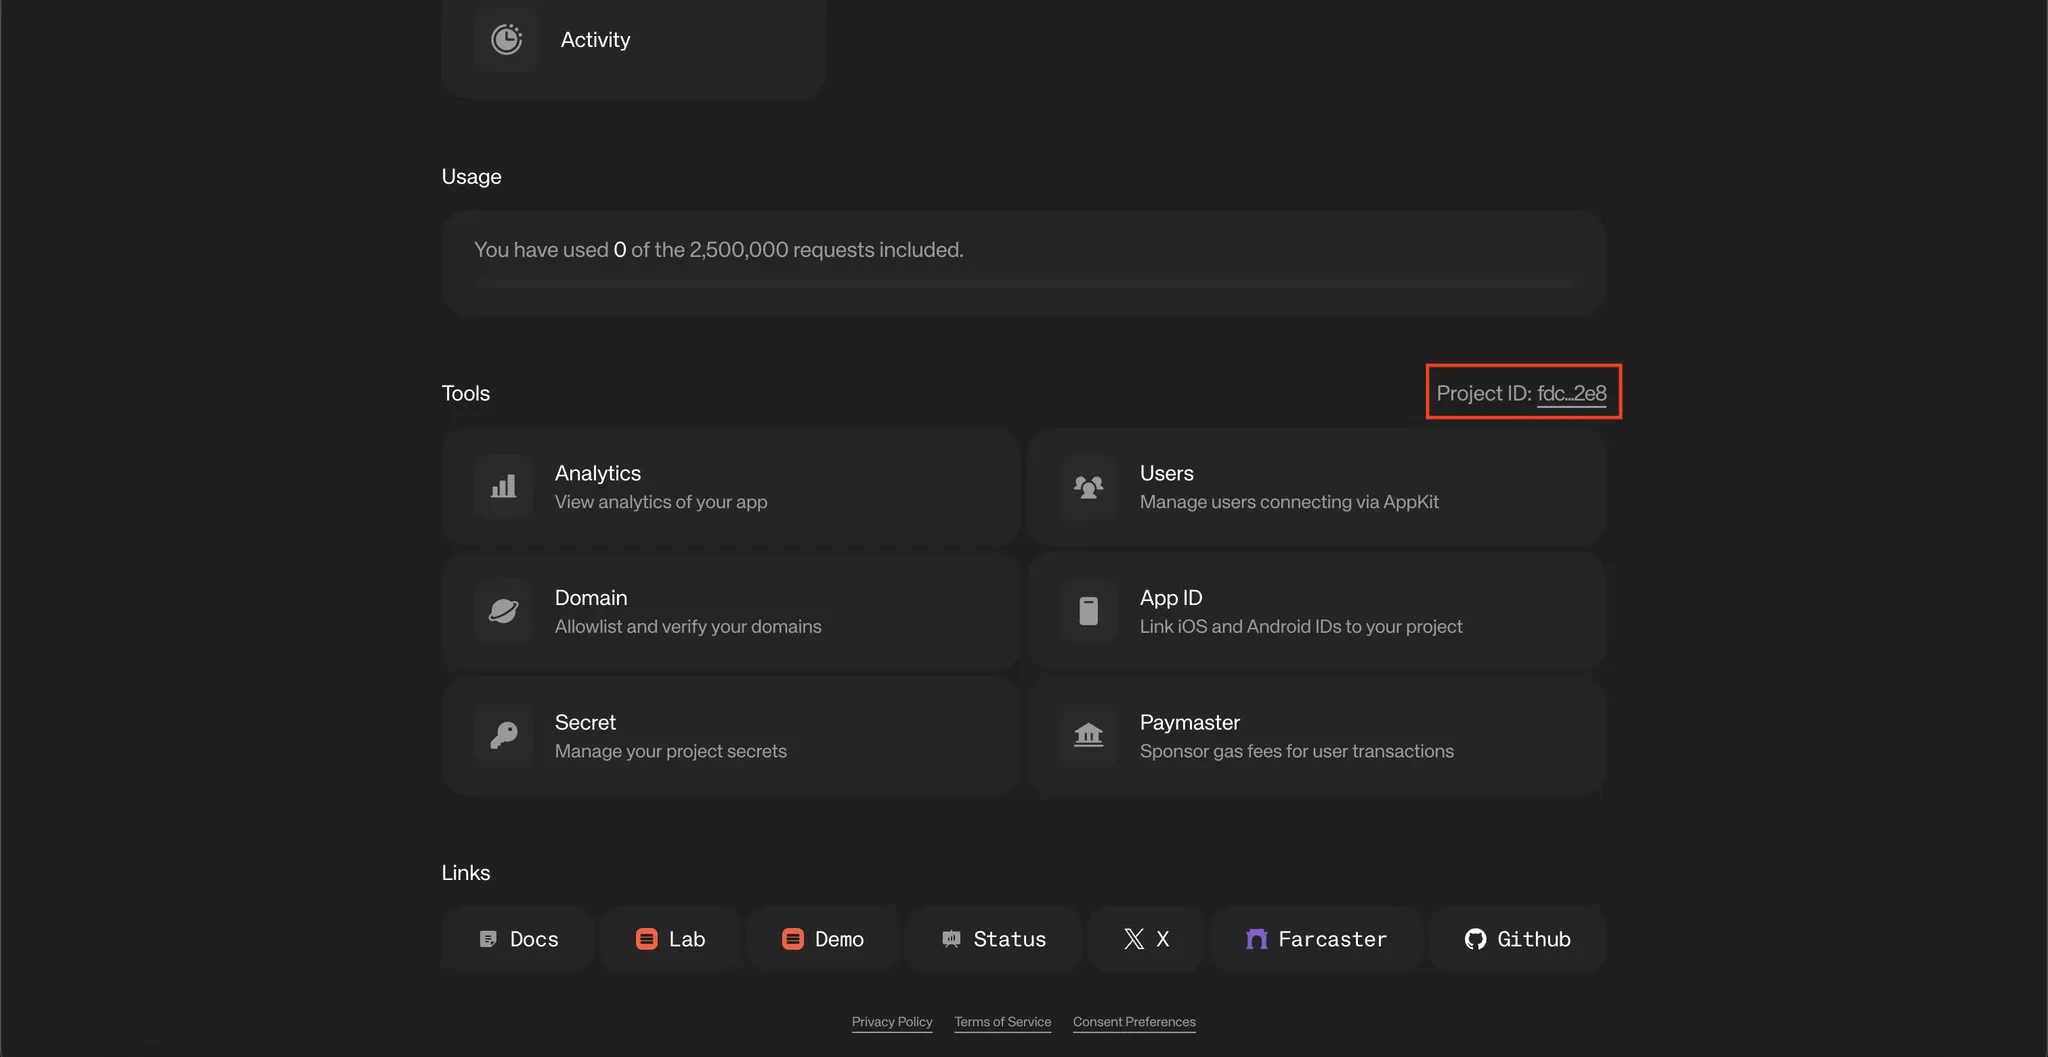
 7. Copy the generated Project ID from the bottom of the page
 ## Step 4: Configure Environment Variables
Create a `.env` file in your project root:
```js title=".env" theme={null}
NEXT_PUBLIC_PROJECT_ID="YOUR_PROJECT_ID_HERE"
```
Replace `YOUR_PROJECT_ID_HERE` with the Project ID you copied in the previous step.
Environment variables starting with `NEXT_PUBLIC_` are exposed to the client. Only include non-sensitive configuration data.
## Step 5: Configure for Monad Testnet
Update `/src/config/index.ts` to use Monad Testnet:
```ts lines title="/src/config/index.ts" theme={null}
import { mainnet, monadTestnet } from '@reown/appkit/networks'
export const networks = [monadTestnet] as [AppKitNetwork, ...AppKitNetwork[]]
```
This configures your app to use Monad Testnet instead of the default networks.
## Step 6: Run Your Application
Start the development server:
```bash theme={null}
npm run dev
```
Your app will be available at `http://localhost:3000`.
If you are using alternative package managers, you can try either of these commands - `yarn dev`, `pnpm dev`, or `bun dev`.
## Conclusion
You have now learned how to create a simple app using AppKit CLI that allows users to connect their wallet and interact with Monad Testnet.
**Reown AppKit** is a powerful solution for developers looking to integrate wallet connections and other Web3 functionalities into their apps on any EVM chain. In just a few simple steps, you can provide your users with seamless wallet access, one-click authentication, social logins, and notifications—streamlining their experience while enabling advanced features like on-ramp functionality and smart accounts.
## What's Next?
* Explore the [Reown blog](https://reown.com/blog)
* Check out the complete example: [Reown AppKit EVM](https://github.com/rohit-710/reown-appkit-evm)
## Step 4: Configure Environment Variables
Create a `.env` file in your project root:
```js title=".env" theme={null}
NEXT_PUBLIC_PROJECT_ID="YOUR_PROJECT_ID_HERE"
```
Replace `YOUR_PROJECT_ID_HERE` with the Project ID you copied in the previous step.
Environment variables starting with `NEXT_PUBLIC_` are exposed to the client. Only include non-sensitive configuration data.
## Step 5: Configure for Monad Testnet
Update `/src/config/index.ts` to use Monad Testnet:
```ts lines title="/src/config/index.ts" theme={null}
import { mainnet, monadTestnet } from '@reown/appkit/networks'
export const networks = [monadTestnet] as [AppKitNetwork, ...AppKitNetwork[]]
```
This configures your app to use Monad Testnet instead of the default networks.
## Step 6: Run Your Application
Start the development server:
```bash theme={null}
npm run dev
```
Your app will be available at `http://localhost:3000`.
If you are using alternative package managers, you can try either of these commands - `yarn dev`, `pnpm dev`, or `bun dev`.
## Conclusion
You have now learned how to create a simple app using AppKit CLI that allows users to connect their wallet and interact with Monad Testnet.
**Reown AppKit** is a powerful solution for developers looking to integrate wallet connections and other Web3 functionalities into their apps on any EVM chain. In just a few simple steps, you can provide your users with seamless wallet access, one-click authentication, social logins, and notifications—streamlining their experience while enabling advanced features like on-ramp functionality and smart accounts.
## What's Next?
* Explore the [Reown blog](https://reown.com/blog)
* Check out the complete example: [Reown AppKit EVM](https://github.com/rohit-710/reown-appkit-evm)