> ## Documentation Index
> Fetch the complete documentation index at: https://docs.monad.xyz/llms.txt
> Use this file to discover all available pages before exploring further.
# How to use the React Native Privy embedded wallet template
This guide walks you through using the [wallet template](https://github.com/monad-developers/react-native-privy-embedded-wallet-template) which uses Expo, React Native, and Privy embedded wallet to build a mobile app on Monad.
Start developing by editing the files inside the `app` directory. This project uses [file-based routing](https://docs.expo.dev/router/introduction).
This template also has a `demo` branch that you can switch to in order to view the demo project.
You can switch using the following command:
```
git checkout demo
```
## Prerequisites
* Node.js
* NPM
* Expo CLI (Install using the following command: `npm i -g expo-cli`)
* a [Privy account](https://dashboard.privy.io/)
- [Android Studio](https://developer.android.com/studio) (API version 35 and above)
* Guide to setup Android Studio for Expo is available [here](https://docs.expo.dev/workflow/android-studio-emulator/)
* [XCode](https://apps.apple.com/in/app/xcode/id497799835?mt=12)
* Guide to setup iOS Simulator for Expo is available [here](https://docs.expo.dev/workflow/ios-simulator/)
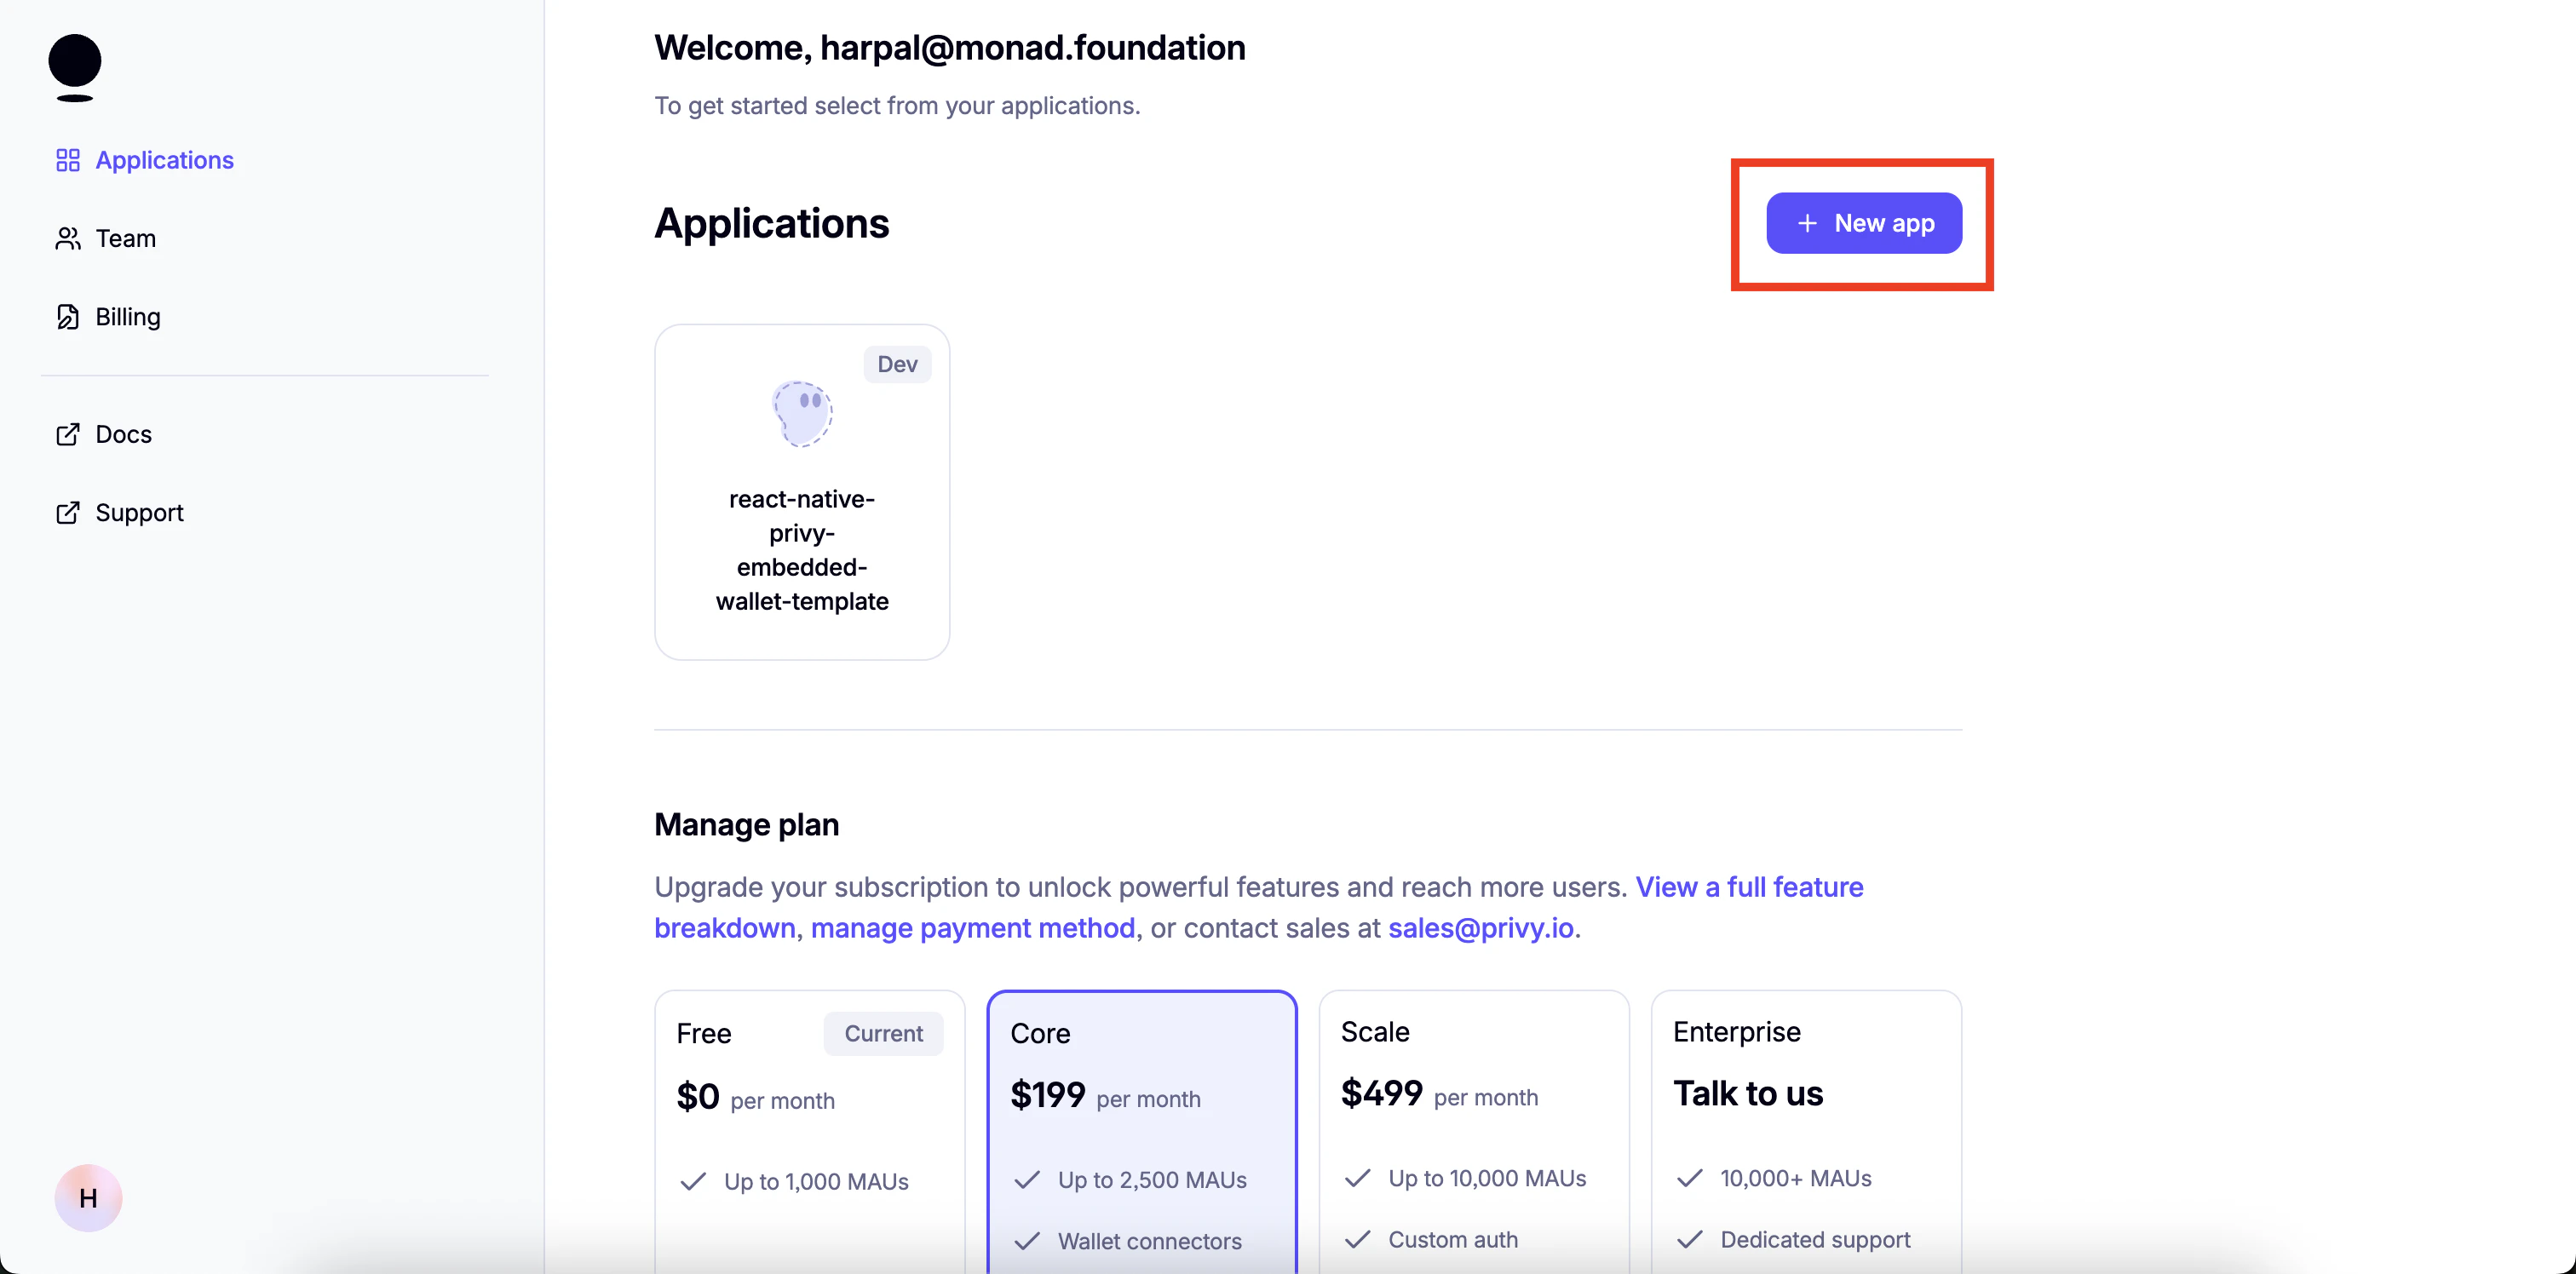
1. Create app:

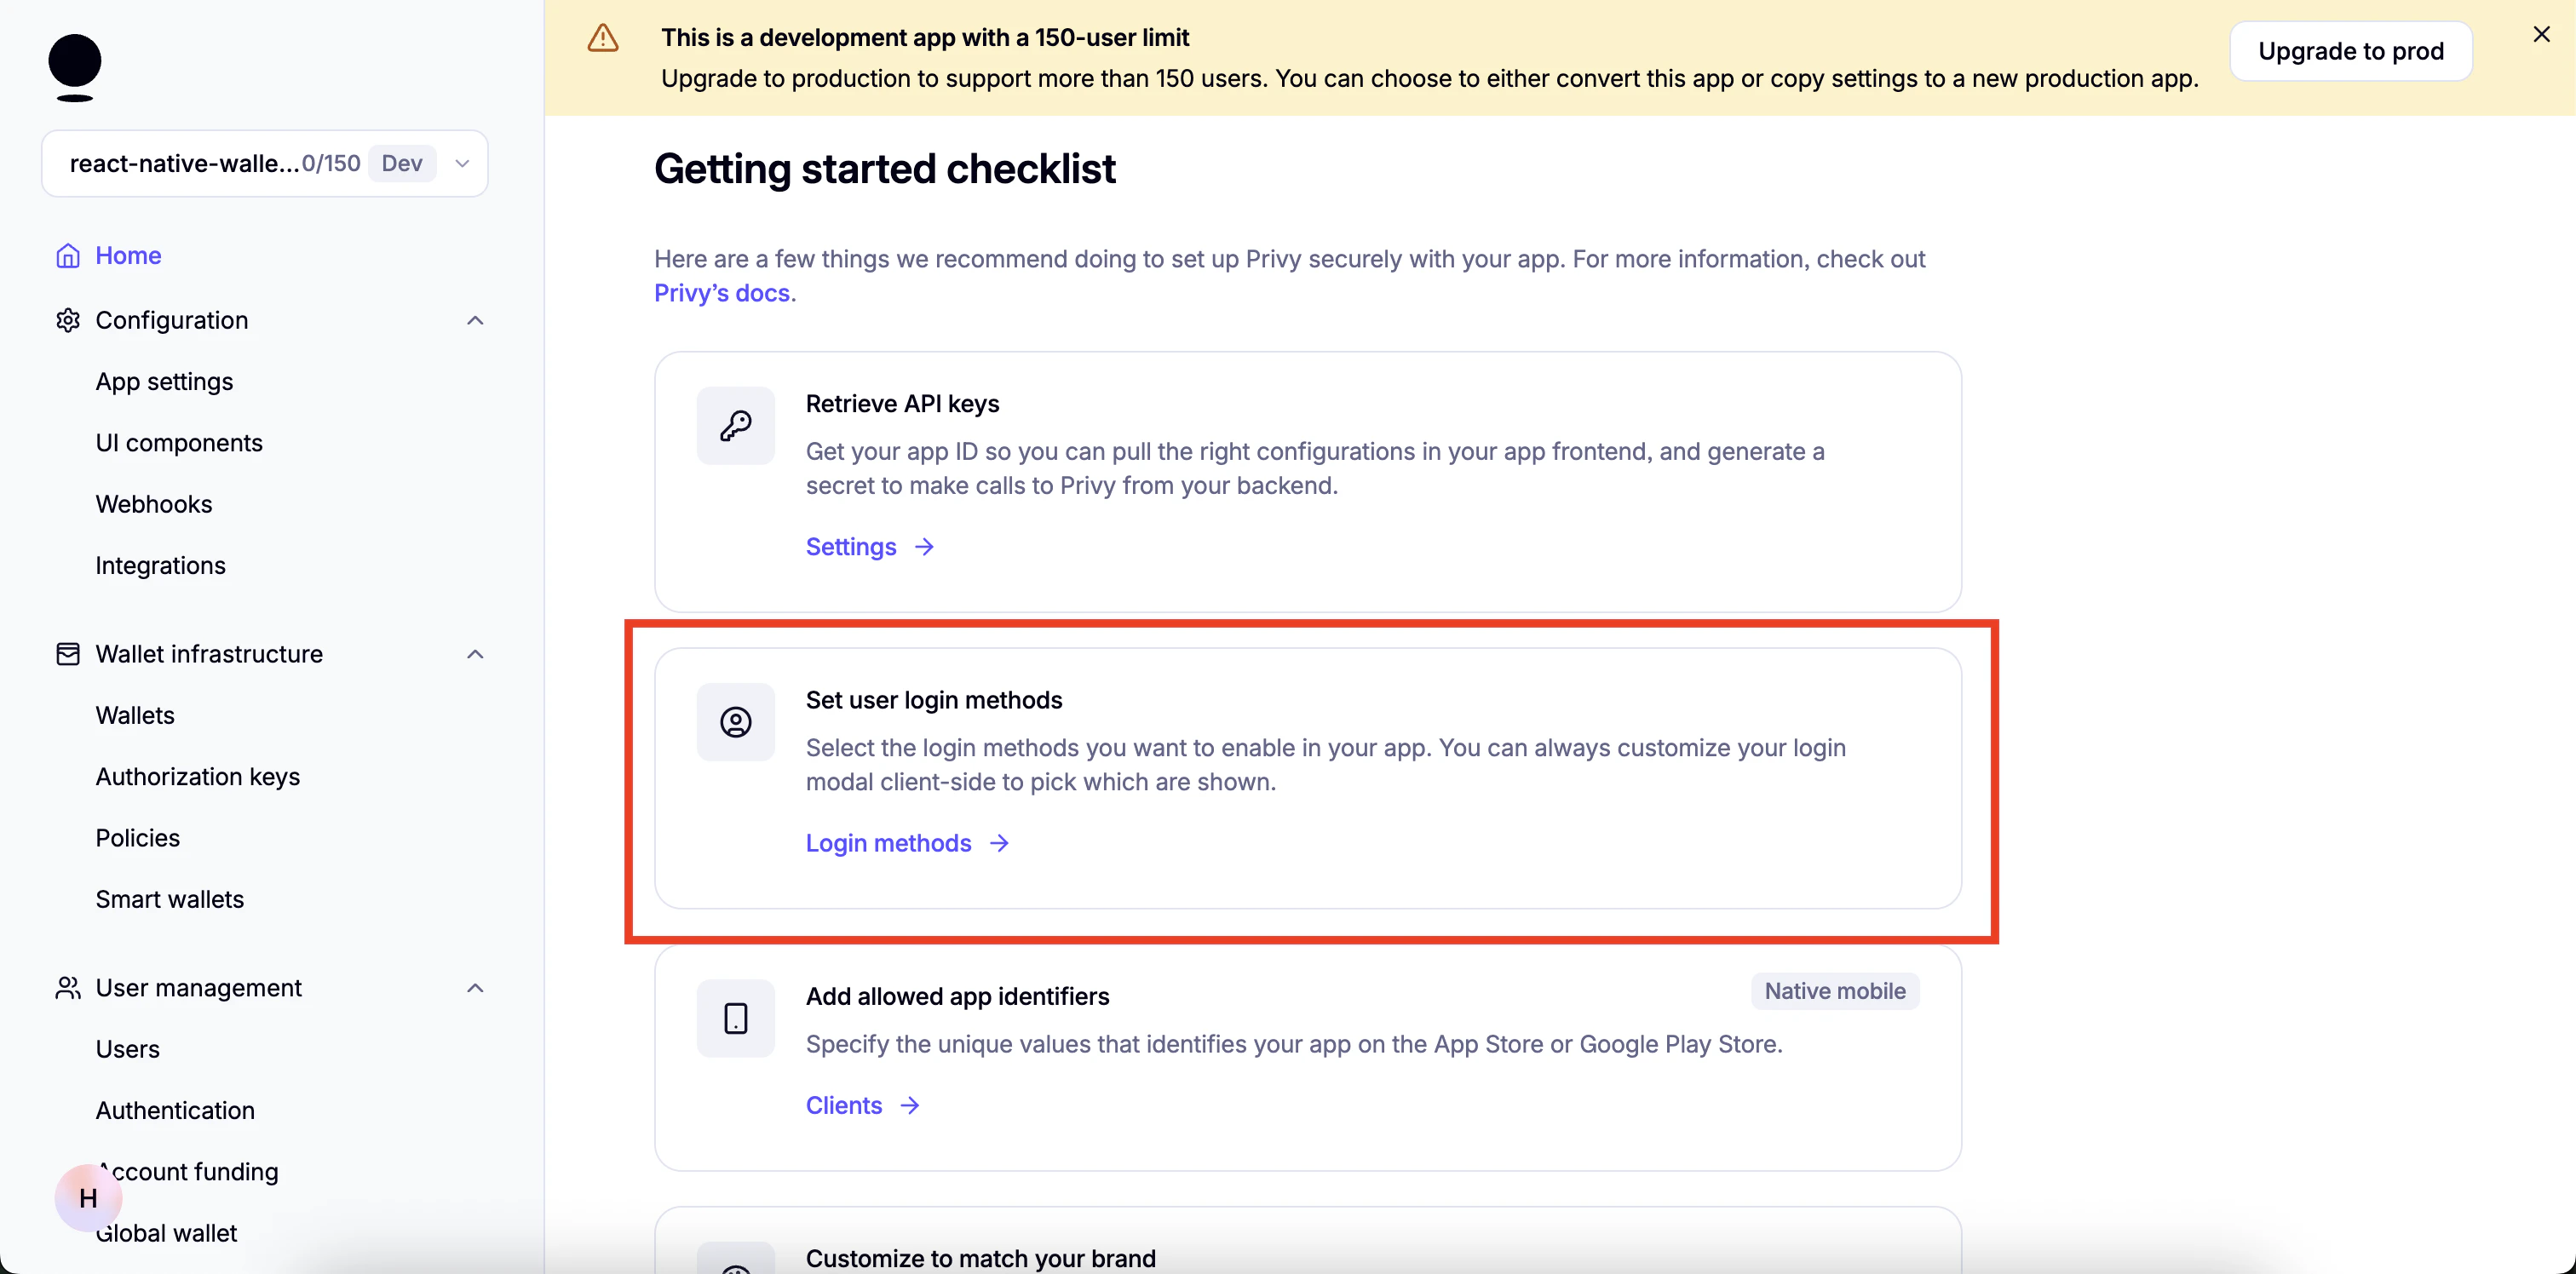
2. Set up login methods:
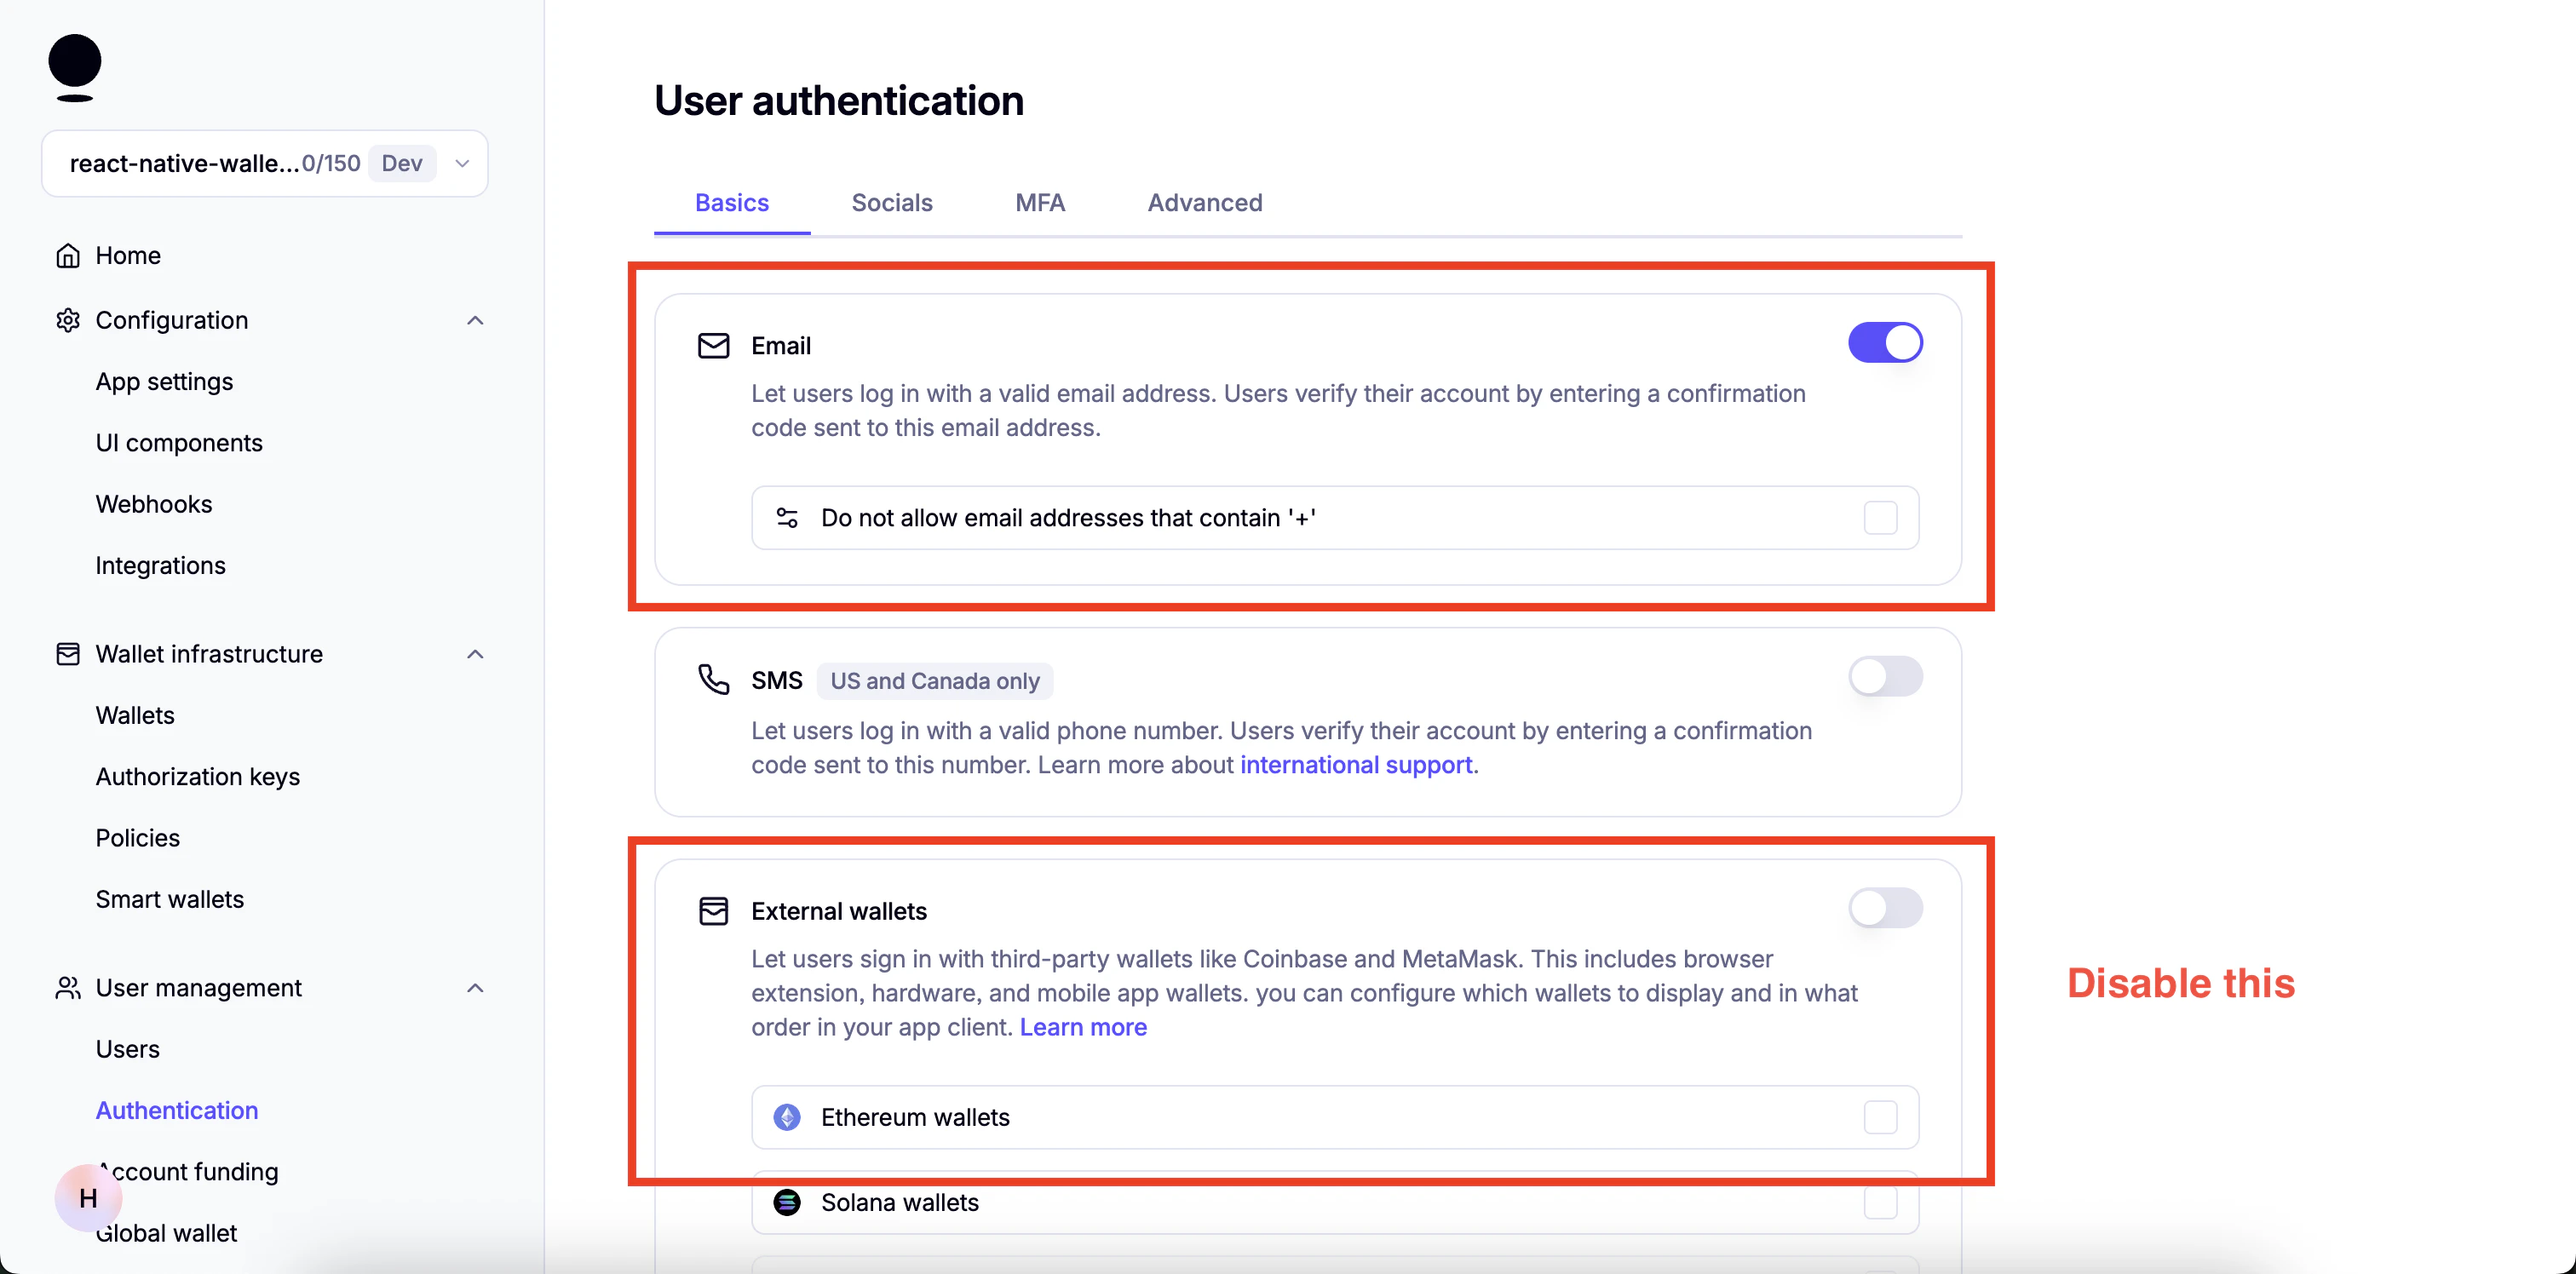
3. Enable email:
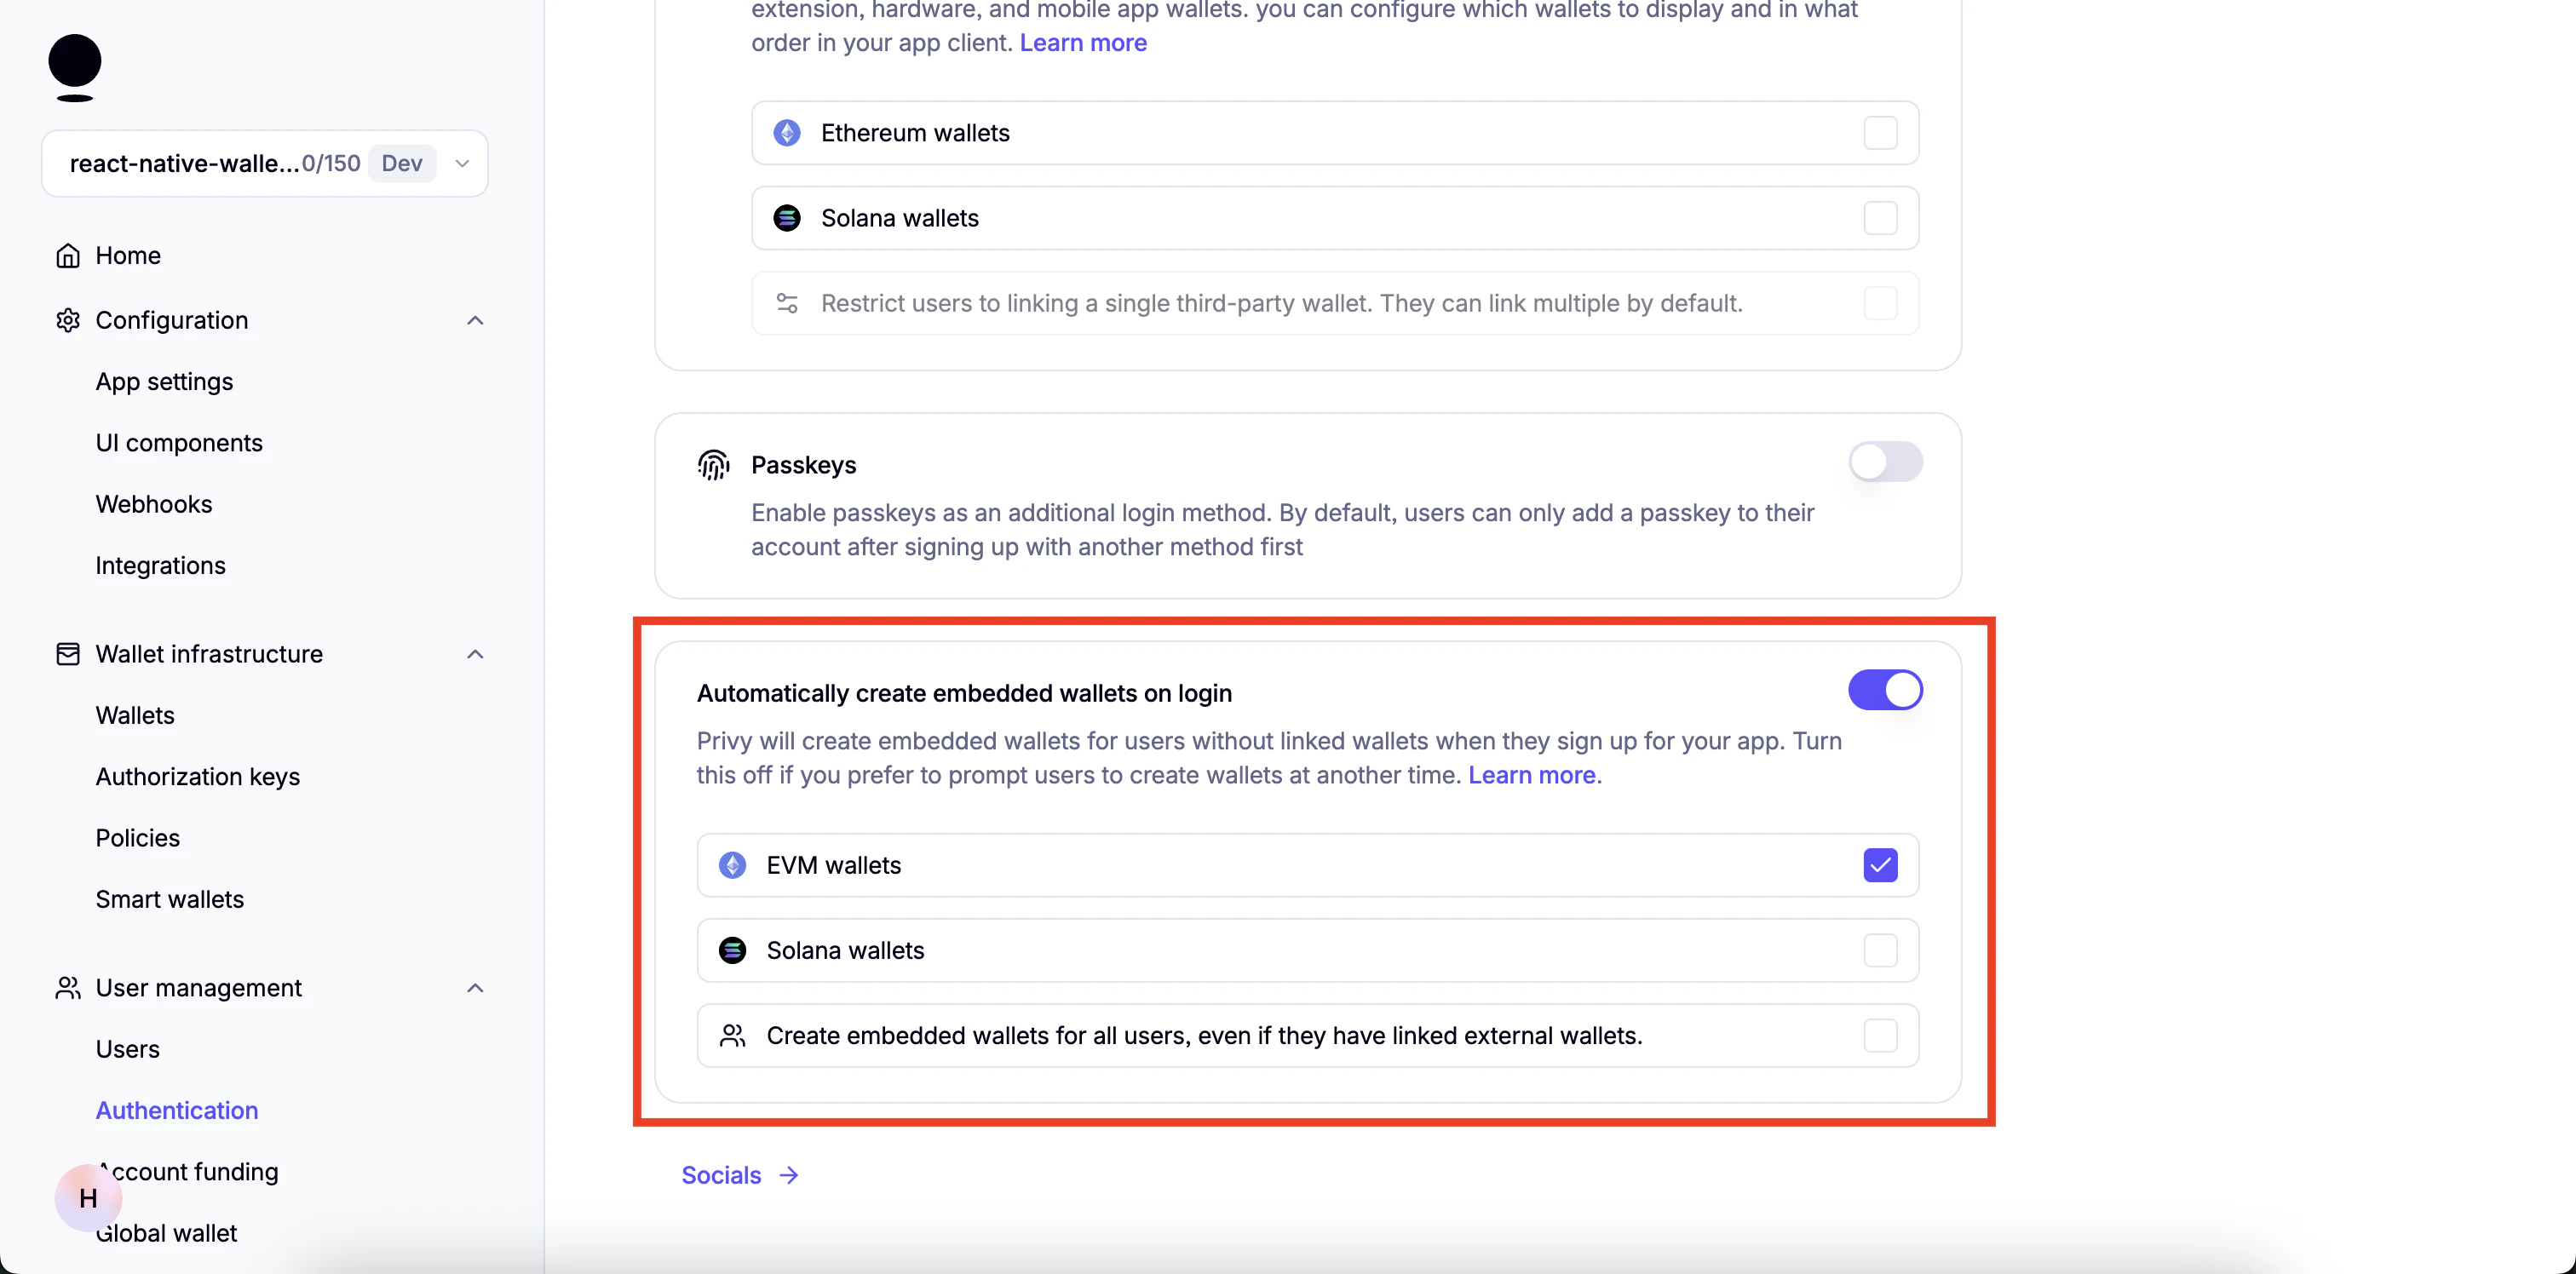
4. Enable "Automatically create embedded wallets on login" and select "EVM Wallets":
5. Disable everything in Socials.
6. Go to "Advanced" and Make sure only "Web2: Email, SMS, and socials" under "Prioritize options displayed" is enabled:
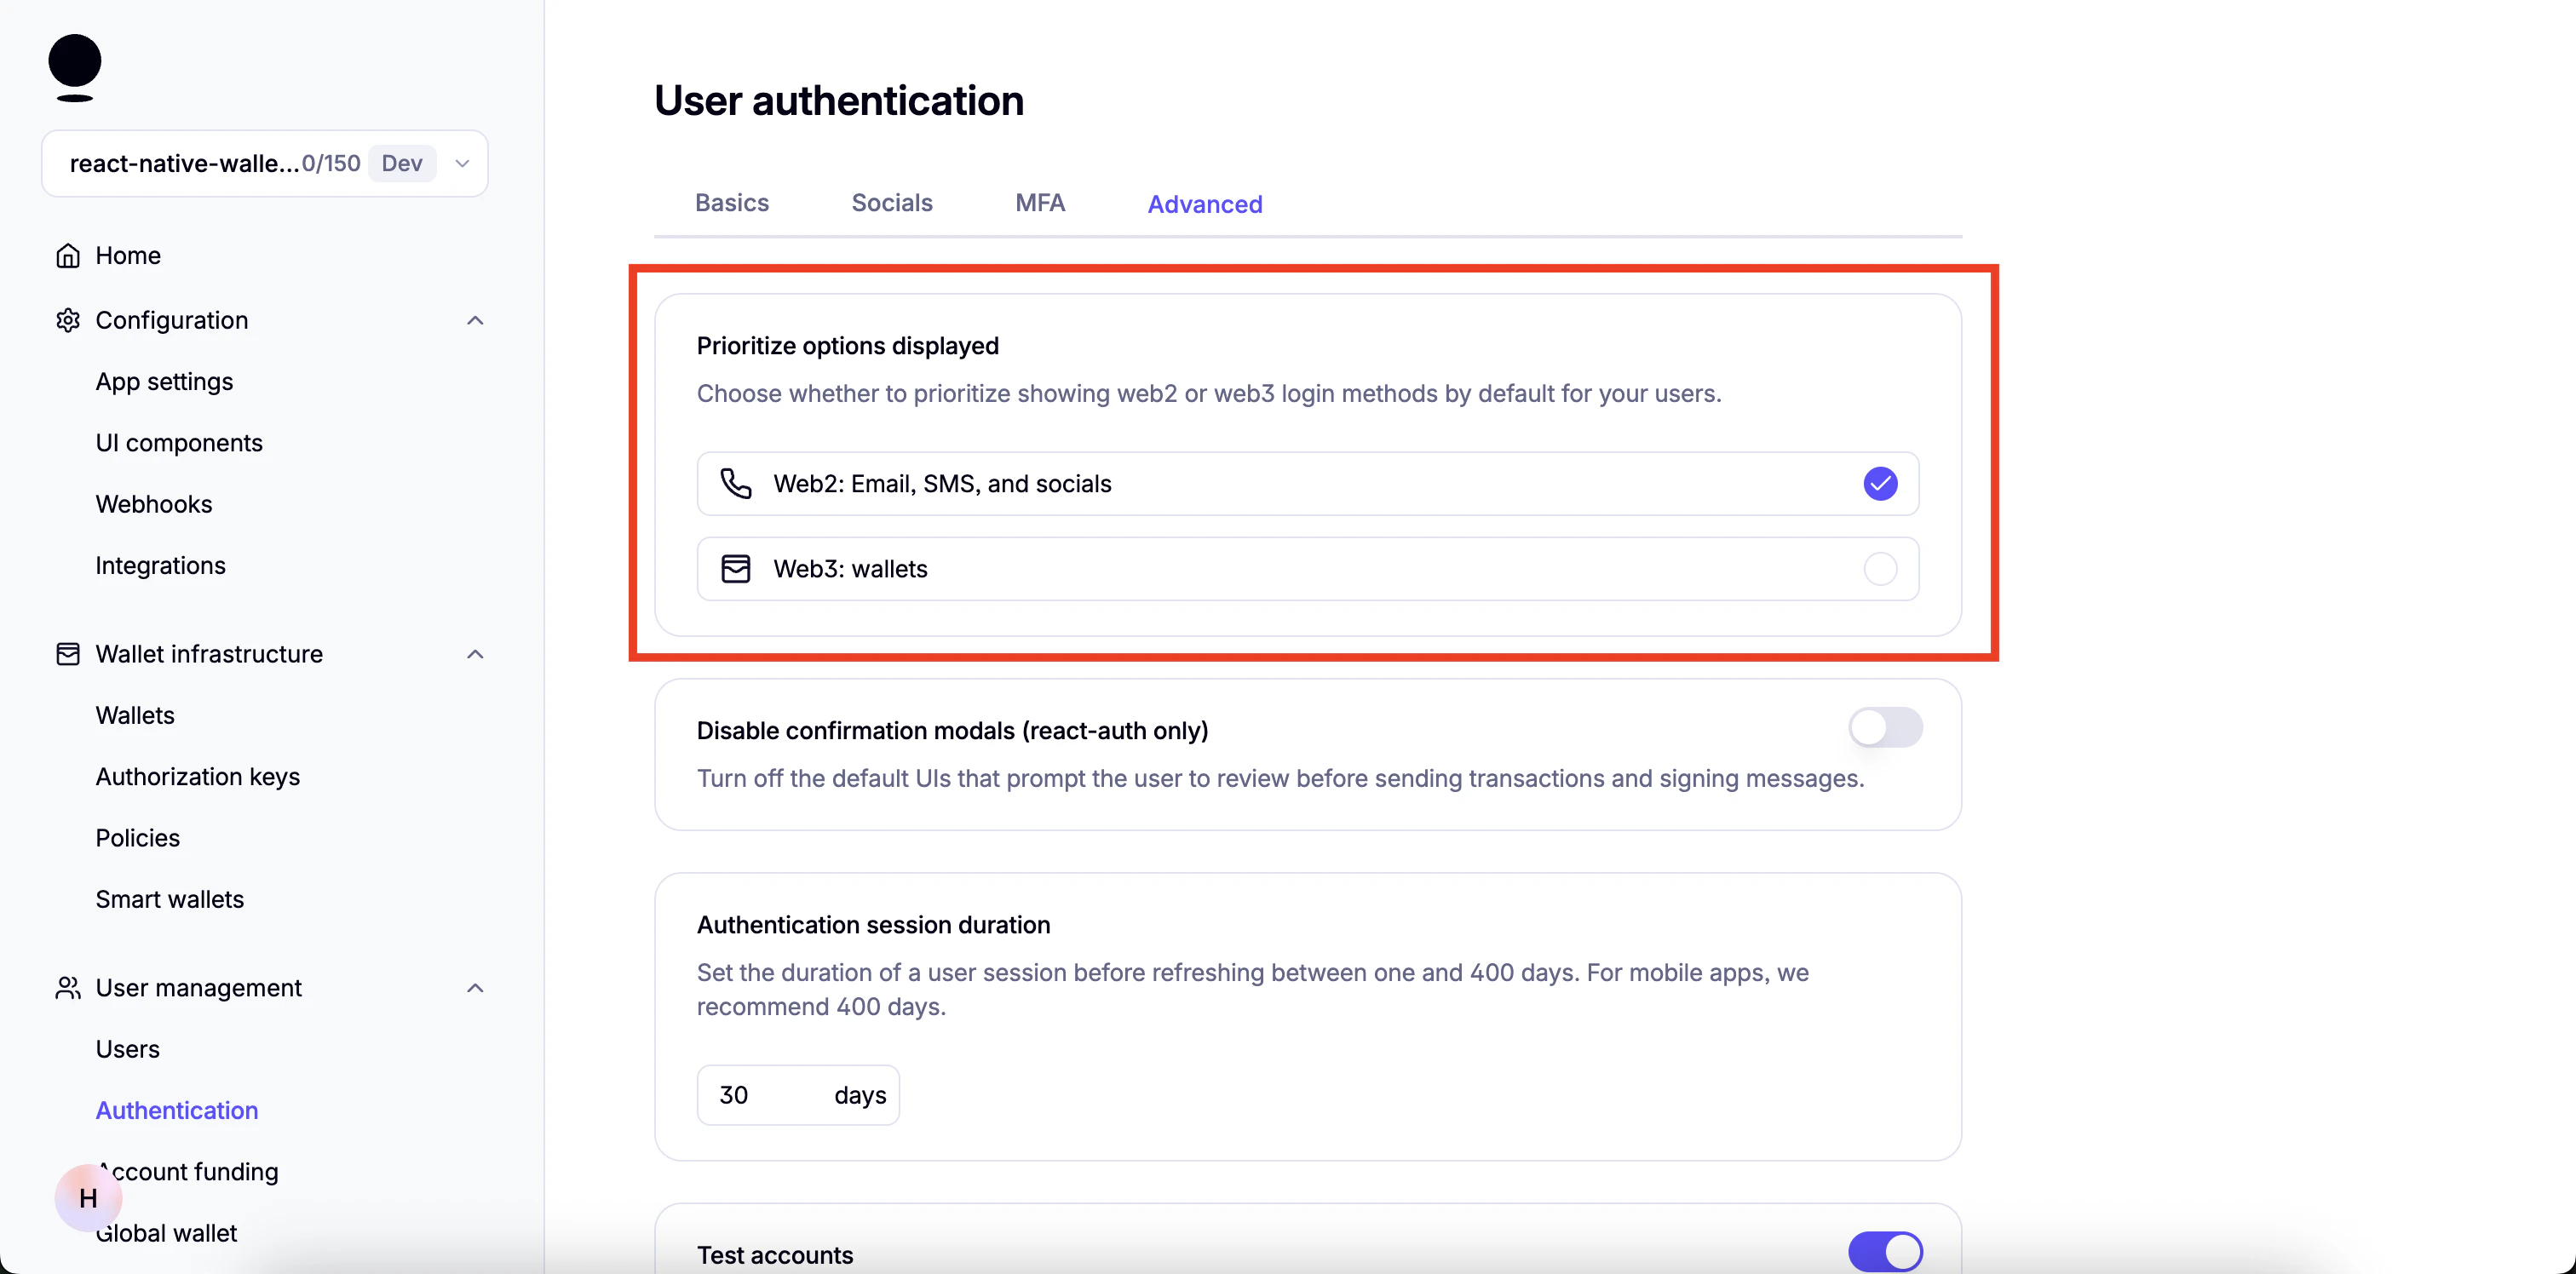
7. Tip: You can enable "Test Accounts" for testing purposes:
 8. A few more steps are required but we will continue once the dependencies for the project are installed.
## Get started
This template also has a `demo` branch that you can switch to in order to view the demo project.
You can switch using the following command:
```
git checkout demo
```
### Install dependencies
```bash theme={null}
npm install
```
### Set up the environment variables
* Create a copy of `.env.example`
```bash theme={null}
cp .env.example .env
```
* Add the following environment variables to it
```
EXPO_PUBLIC_PRIVY_APP_ID=
EXPO_PUBLIC_PRIVY_CLIENT_ID=
```
1. Go to your Privy Dashboard and click on `Home` for your Privy app and click on `Retrieve API keys`.
8. A few more steps are required but we will continue once the dependencies for the project are installed.
## Get started
This template also has a `demo` branch that you can switch to in order to view the demo project.
You can switch using the following command:
```
git checkout demo
```
### Install dependencies
```bash theme={null}
npm install
```
### Set up the environment variables
* Create a copy of `.env.example`
```bash theme={null}
cp .env.example .env
```
* Add the following environment variables to it
```
EXPO_PUBLIC_PRIVY_APP_ID=
EXPO_PUBLIC_PRIVY_CLIENT_ID=
```
1. Go to your Privy Dashboard and click on `Home` for your Privy app and click on `Retrieve API keys`.
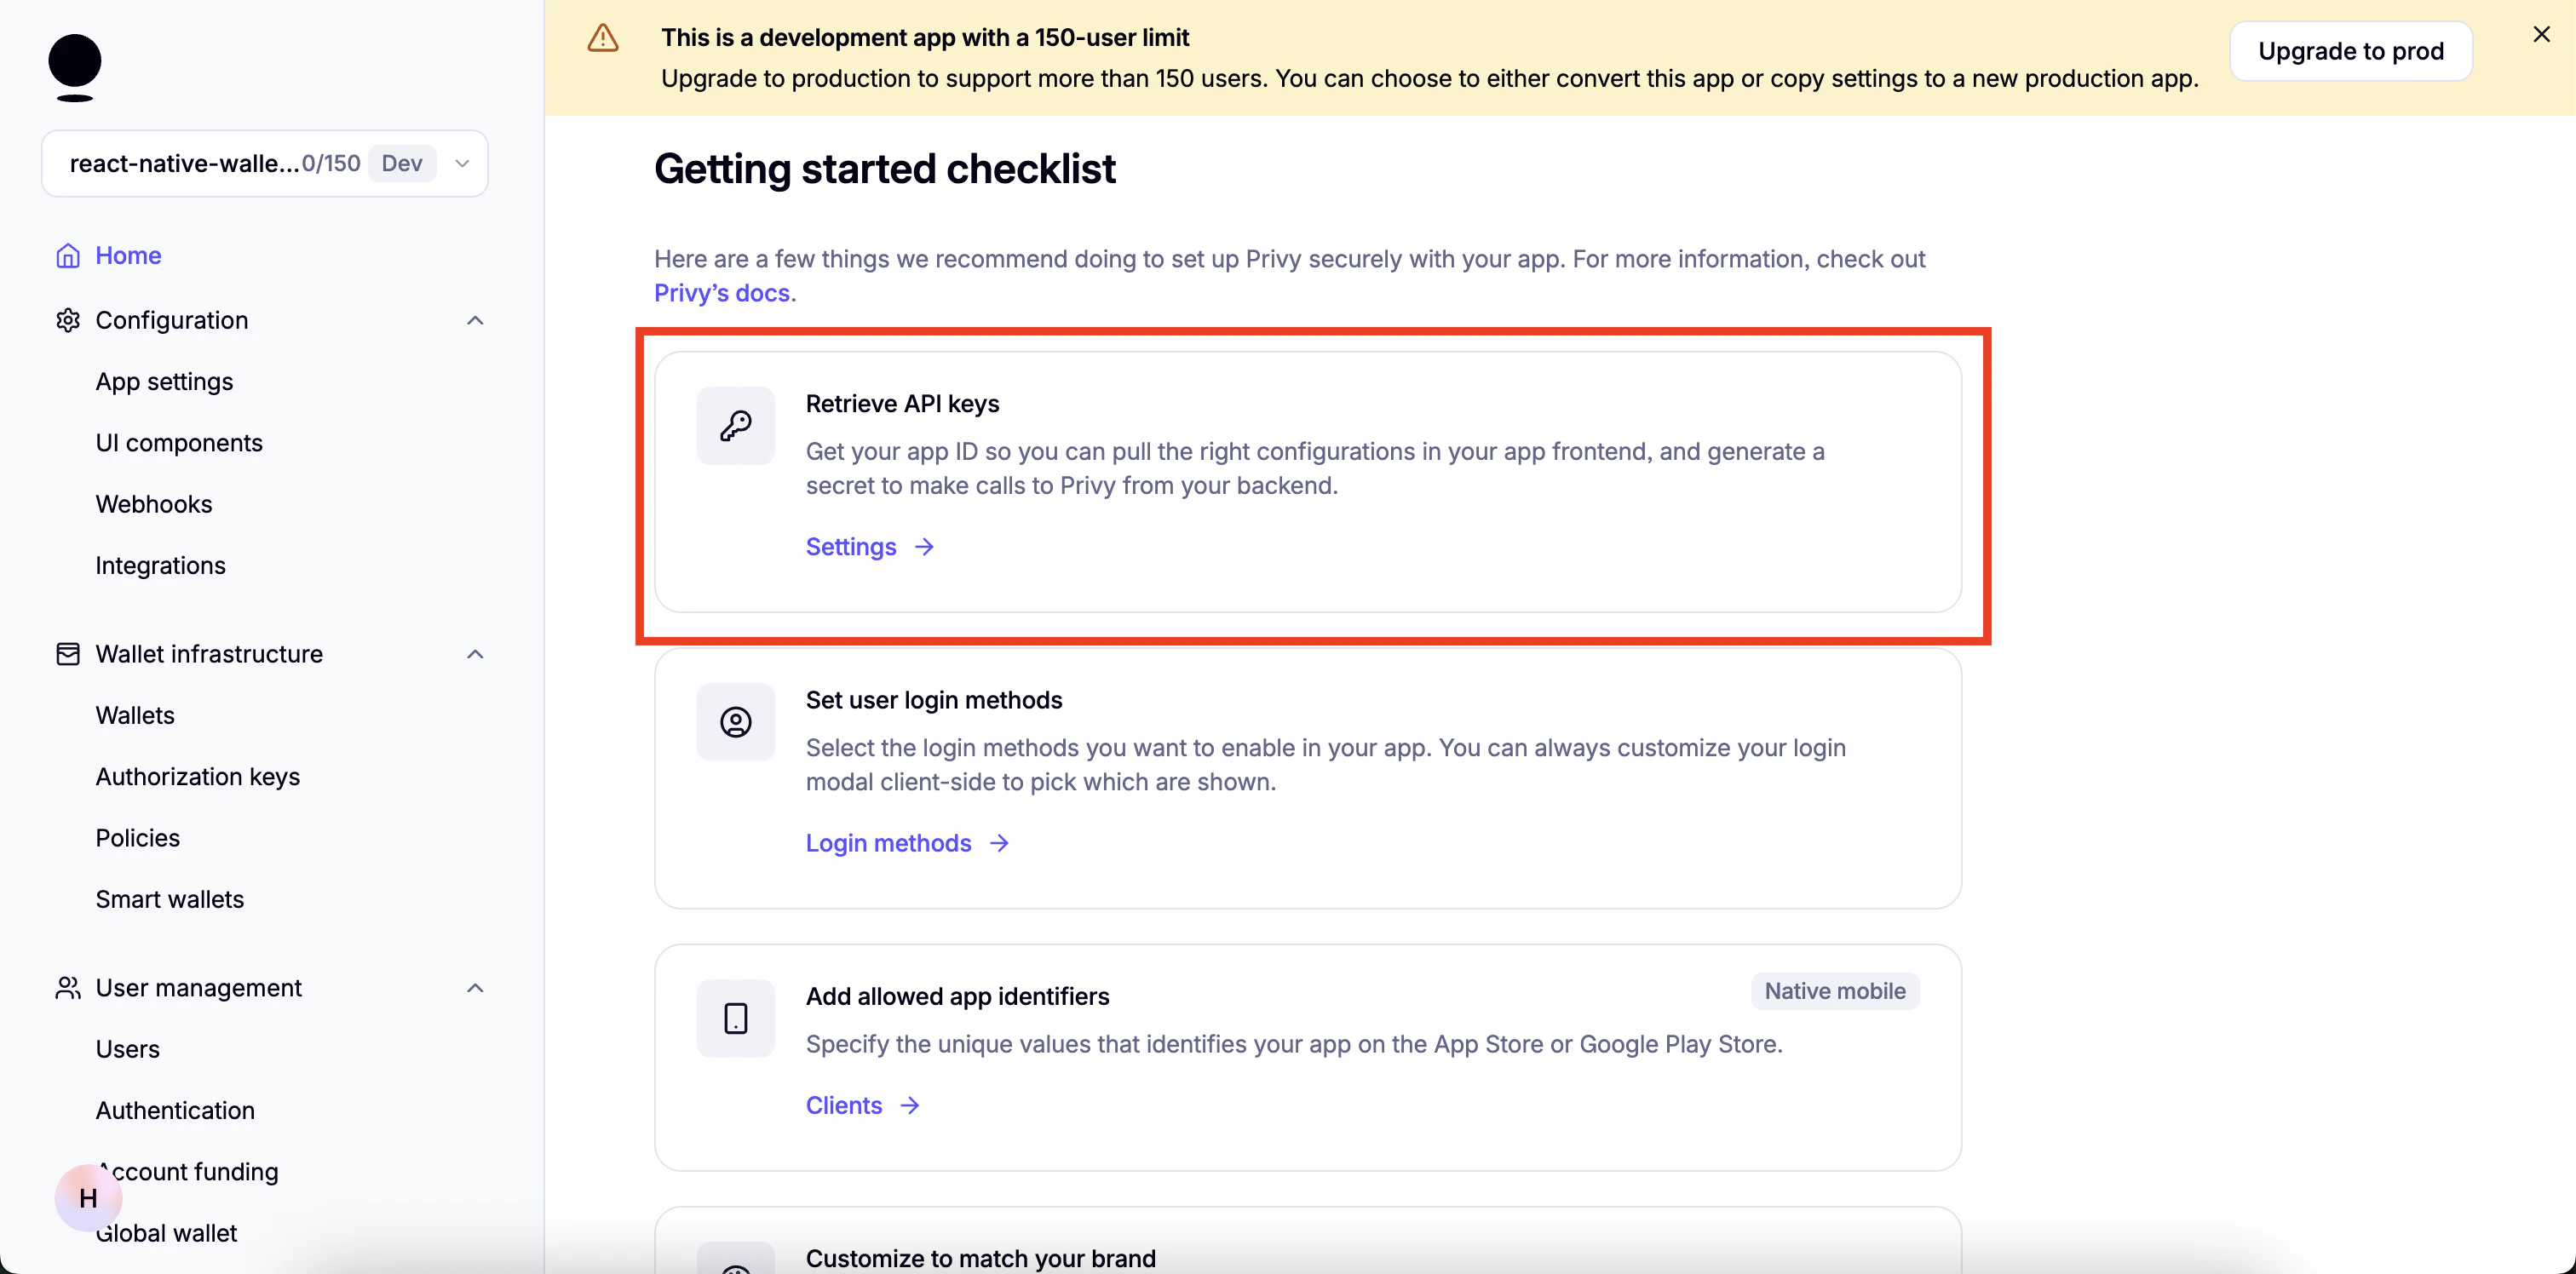 2. You will find `App ID` under `API keys`.
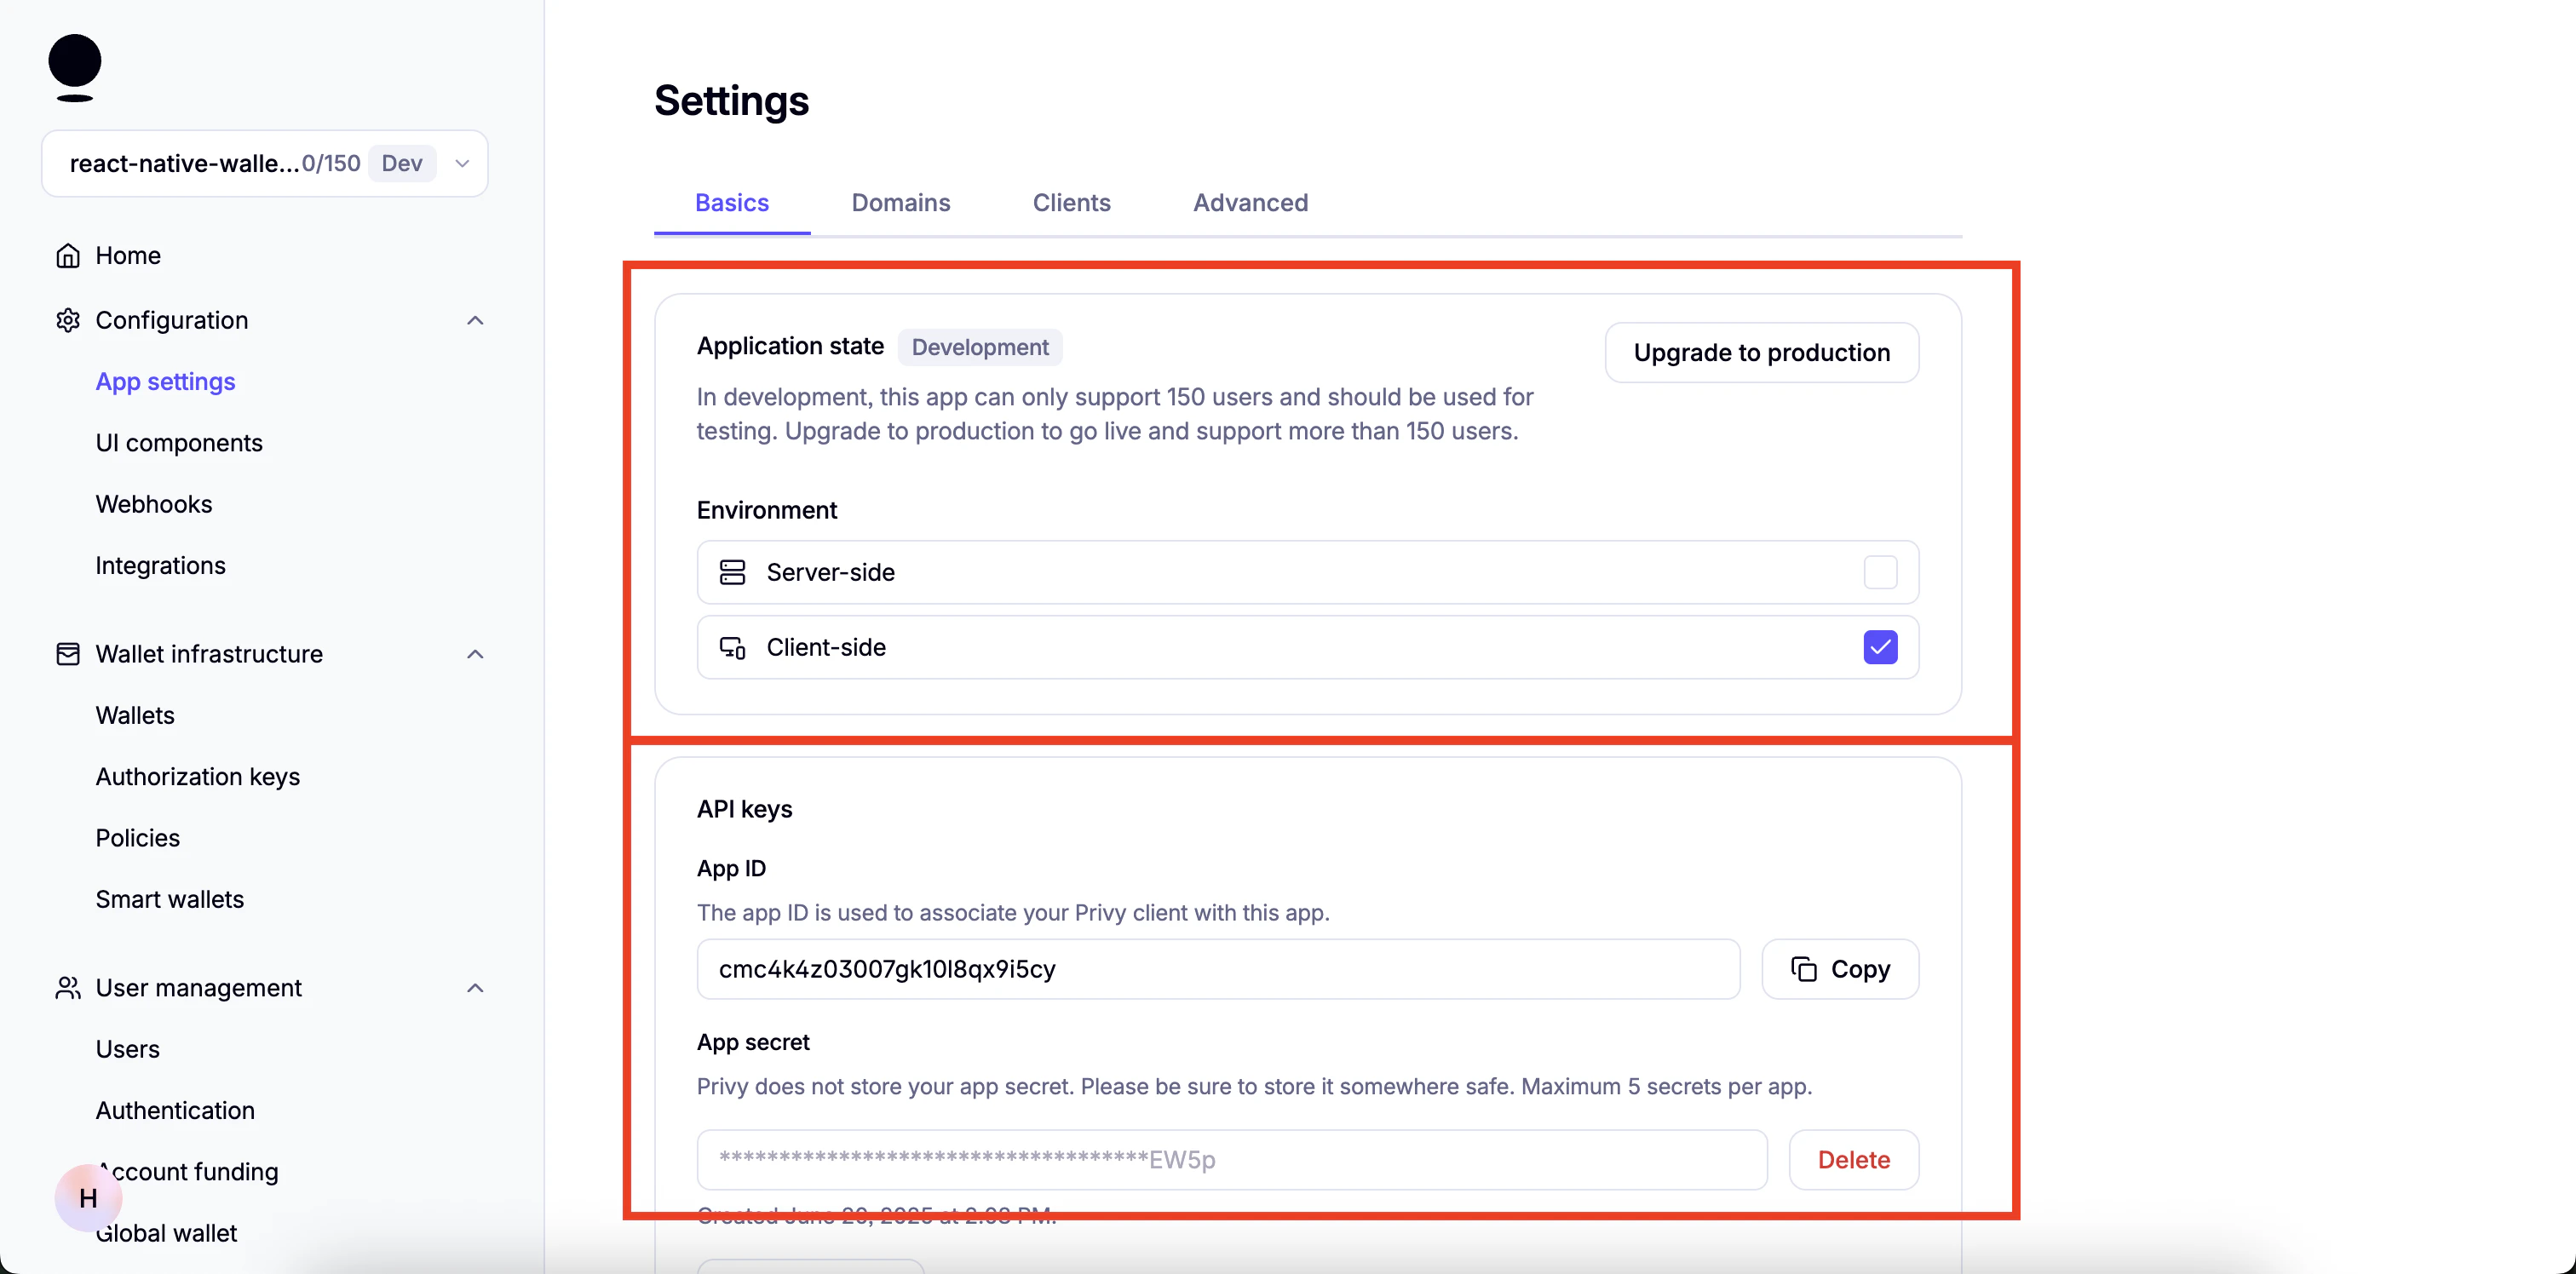 1. Go to your Privy Dashboard and click on "Home" for your Privy app and click on `Retrieve API keys`.
2. Click on the `Clients` tab at the top and click on `Edit`.
1. Go to your Privy Dashboard and click on "Home" for your Privy app and click on `Retrieve API keys`.
2. Click on the `Clients` tab at the top and click on `Edit`.
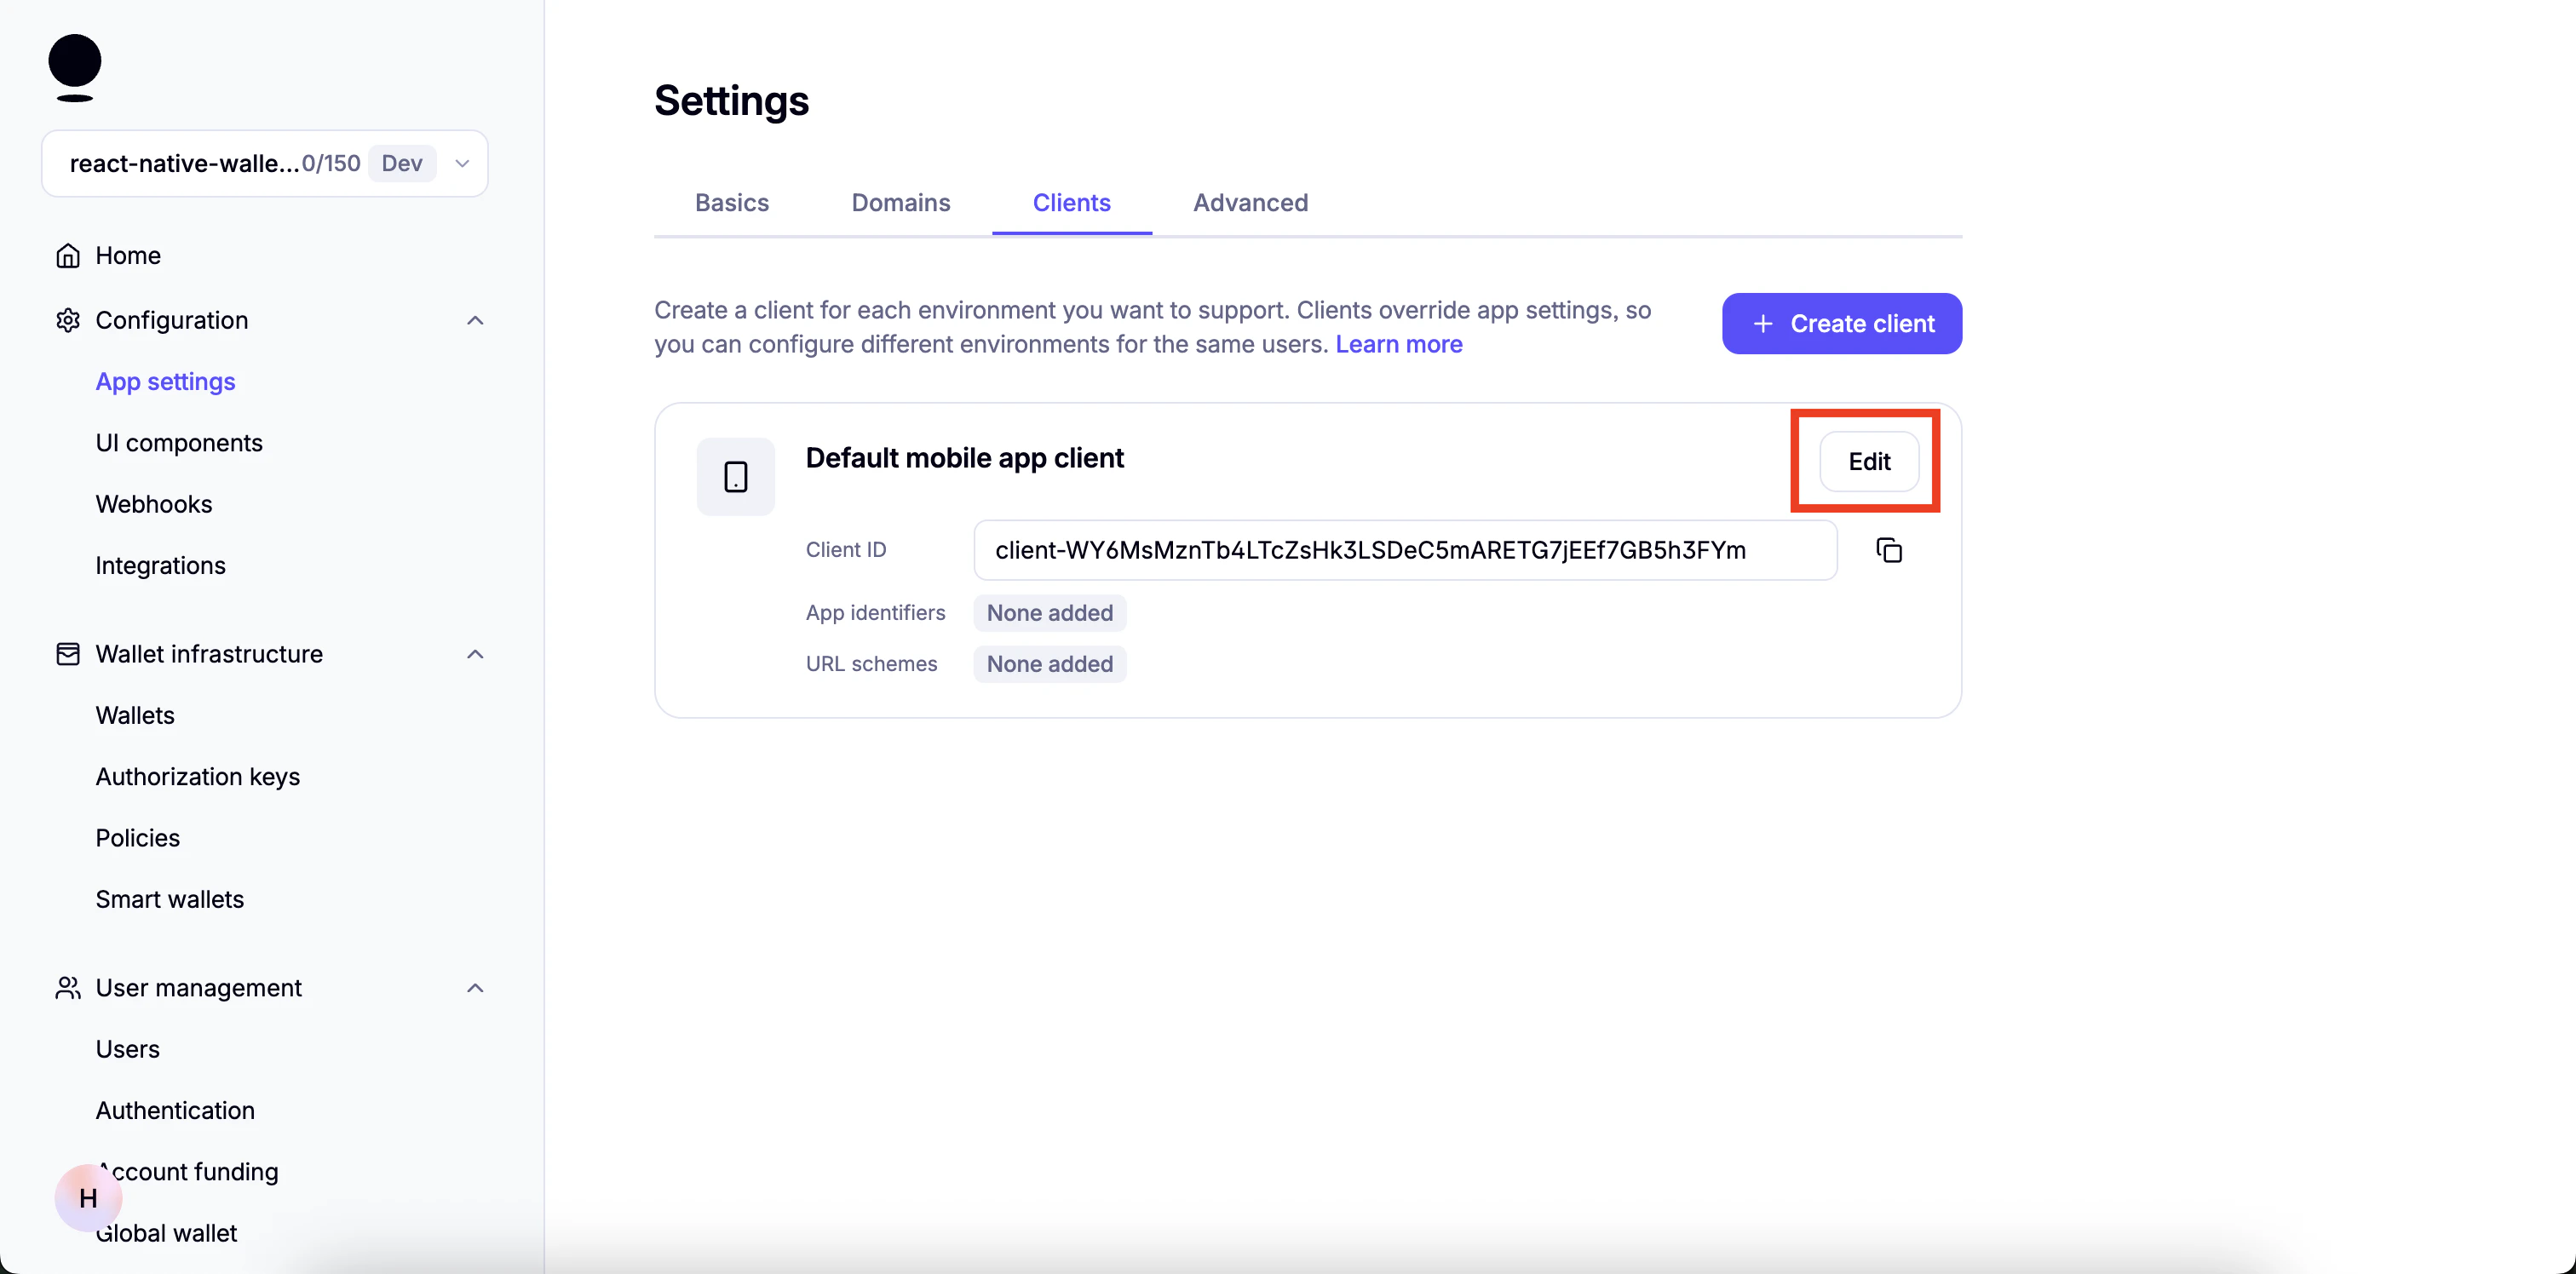 3. Under `Allowed app identifiers` paste the name of the app bundle and click `Add`
You can find the app bundle name in `app.json` for Android it is `package` property and iOS it is the `bundleIdentifier` property
3. Under `Allowed app identifiers` paste the name of the app bundle and click `Add`
You can find the app bundle name in `app.json` for Android it is `package` property and iOS it is the `bundleIdentifier` property
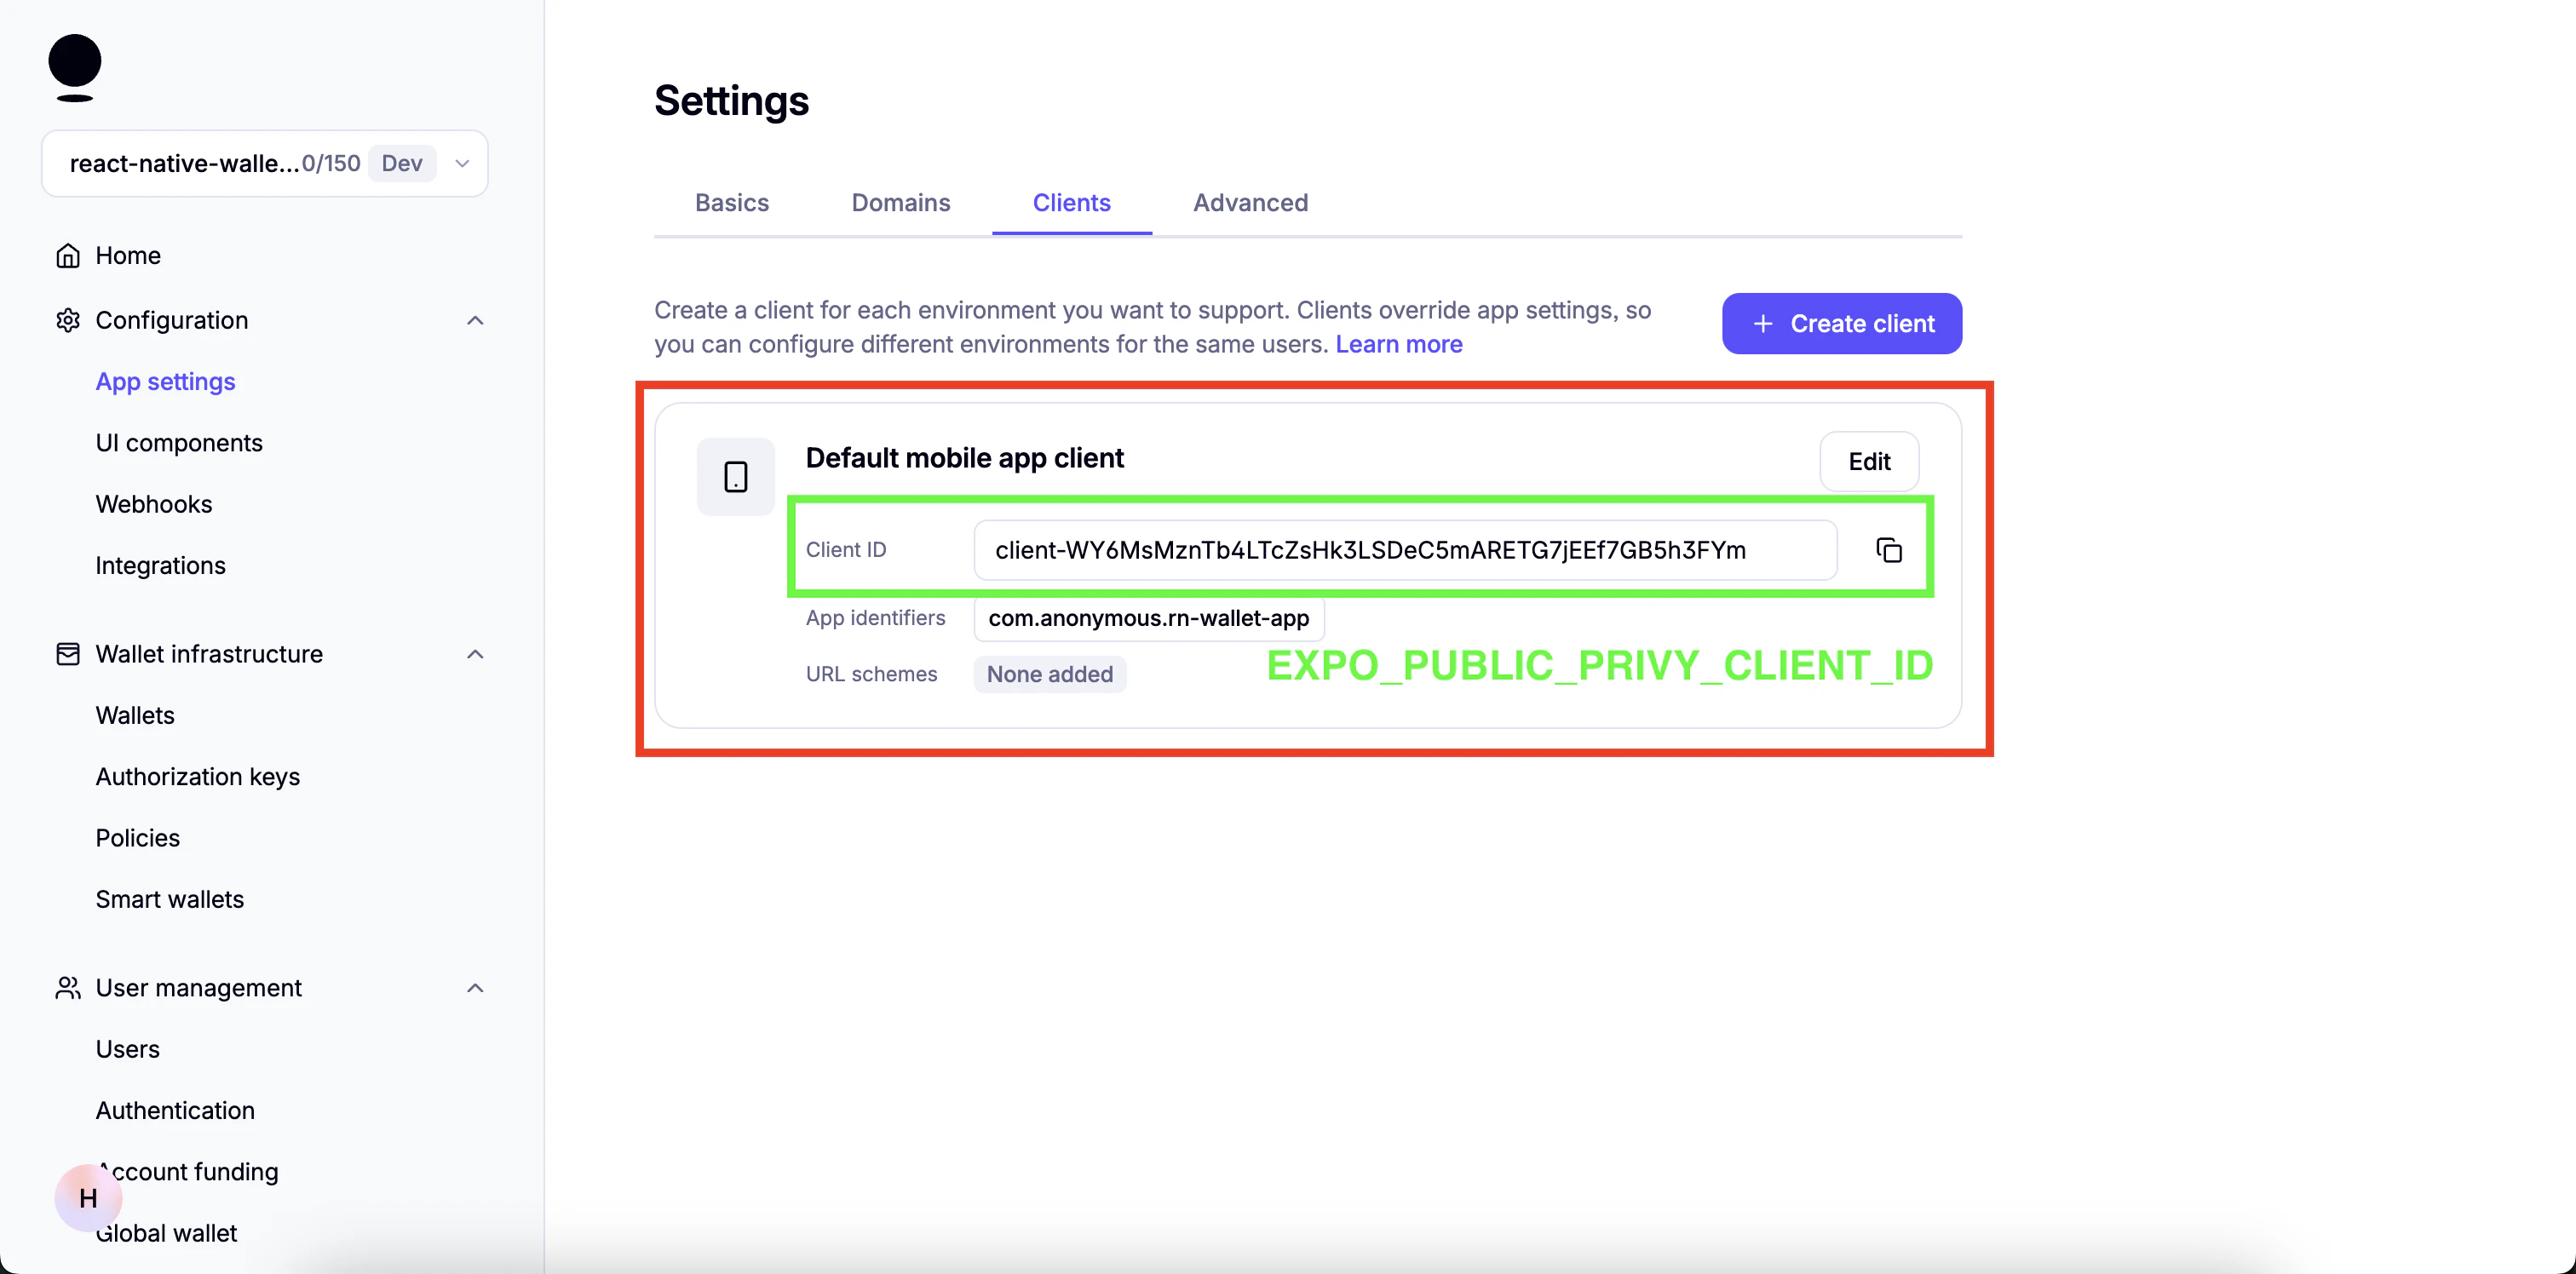
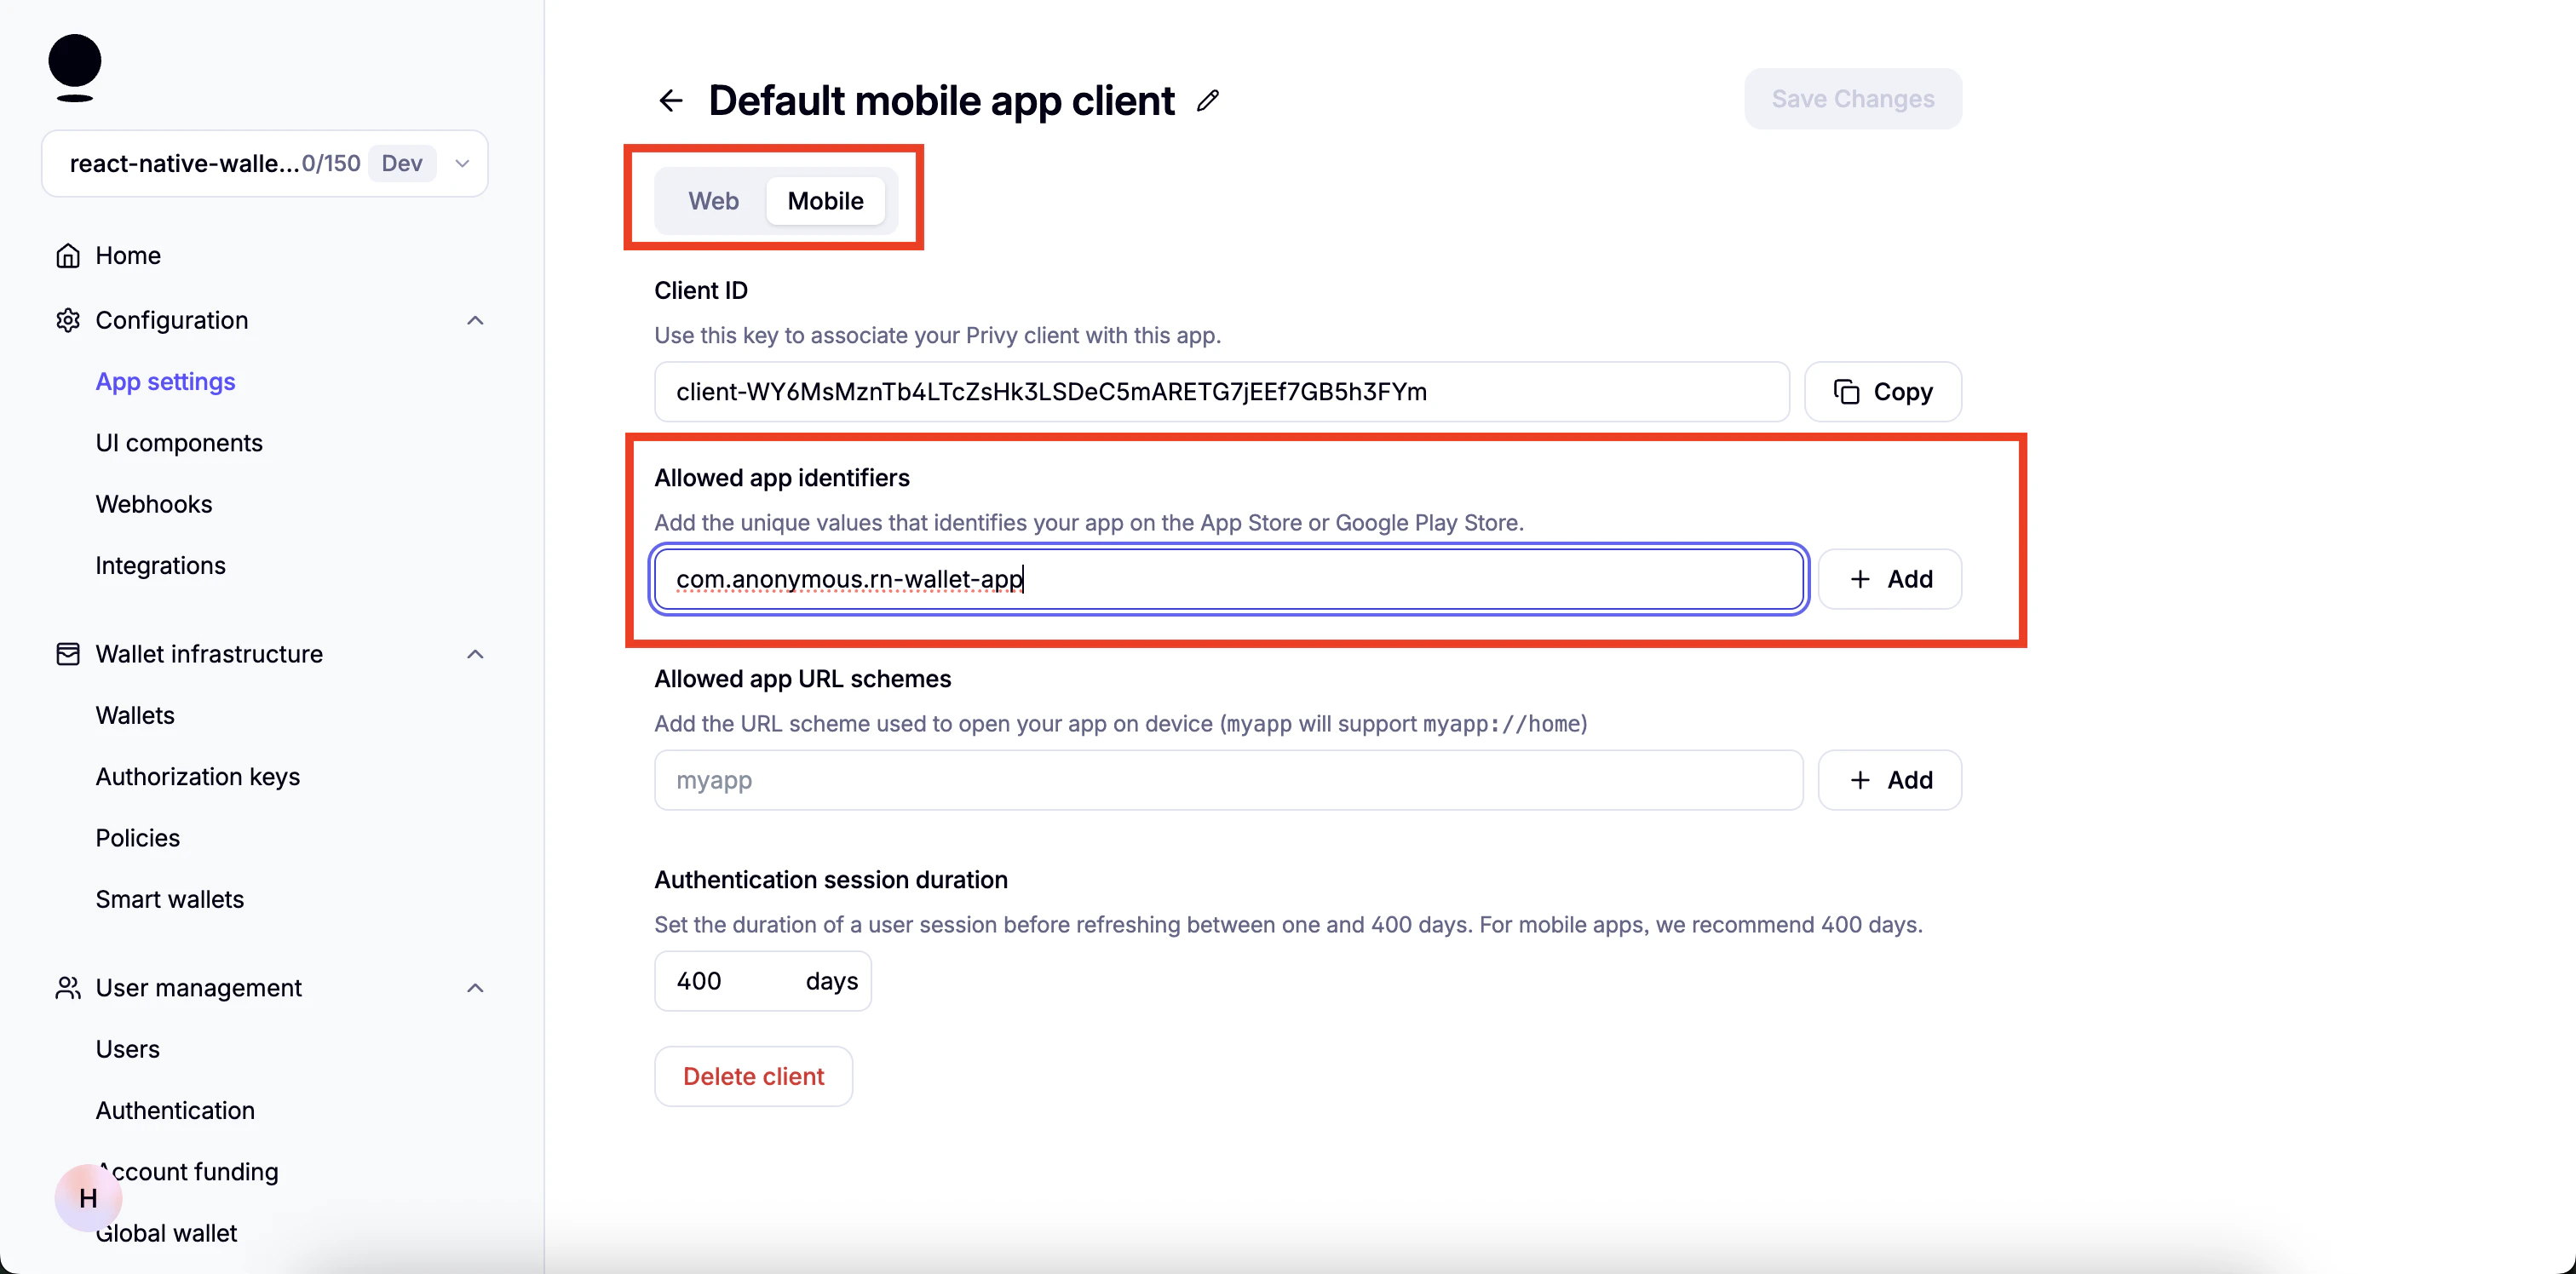 4. You can copy the `Client ID` and use as the value for `EXPO_PUBLIC_PRIVY_CLIENT_ID`.
 ### Start the app
The below commands will start the app in Expo Go app on respective devices.
For iOS:
```bash theme={null}
npm run ios
```
For Android:
```bash theme={null}
npm run android
```
For native app builds use the following commands
For iOS:
```bash theme={null}
npx expo run:ios
```
For Android:
```bash theme={null}
npx expo run:android
```
## Folder structure of the template
```
react-native-privy-embedded-wallet-template/
├── app/ # Expo router entrypoint
│ ├── _layout.tsx # Root Layout
│ └── index.tsx # First screen
├── assets/
│ ├── fonts/ # Custom fonts go here
│ └── images/
│ ├── adaptive-icon.png
│ ├── favicon.png
│ ├── icon.png
│ ├── monad-logo-inverted.png
│ └── monad-logo.png
│ └── readme/ # images for the readme, you can delete this
├── constants/
│ └── Colors.ts
├── app.json # App properties
├── babel.config.js
├── eas.json
├── entrypoint.js
├── eslint.config.js
├── metro.config.js # Configuration for Hermes and Polyfills
├── package-lock.json
├── package.json
├── README.md
├── tsconfig.json
├── types/
│ └── react-native-qrcode-styled.d.ts
```
## Modifying the app name
### Start the app
The below commands will start the app in Expo Go app on respective devices.
For iOS:
```bash theme={null}
npm run ios
```
For Android:
```bash theme={null}
npm run android
```
For native app builds use the following commands
For iOS:
```bash theme={null}
npx expo run:ios
```
For Android:
```bash theme={null}
npx expo run:android
```
## Folder structure of the template
```
react-native-privy-embedded-wallet-template/
├── app/ # Expo router entrypoint
│ ├── _layout.tsx # Root Layout
│ └── index.tsx # First screen
├── assets/
│ ├── fonts/ # Custom fonts go here
│ └── images/
│ ├── adaptive-icon.png
│ ├── favicon.png
│ ├── icon.png
│ ├── monad-logo-inverted.png
│ └── monad-logo.png
│ └── readme/ # images for the readme, you can delete this
├── constants/
│ └── Colors.ts
├── app.json # App properties
├── babel.config.js
├── eas.json
├── entrypoint.js
├── eslint.config.js
├── metro.config.js # Configuration for Hermes and Polyfills
├── package-lock.json
├── package.json
├── README.md
├── tsconfig.json
├── types/
│ └── react-native-qrcode-styled.d.ts
```
## Modifying the app name
| iOS |
Android |

|

|
Edit the `name` property in the `app.json` file.
```json theme={null}
{
"expo": {
"name": "wallet-app", <--- Edit this
...
}
}
```
## Modifying the App Icon & Splash Screen
### App Icon
| iOS |
Android |
|
|
|
You can edit the app icon by replacing the `assets/images/icon.png` file.
Recommended App Icon size is `1024x1024`.
If you name the icon file something else then edit the `icon` property in `app.json` accordingly.
```json theme={null}
{
"expo": {
"name": "rn-wallet-app",
...
"icon": "./assets/images/icon.png", <--- Change this
...
}
}
```
### Splash Screen
| iOS |
Android |
|
|
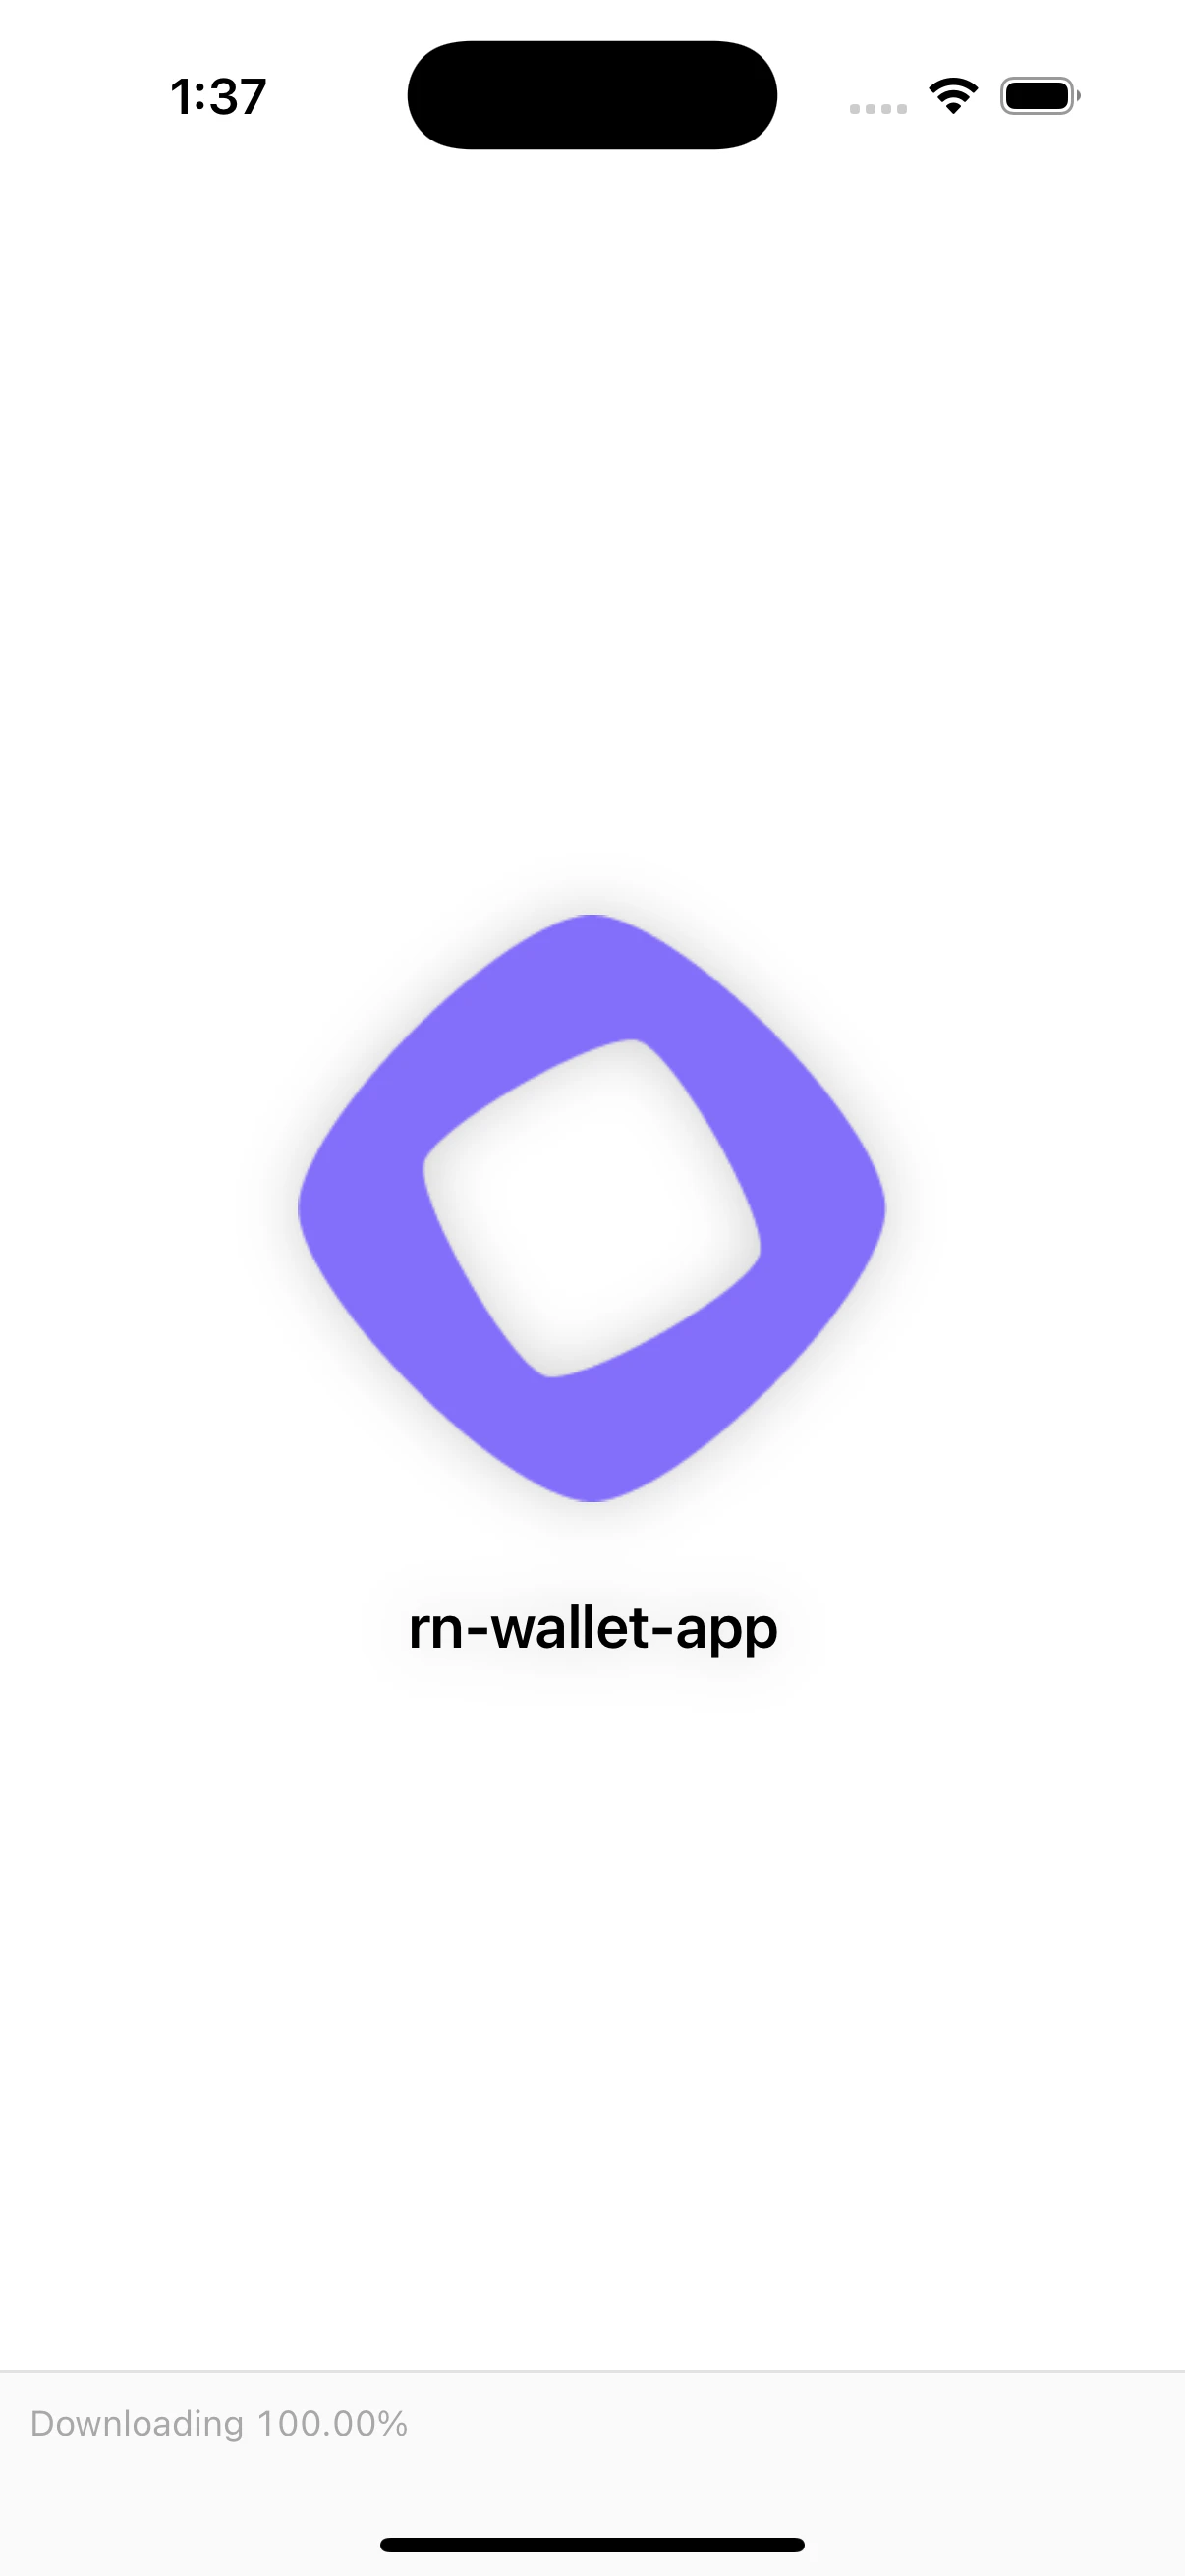
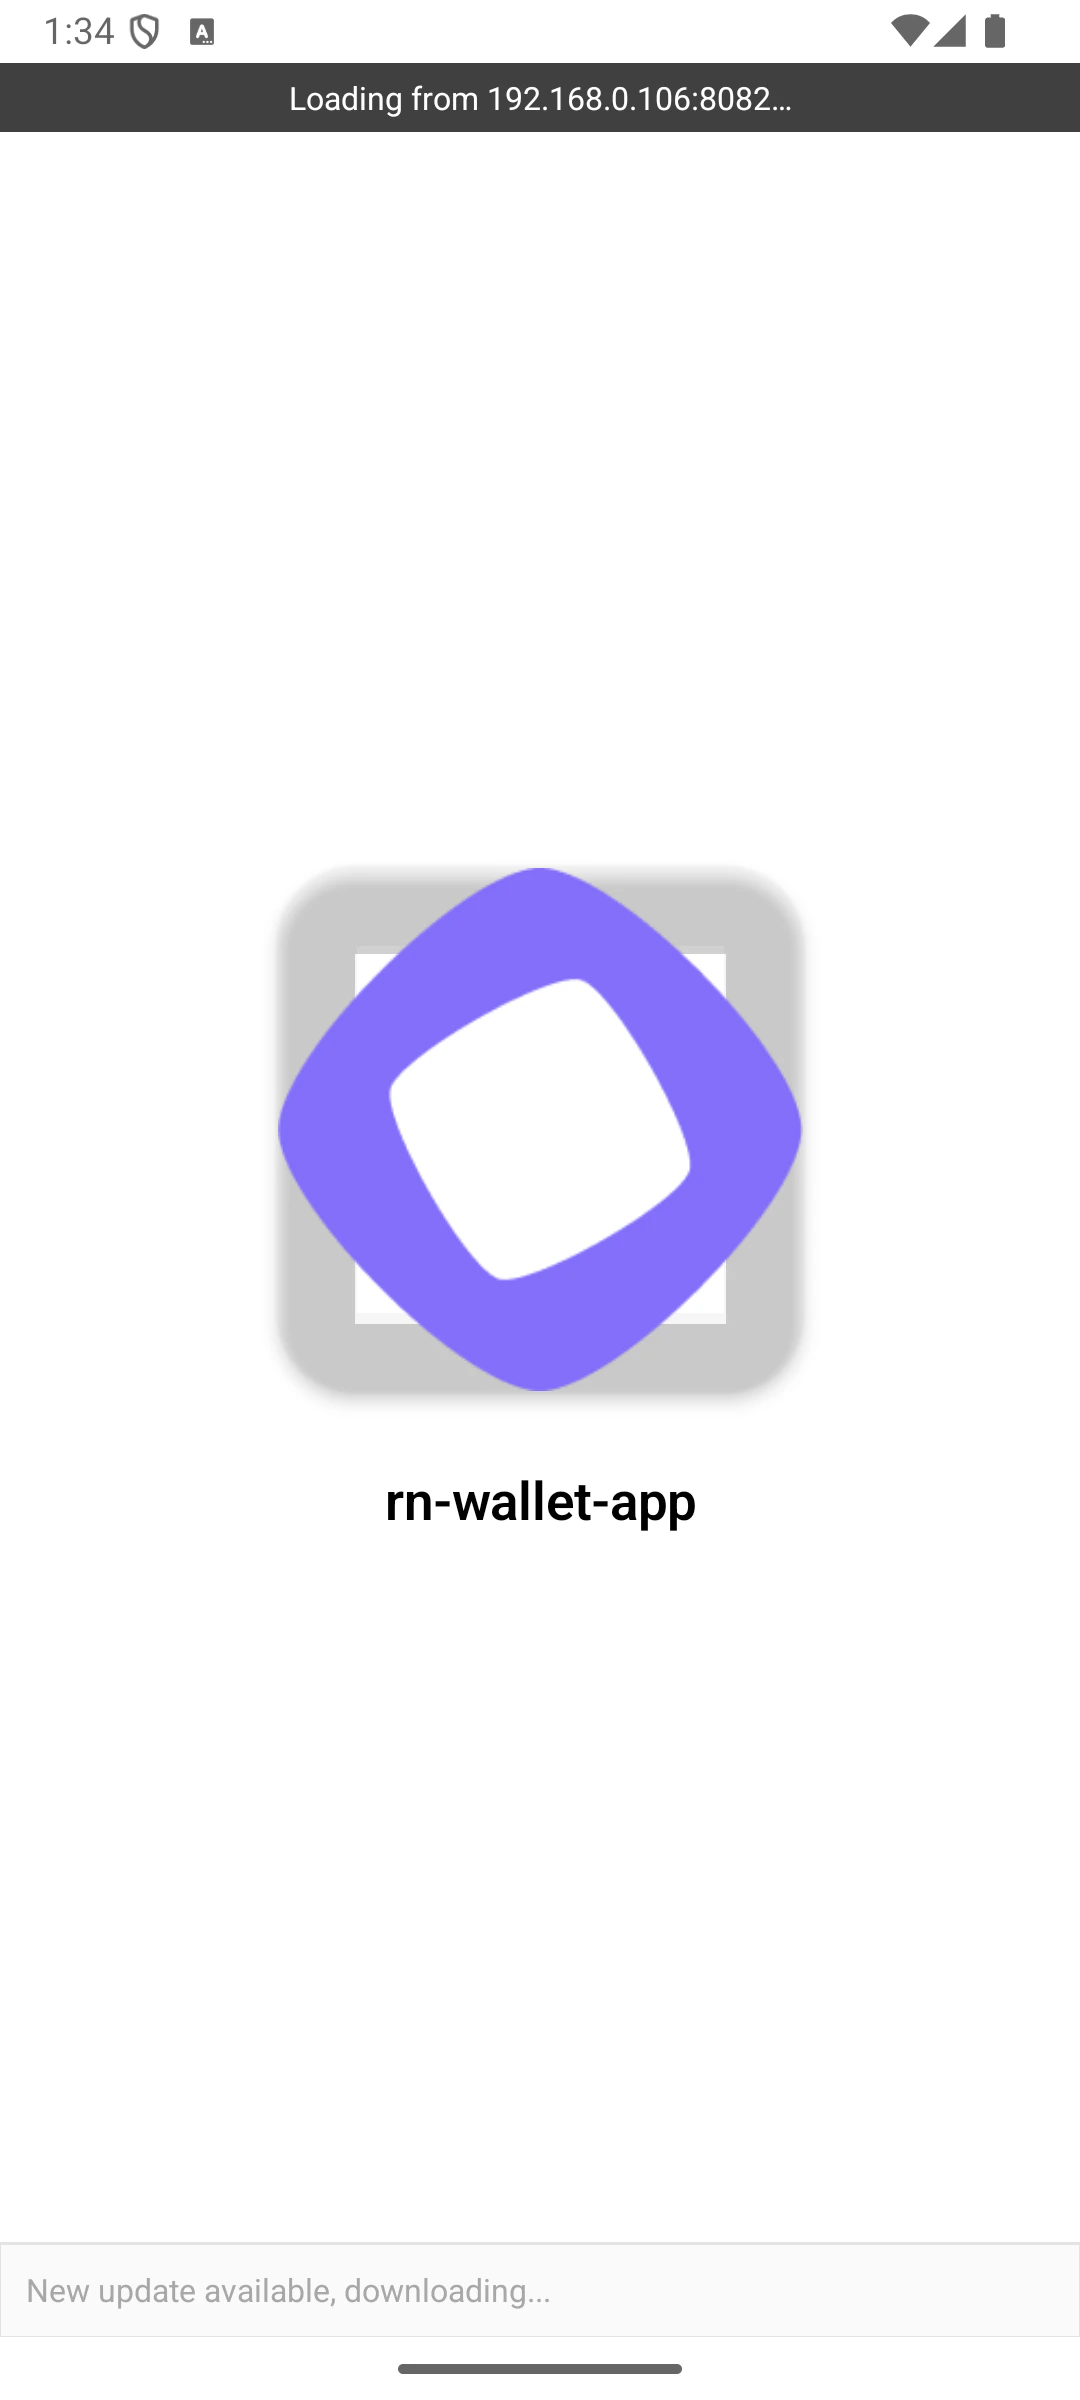
Edit the `splash` object in `app.json` to modify the splash screen.
```json theme={null}
{
"expo": {
"name": "rn-wallet-app",
...
"splash": { <--- Edit this object
"image": "./assets/images/icon.png",
"backgroundColor": "#ffffff"
}
}
}
```
## Modifying fonts for the app
You can create a `fonts` folder inside `assets` folder and keep your custom font files in the `fonts` folder.
To use the custom font, load the font in the `app/_layout.tsx` file.
Example:
```ts theme={null}
const [loaded] = useFonts({
"SF-Pro-Rounded-Black": require("../assets/fonts/SF_Pro_Rounded/SF-Pro-Rounded-Black.otf"),
"SF-Pro-Rounded-Bold": require("../assets/fonts/SF_Pro_Rounded/SF-Pro-Rounded-Bold.otf"),
"SF-Pro-Rounded-Heavy": require("../assets/fonts/SF_Pro_Rounded/SF-Pro-Rounded-Heavy.otf"),
"SF-Pro-Rounded-Medium": require("../assets/fonts/SF_Pro_Rounded/SF-Pro-Rounded-Medium.otf"),
"SF-Pro-Rounded-Regular": require("../assets/fonts/SF_Pro_Rounded/SF-Pro-Rounded-Regular.otf"),
"SF-Pro-Rounded-Semibold": require("../assets/fonts/SF_Pro_Rounded/SF-Pro-Rounded-Semibold.otf"),
Inter_400Regular,
Inter_500Medium,
Inter_600SemiBold,
});
```
## Modifying the deeplinking scheme
Edit the `scheme` property in `app.json` file, for your custom deeplinking scheme.
```json theme={null}
{
"expo": {
...
"scheme": "rnwalletapp",
...
}
}
```
For example, if you set this to `rnwalletapp`, then `rnwalletapp://` URLs would open your app when tapped.
This is a build-time configuration, it has no effect in Expo Go.
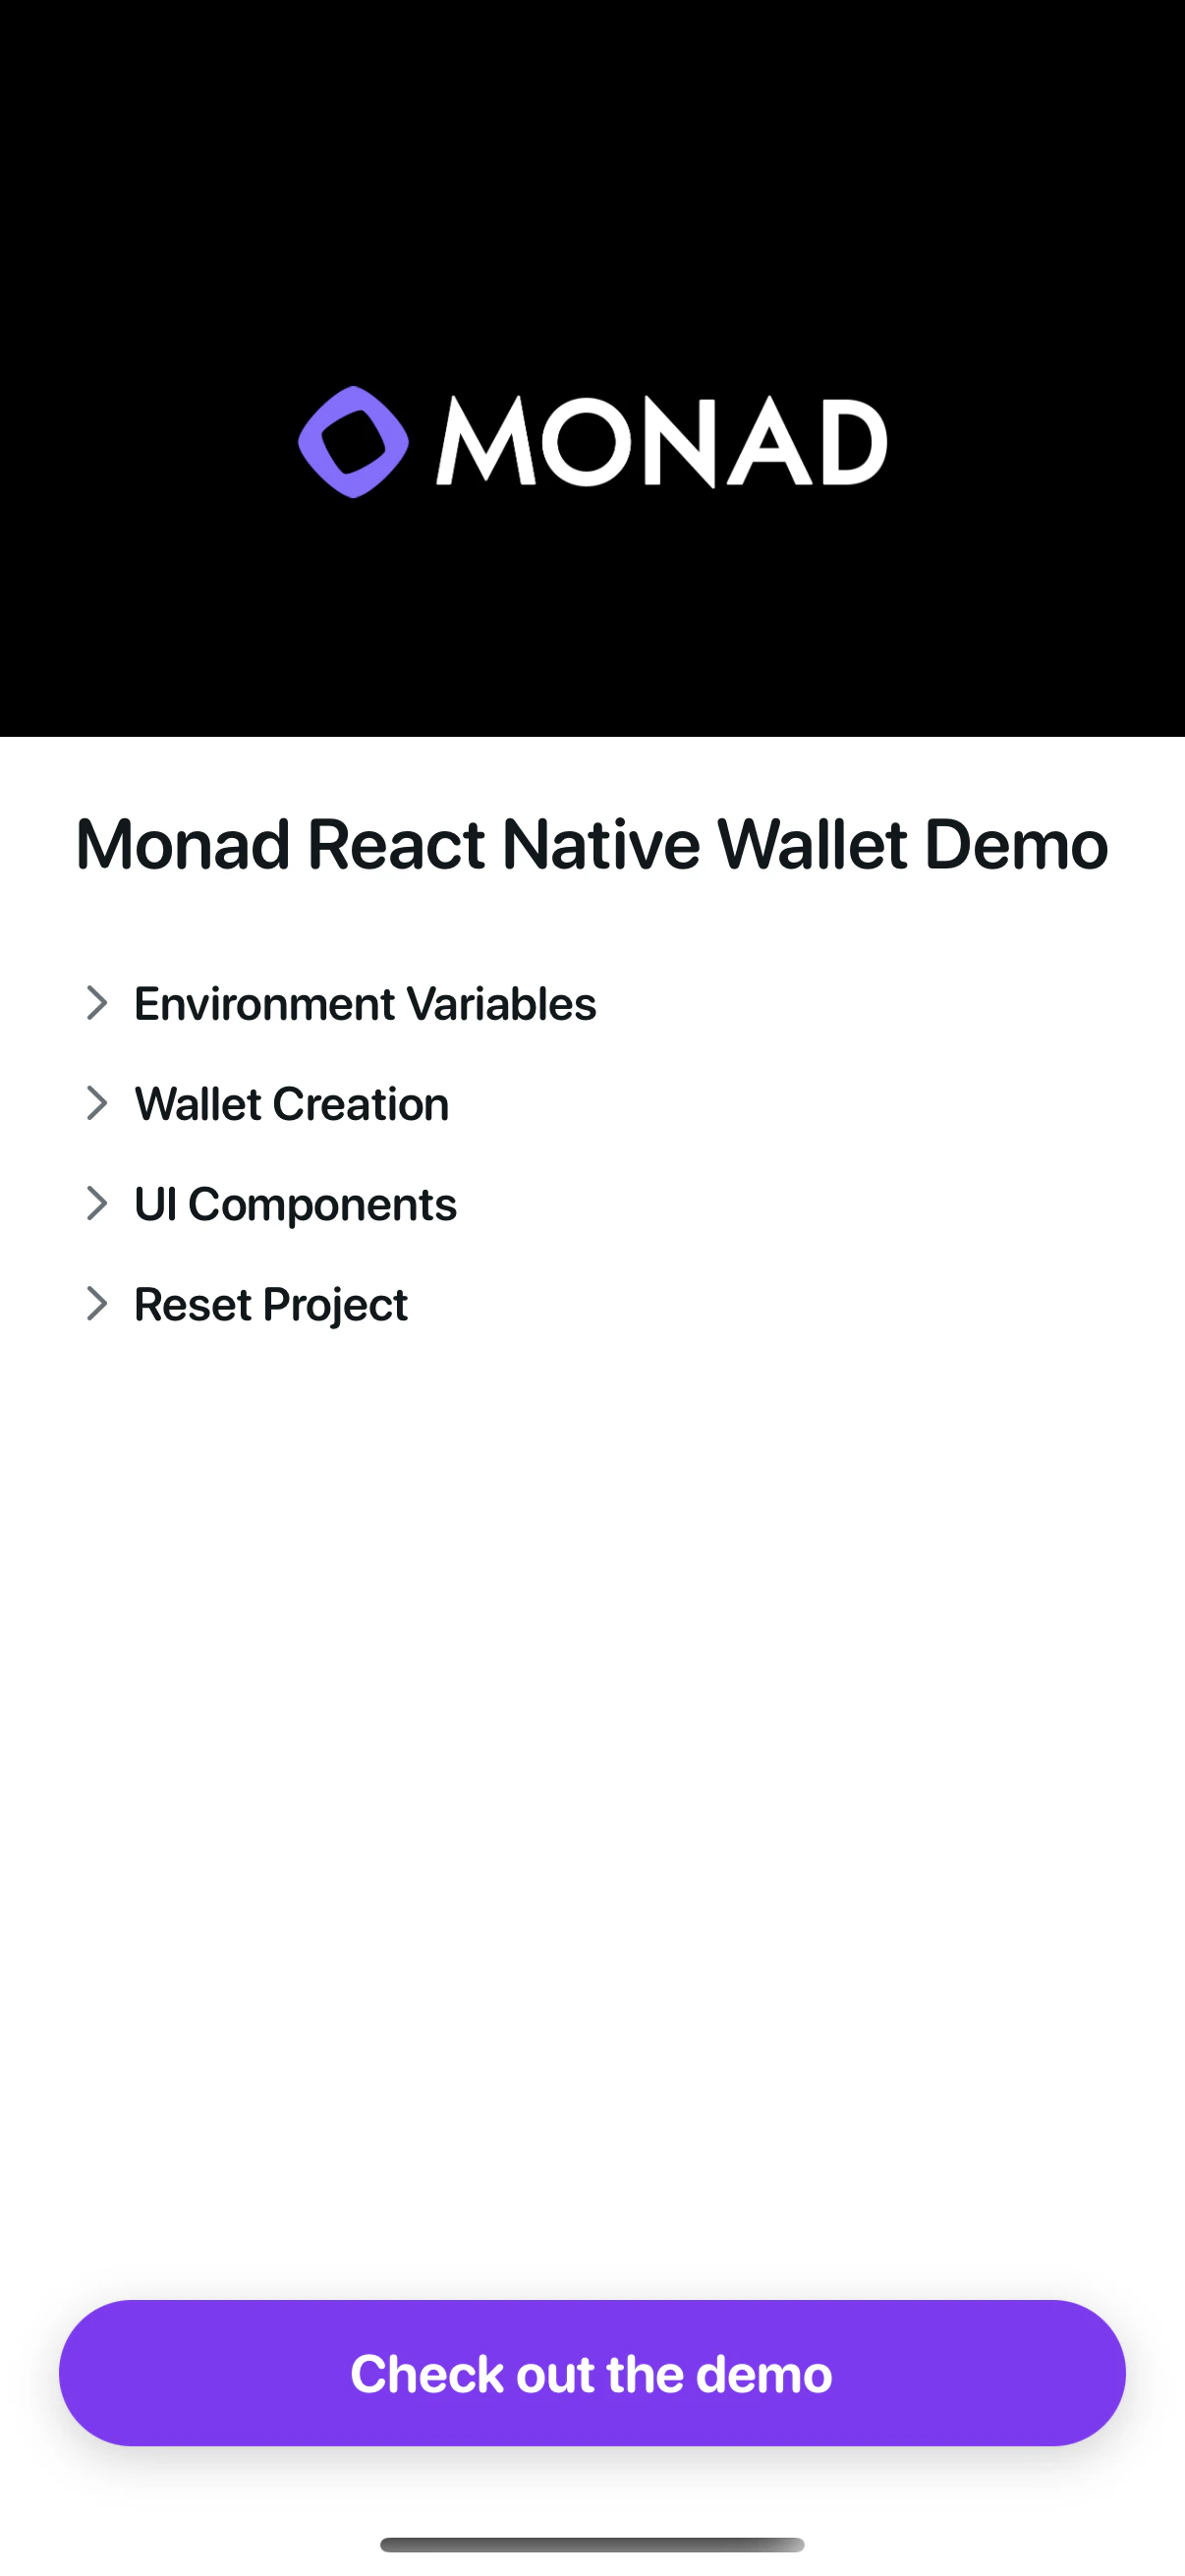
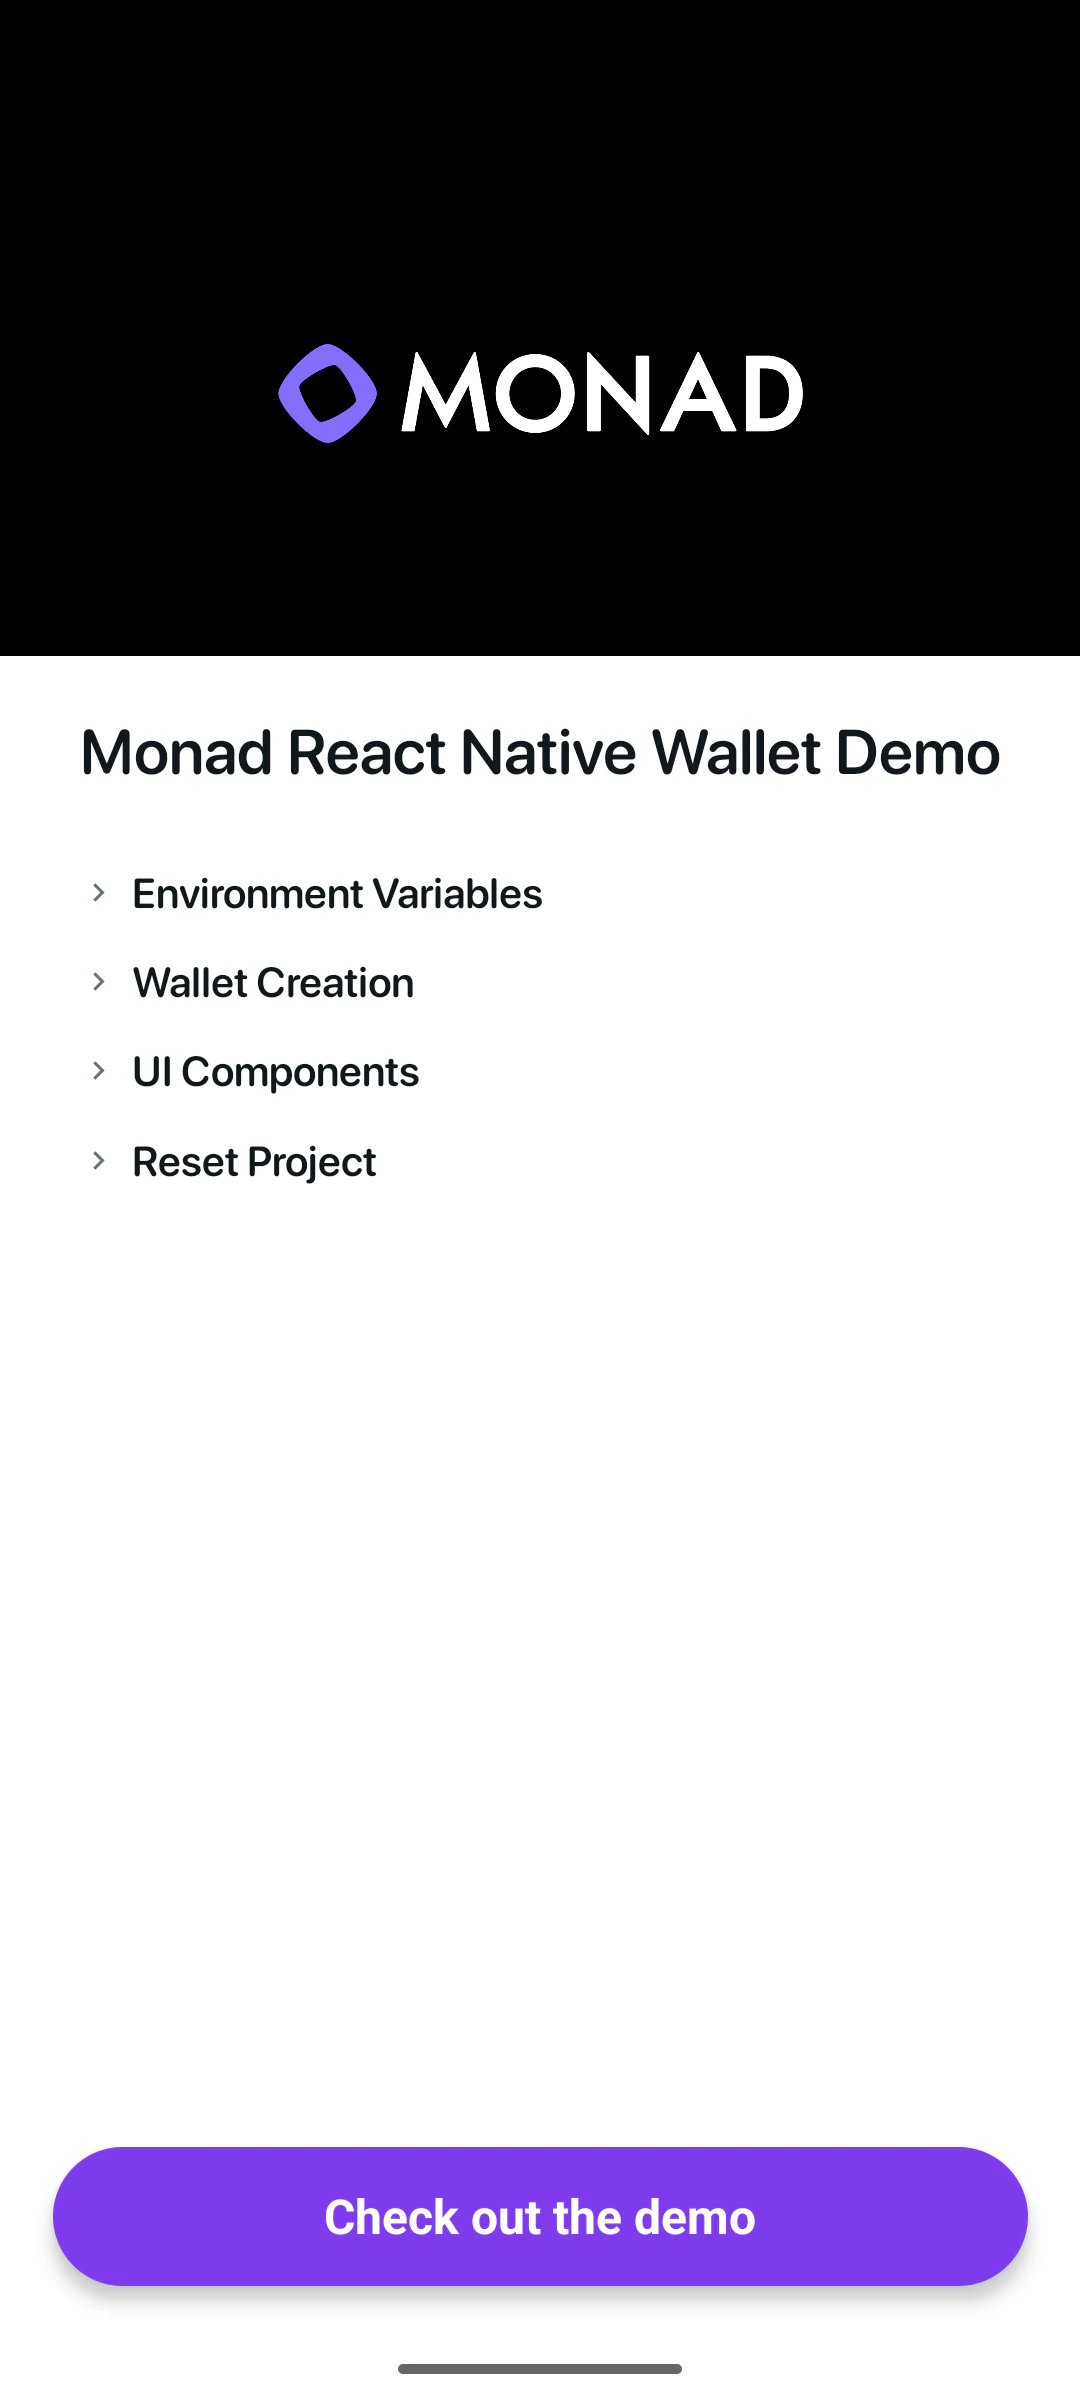
## Editing the landing screen
| iOS |
Android |
|
|
You can edit the landing page by editing the code in the file `app/index.tsx`.
## Wallet Actions
The template has example code for the following Wallet Actions:
* [Send USDC](https://github.com/monad-developers/react-native-privy-embedded-wallet-template/blob/demo/components/sheets/SendSheet.tsx)
* [Sign Message](https://github.com/monad-developers/react-native-privy-embedded-wallet-template/blob/demo/components/sheets/SignSheet.tsx)
## Modifying the package/bundle identifier
When publishing app to the app store you need to have a unique package/bundle identifier you can change it in in `app.json`.
Don't forget to the change the identifier in Privy dashboard
```json theme={null}
{
"expo": {
"name": "rn-wallet-app",
...
"ios": {
"bundleIdentifier": "com.anonymous.rn-wallet-app", <--- Edit this
...
},
"android": {
...
"package": "com.anonymous.rnwalletapp" <--- Edit this
},
}
}
```
## Check out the demo app
If you want try the demo app before you start developing you can switch to the `demo` branch available with the repo:
```bash theme={null}
git checkout demo
```
### Folder structure of the demo project (Change to `demo` branch to view this)
```
react-native-privy-embedded-wallet-template/
├── app/
│ ├── _layout.tsx # Root layout of the project
│ ├── +not-found.tsx
│ ├── demo/ # This is entrypoint for the Wallet related code.
│ │ ├── _layout.tsx
│ │ ├── app/ # If Authenticated the user can access route /app
│ │ │ ├── _layout.tsx
│ │ │ └── index.tsx
│ │ └── sign-in/ # Unauthenticated user gets redirected to /sign-in
│ └── index.tsx # This is the landing page
├── assets/
│ ├── fonts/ # Custom fonts go here
│ │ └── SF_Pro_Rounded/ # Custom Font example
│ └── images/
│ ├── adaptive-icon.png
│ ├── favicon.png
│ ├── icon.png
│ ├── monad-icon.png
│ ├── monad-logo-inverted.png
│ ├── monad-logo.png
│ ├── partial-react-logo.png
│ └── splash-icon.png
├── components/
│ ├── sheets/ # All the bottom sheets are here
│ └── ui/
├── config/
│ ├── privyConfig.ts # Privy related config
│ ├── providers.tsx
│ └── wagmiConfig.ts # Monad Testnet related config
├── constants/
├── context/
│ ├── AuthContext.tsx
│ └── WalletContext.tsx # Wallet actions implementations are here
├── hooks/
├── screens/
│ ├── Email/ # Screen that asks for Email
│ ├── Home/ # Wallet Home screen (Authenticated users only)
│ ├── Landing/ # Screen with info on how to use the template
│ └── OTP/ # Screen that asks for the OTP code sent to email
├── types/
├── utils.ts
├── entrypoint.ts
├── app.json
├── babel.config.js
├── eas.json
├── eslint.config.js
├── metro.config.js
├── package.json
├── package-lock.json
├── README.md
├── tsconfig.json
```
## Learn more
To learn more about developing your project with Expo, Privy, and Monad, check out the following resources:
* Expo [docs](https://docs.expo.dev/) | [guides](https://docs.expo.dev/guides) | [tutorial](https://docs.expo.dev/tutorial/introduction/)
* Privy: [create a wallet](https://docs.privy.io/wallets/wallets/create/create-a-wallet) | [send a transaction](https://docs.privy.io/wallets/using-wallets/ethereum/send-a-transaction) | [sign a transaction](https://docs.privy.io/wallets/using-wallets/ethereum/sign-a-transaction)
* Monad: [supported tooling and infra](/tooling-and-infra)
Please report any issues [here](https://github.com/monad-developers/react-native-privy-embedded-wallet-template/issues).