> ## Documentation Index
> Fetch the complete documentation index at: https://docs.monad.xyz/llms.txt
> Use this file to discover all available pages before exploring further.
# 如何使用 Envio HyperIndex 构建转账通知机器人
在本指南中,您将学习如何使用 [Envio](https://envio.dev/) HyperIndex 创建一个 Telegram 机器人,每当 Monad 测试网上发生 WMON 代币转账时发送通知。我们将逐步完成索引器和 Telegram 机器人的设置。
Envio HyperIndex 是一个用于构建区块链应用后端的开放开发框架。它提供实时索引、从合约地址自动生成索引器,以及外部 API 调用触发器等功能。
## 前置条件
您需要安装以下工具:
* Node.js v18 或更高版本
* pnpm v8 或更高版本
* Docker Desktop(在本地运行 Envio 索引器所必需)
## 设置项目
首先,创建并进入一个新目录:
```shell theme={null}
mkdir envio-mon && cd envio-mon
```
### 获取合约 ABI
1. 创建 `abi.json` 文件:
```shell theme={null}
touch abi.json
```
2. 从浏览器复制 [WrappedMonad](https://testnet.monadvision.com/token/0xFb8bf4c1CC7a94c73D209a149eA2AbEa852BC541?tab=Contract) 的 ABI
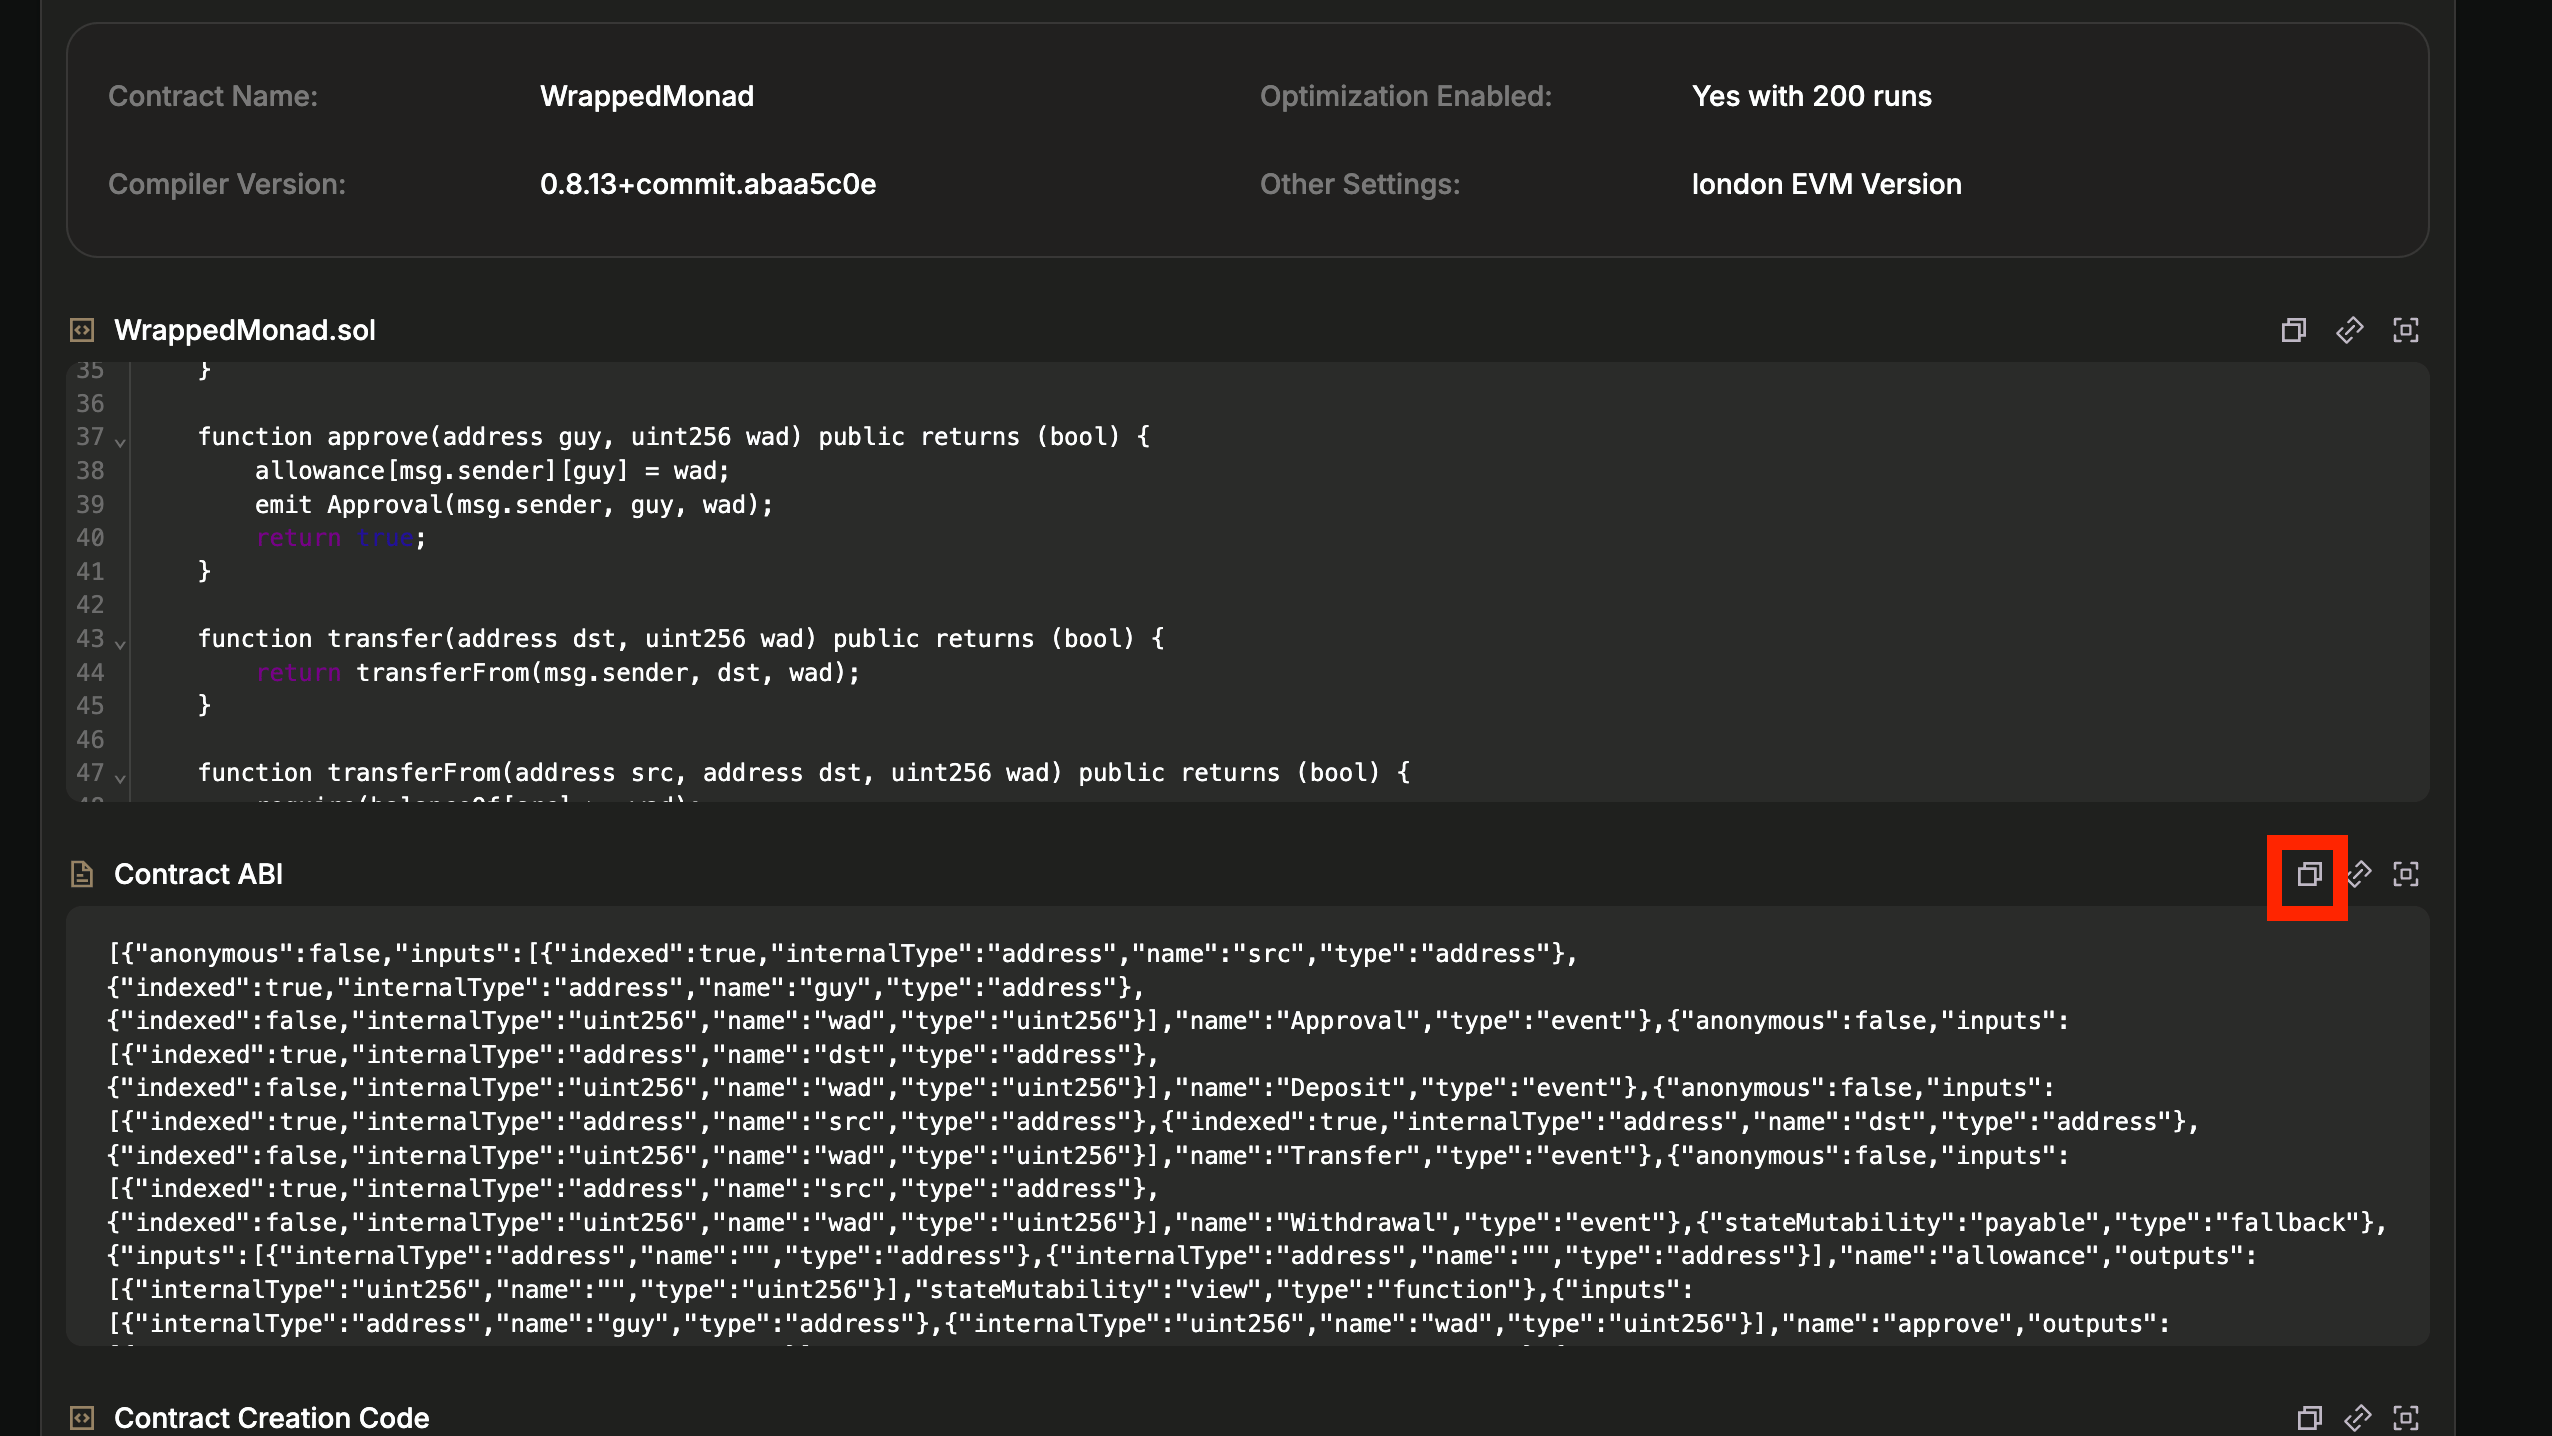 3. 将 ABI 粘贴到您的 `abi.json` 文件中
### 初始化项目
运行初始化命令:
```shell theme={null}
pnpx envio init
```
按提示操作:
1. 询问文件夹名称时按回车(使用当前目录)
2. 选择 `TypeScript` 作为您的语言
3. 选择 `Evm` 作为区块链生态系统
4. 选择 `Contract Import` 进行初始化
5. 选择 `Local ABI` 作为导入方法
6. 输入 `./abi.json` 作为 ABI 文件路径
7. 只选择 `Transfer` 事件进行索引
8. 选择 `` 并输入 `10143`(Monad 测试网链 ID)
9. 输入 `WrappedMonad` 作为合约名称
10. 输入合约地址:`0xFb8bf4c1CC7a94c73D209a149eA2AbEa852BC541`
11. 由于我们只索引一个合约,选择 `I'm finished`
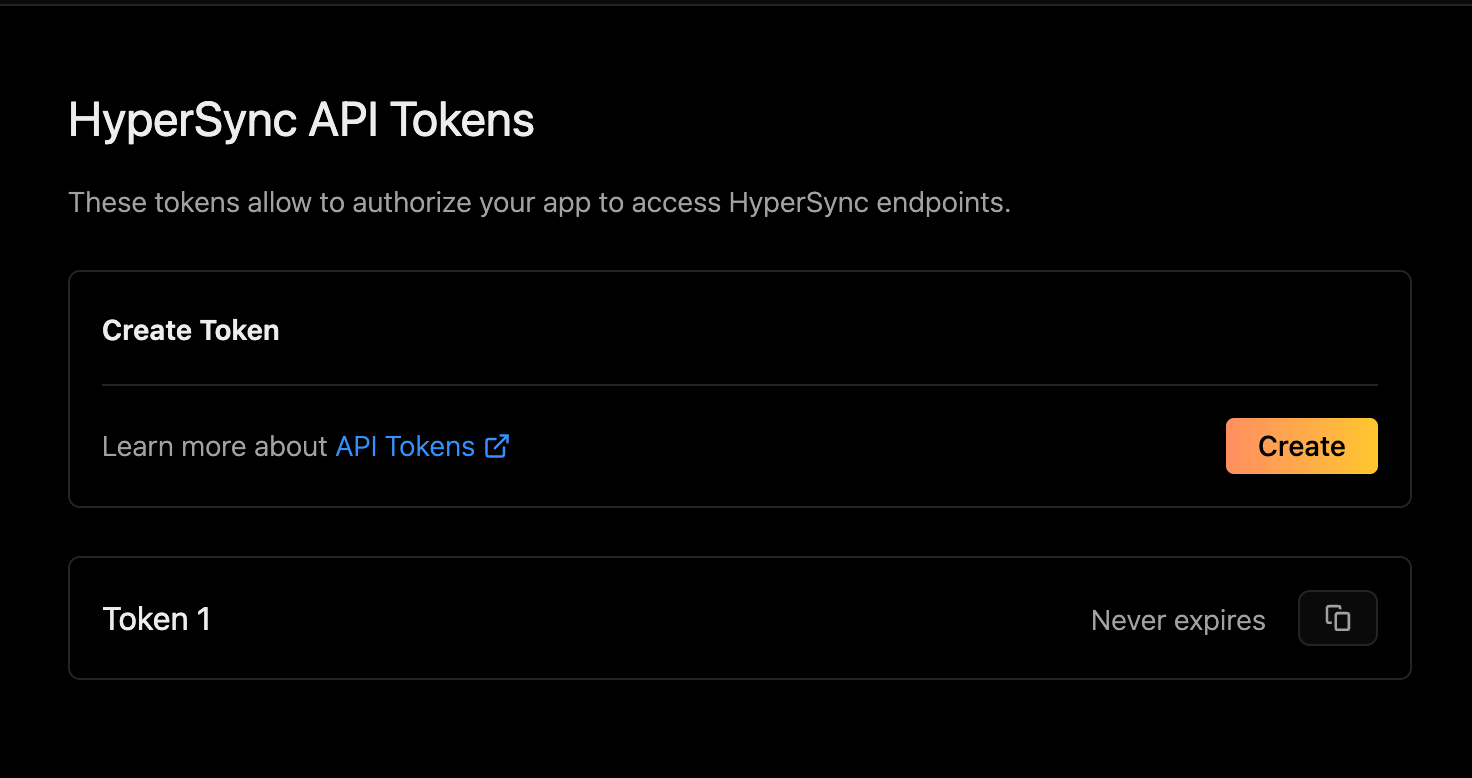
12. 选择创建或添加现有 API token。如果您选择创建新 token,将进入类似下图的页面:
3. 将 ABI 粘贴到您的 `abi.json` 文件中
### 初始化项目
运行初始化命令:
```shell theme={null}
pnpx envio init
```
按提示操作:
1. 询问文件夹名称时按回车(使用当前目录)
2. 选择 `TypeScript` 作为您的语言
3. 选择 `Evm` 作为区块链生态系统
4. 选择 `Contract Import` 进行初始化
5. 选择 `Local ABI` 作为导入方法
6. 输入 `./abi.json` 作为 ABI 文件路径
7. 只选择 `Transfer` 事件进行索引
8. 选择 `` 并输入 `10143`(Monad 测试网链 ID)
9. 输入 `WrappedMonad` 作为合约名称
10. 输入合约地址:`0xFb8bf4c1CC7a94c73D209a149eA2AbEa852BC541`
11. 由于我们只索引一个合约,选择 `I'm finished`
12. 选择创建或添加现有 API token。如果您选择创建新 token,将进入类似下图的页面:
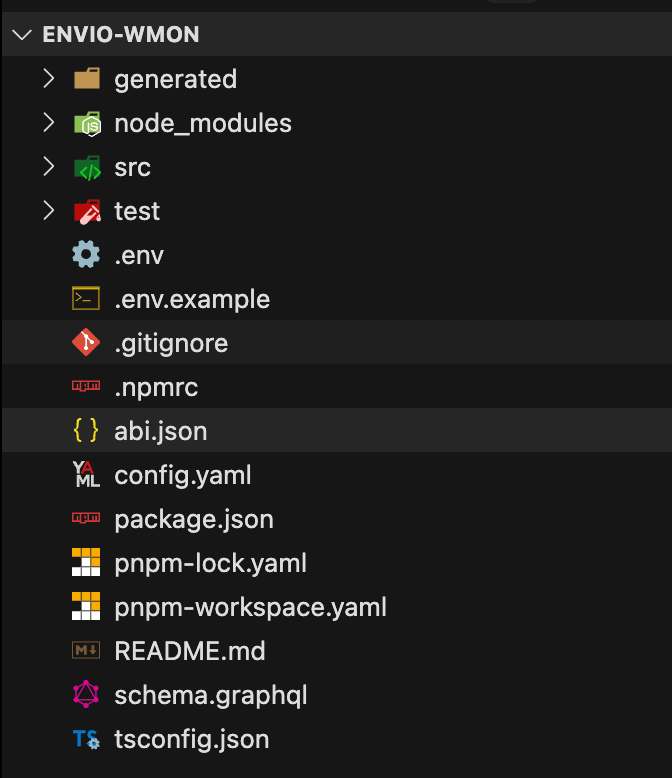
 项目初始化完成后,您应该会在项目目录中看到以下项目结构。
 将以下代码添加到 `config.yaml` 文件,使事件处理器中能够获取交易哈希:
```yaml lines title="config.yaml" theme={null}
# default config...
field_selection:
transaction_fields:
- hash
```
*关于 `field_selection` 配置的更多详情请见[此处](https://docs.envio.dev/docs/HyperIndex/configuration-file#field-selection)*
## 启动索引器
启动 Docker Desktop。
在项目目录下运行以下命令启动索引器:
```shell theme={null}
pnpx envio dev
```
您应该会在终端看到类似下图的内容;这意味着索引器正在同步,最终会追上链的最新区块。
将以下代码添加到 `config.yaml` 文件,使事件处理器中能够获取交易哈希:
```yaml lines title="config.yaml" theme={null}
# default config...
field_selection:
transaction_fields:
- hash
```
*关于 `field_selection` 配置的更多详情请见[此处](https://docs.envio.dev/docs/HyperIndex/configuration-file#field-selection)*
## 启动索引器
启动 Docker Desktop。
在项目目录下运行以下命令启动索引器:
```shell theme={null}
pnpx envio dev
```
您应该会在终端看到类似下图的内容;这意味着索引器正在同步,最终会追上链的最新区块。
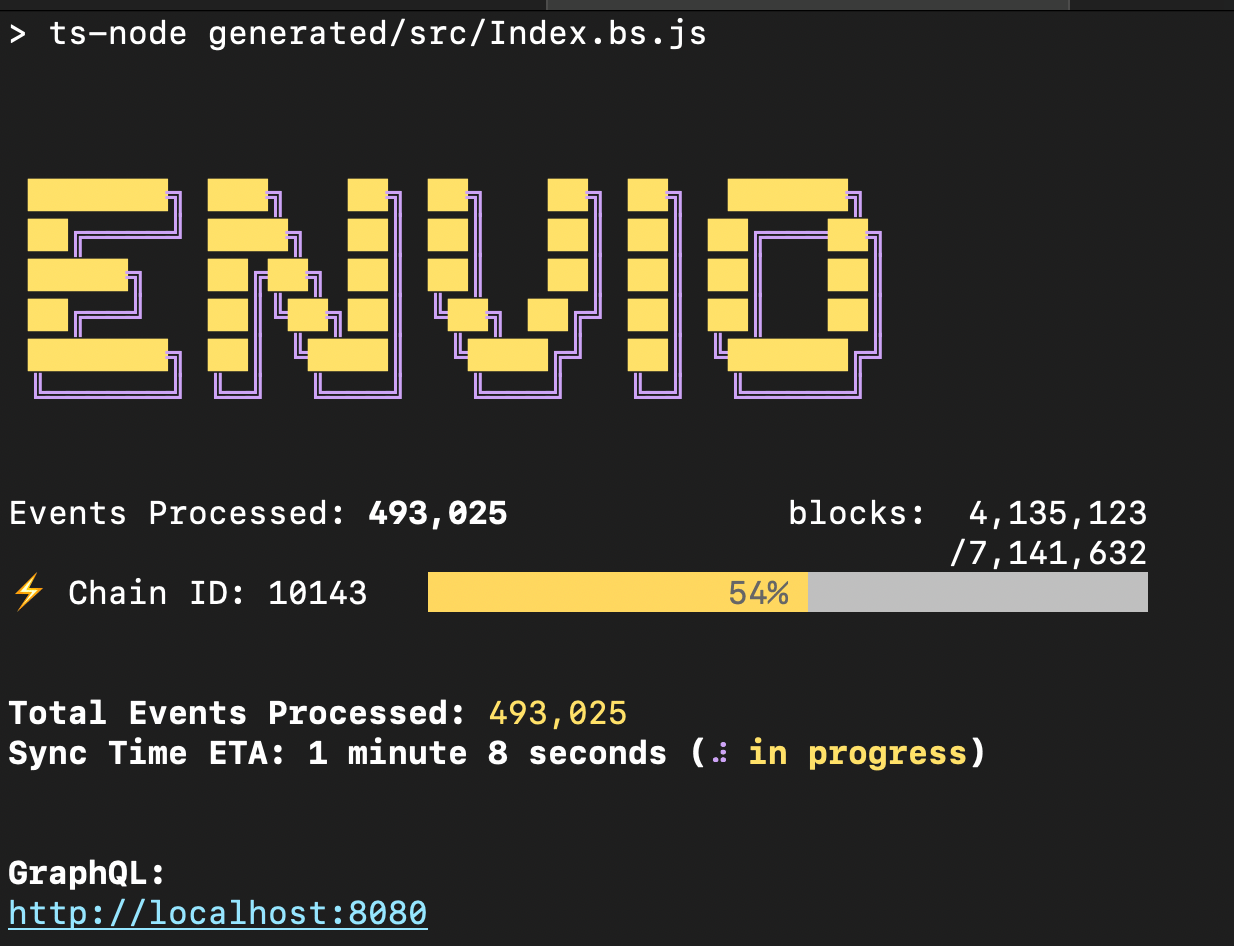 您还会在浏览器中自动打开这个页面,密码是 `testing`。
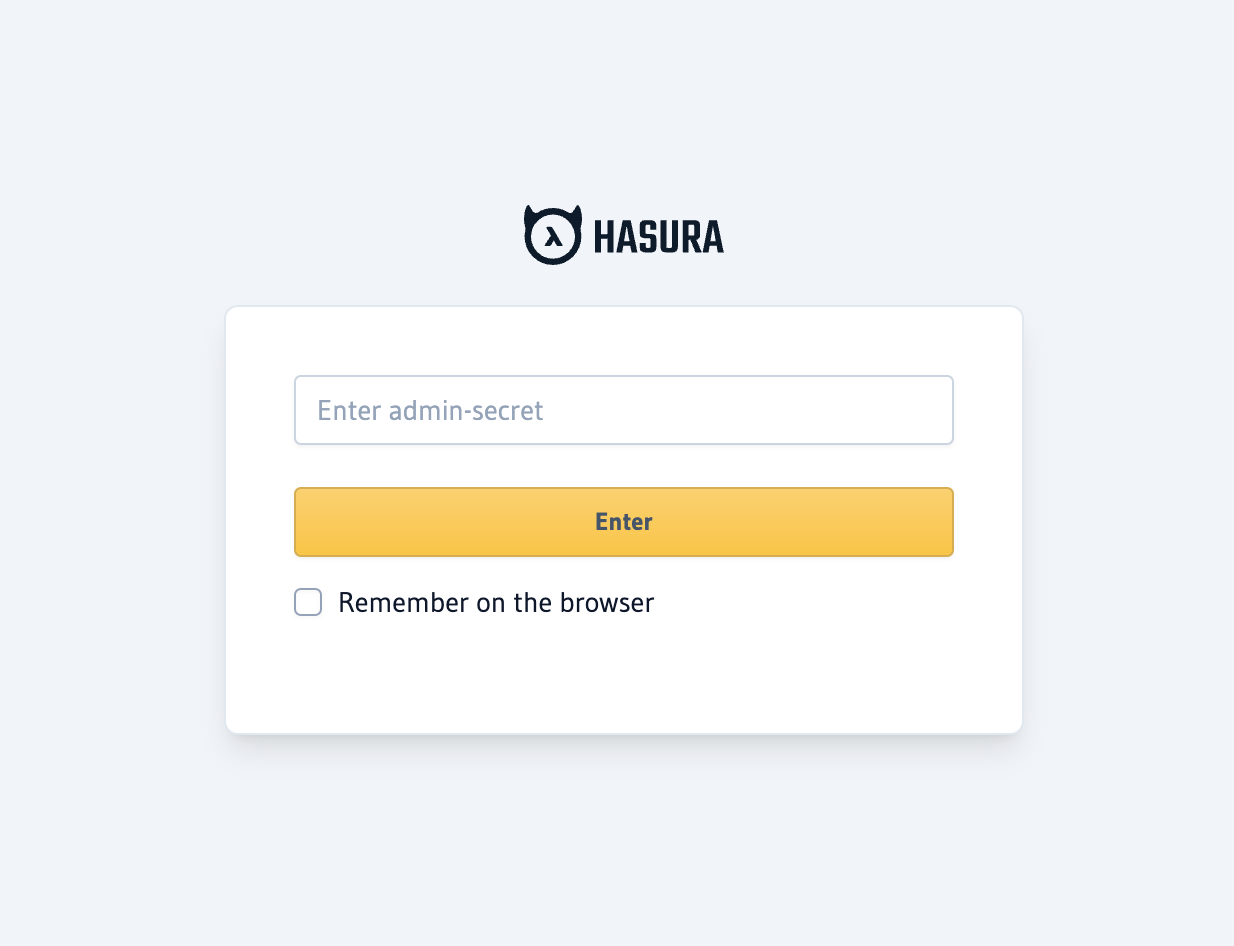 我们可以通过这个界面使用 GraphQL 查询索引器。结果取决于同步进度:
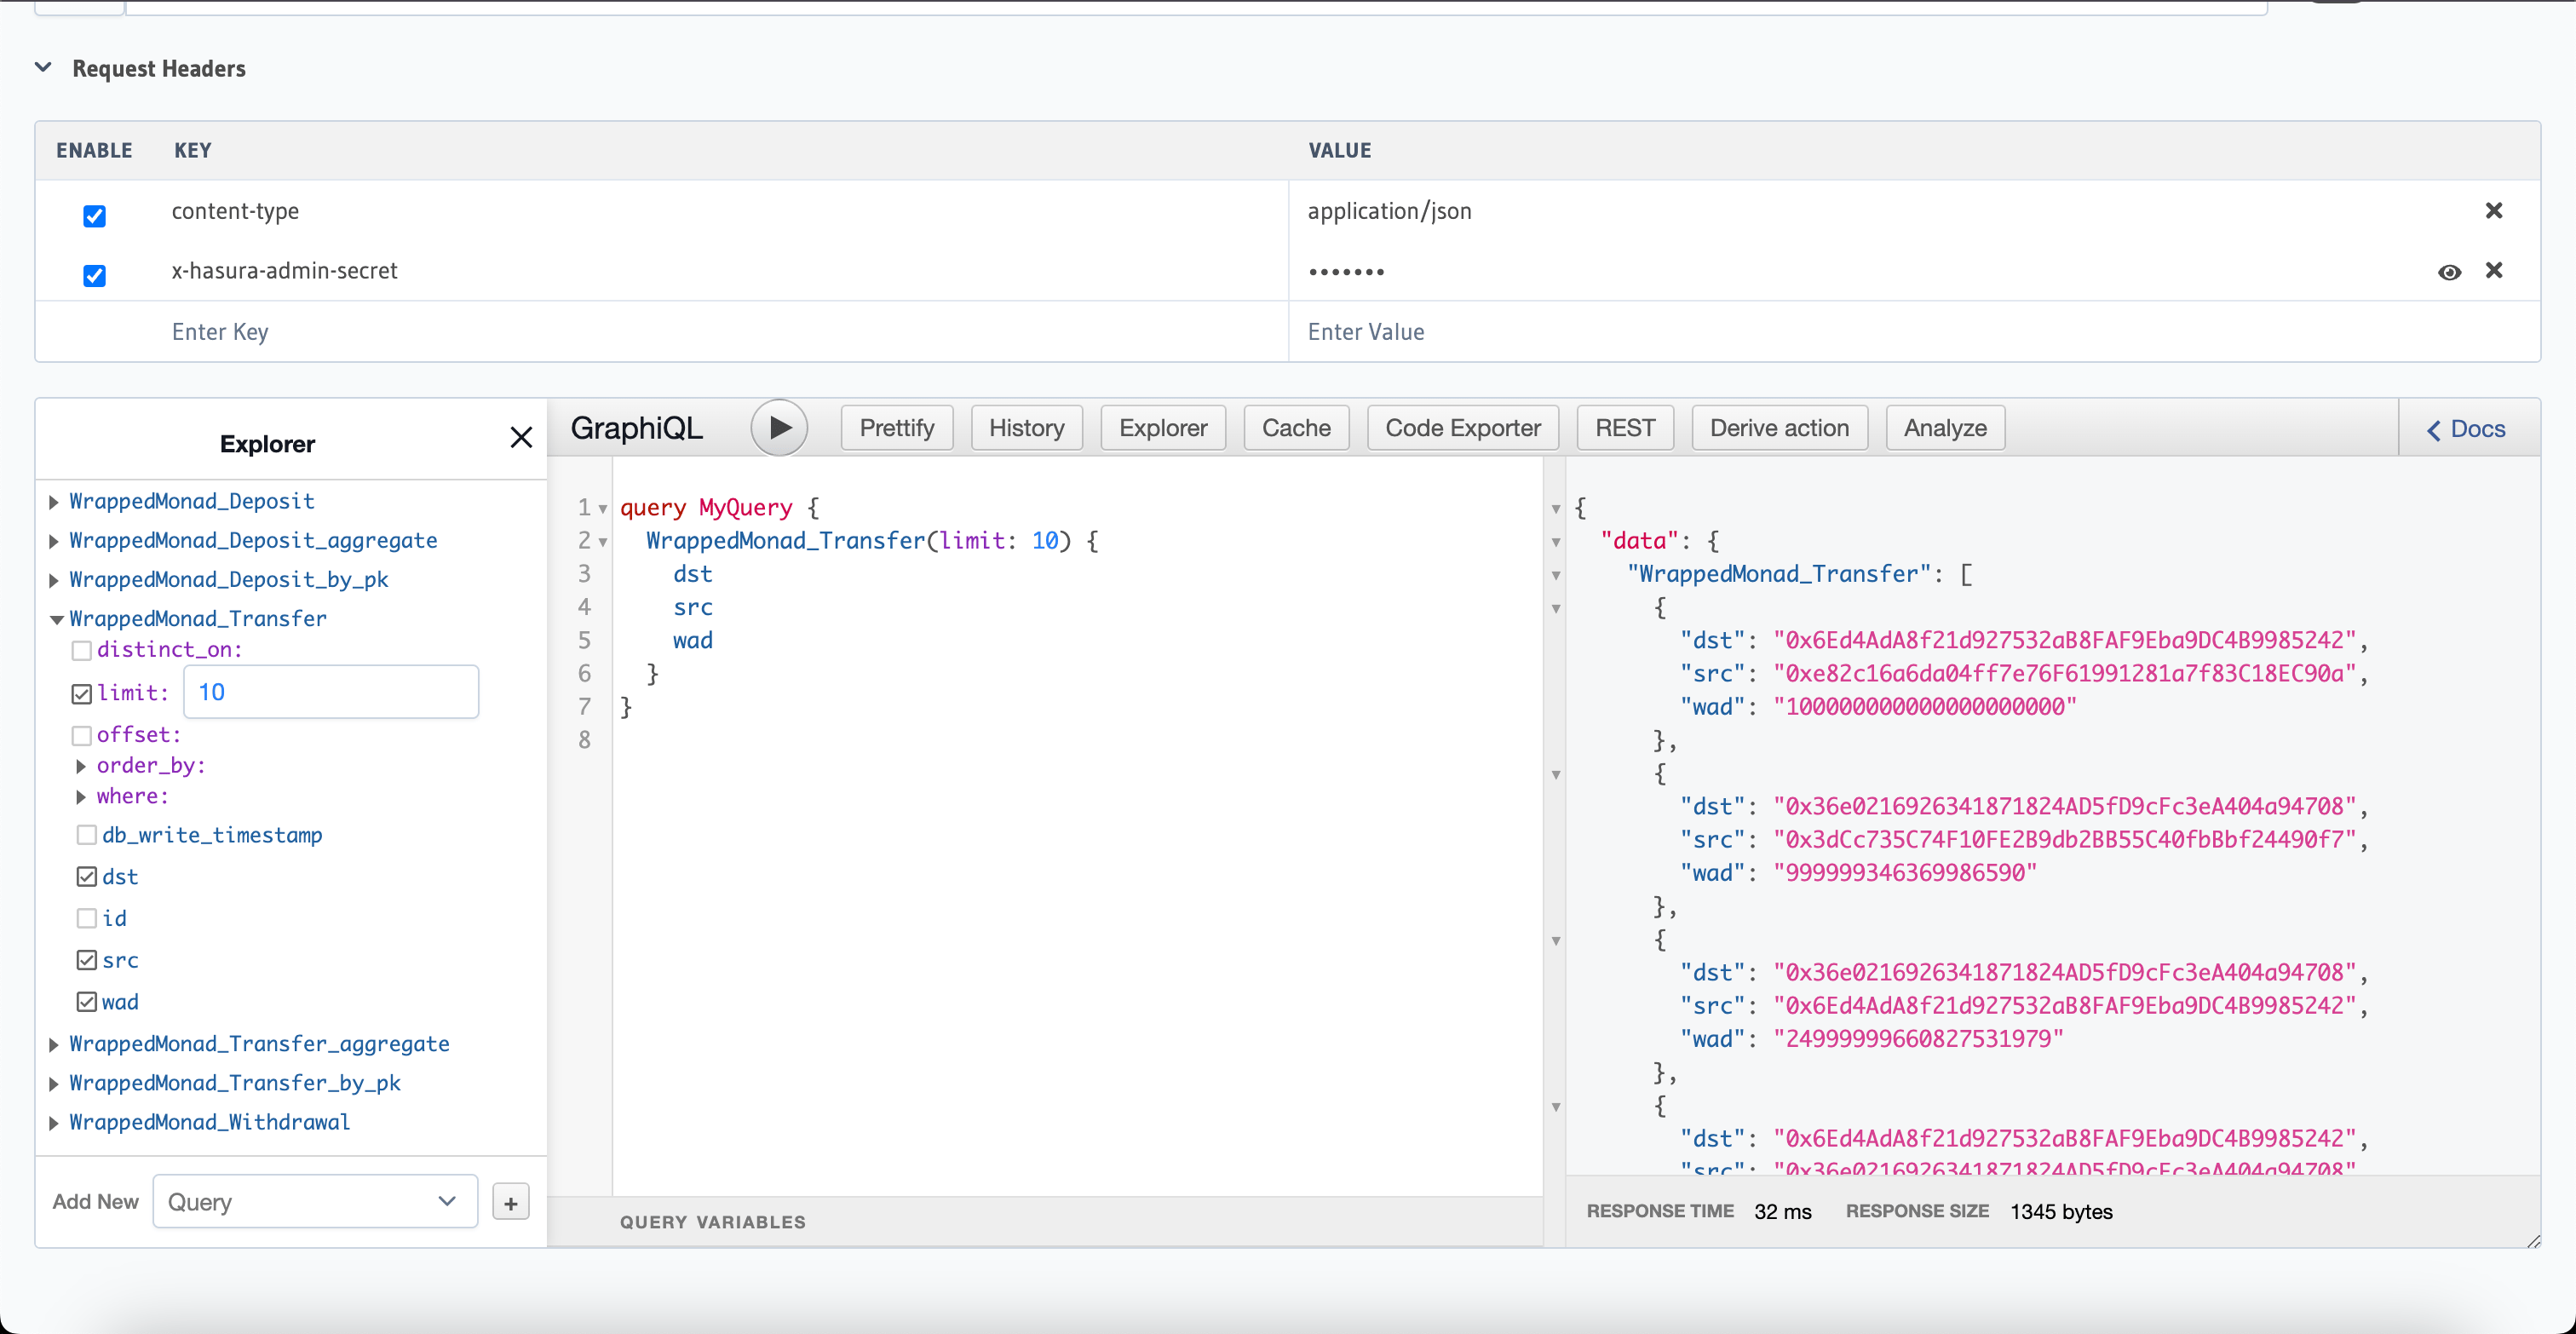 目前,索引器正在追赶链的最新区块。完成同步后,索引器将能够识别最新的 WMON 转账。
我们现在可以先关闭索引器,继续进行 Telegram 集成。
## 创建 Telegram 机器人
1. 访问 [BotFather](https://t.me/botfather) 创建您的机器人并获取 API token
2. 将这些环境变量添加到您的 `.env` 文件:
```
ENVIO_BOT_TOKEN=
ENVIO_TELEGRAM_CHAT_ID=
```
获取您的 chat ID:
1. 创建一个 Telegram 群组并添加您的机器人
2. 向机器人发送 `/start`:`@YourBot /start`
3. 访问 `https://api.telegram.org/bot/getUpdates`
4. 查找频道的 chat ID(应以"-"开头)
如果您没有看到 chat ID,请尝试将机器人从群组中移除后重新添加。
Telegram 机器人现已就绪。
## 将 Telegram API 集成到 HyperIndex 事件处理器
在项目目录的 `src` 文件夹内创建 `libs` 文件夹,在其中创建 `telegram.ts` 文件并添加以下代码:
```ts lines title="src/libs/telegram.ts" theme={null}
import axios from "axios";
import { CHAT_ID, BOT_TOKEN } from "../constants";
export const sendMessageToTelegram = async (message: string): Promise => {
try {
const apiUrl = `https://api.telegram.org/bot${BOT_TOKEN}/sendMessage`;
await axios.post(apiUrl, {
chat_id: CHAT_ID,
text: message,
parse_mode: "HTML",
});
} catch (error) {
console.error("Error sending message:", error);
}
};
```
您会遇到一些错误,让我们来修复它们。
安装 `axios` 包
```bash theme={null}
pnpm i axios
```
在 `src` 文件夹中创建一个名为 `constants.ts` 的文件并添加以下代码:
```ts lines title="src/constants.ts" theme={null}
export const EXPLORER_URL_MONAD = "https://testnet.monadvision.com/";
// Threshold for WMON transfer amount above which the bot sends a notification
export const THRESHOLD_WEI: string = process.env.ENVIO_THRESHOLD_WEI ?? "1000000000000000000"; // in wei
export const BOT_TOKEN = process.env.ENVIO_BOT_TOKEN; // Telegram bot token
export const CHAT_ID = process.env.ENVIO_TELEGRAM_CHAT_ID; // WMON Transfers Notification Channel ID
// Function to get explorer url for the provided address
export const explorerUrlAddress = (address: string) =>
EXPLORER_URL_MONAD + "address/" + address;
// Function to get explorer url for the provided transaction hash
export const explorerUrlTx = (txHash: string) =>
EXPLORER_URL_MONAD + "tx/" + txHash;
```
我们现在可以编辑 `src` 文件夹中的 `EventHandlers.ts`,添加发送 Telegram 消息的代码:
```ts lines title="src/EventHandlers.ts" theme={null}
import {
WrappedMonad,
} from "generated";
import { isIndexingAtHead, weiToEth } from "./libs/helpers";
import { sendMessageToTelegram } from "./libs/telegram";
import { THRESHOLD_WEI, explorerUrlAddress, explorerUrlTx } from "./constants";
// Other event handlers can be removed...
WrappedMonad.Transfer.handler(async ({ event, context }) => {
const from_address = event.params.src;
const to_address = event.params.dst;
if (isIndexingAtHead(event.block.timestamp) && event.params.wad >= BigInt(THRESHOLD_WEI)) {
// Only send a message when the indexer is indexing event from the time it was started and not historical transfers, and only message if the transfer amount is greater than or equal to THRESHOLD_WEI.
// Example message
// WMON Transfer ALERT: A new transfer has been made by 0x65C3564f1DD63eA81C11D8FE9a93F8FFb5615233 to 0xBA5Cf1c0c1238F60832618Ec49FC81e8C7C0CF01 for 2.0000 WMON! 🔥 - View on Explorer
const msg = `WMON Transfer ALERT: A new transfer has been made by ${from_address} to ${to_address} for ${weiToEth(event.params.wad)} WMON! 🔥 - View on Explorer`;
await sendMessageToTelegram(msg);
}
});
```
现在让我们修复导入错误。
在 `src/libs` 文件夹中创建 `helpers.ts` 文件,将以下代码粘贴进去:
```ts lines title="src/libs/helpers.ts" theme={null}
// Used to ensure notifications are only sent while indexing at the head and not historical sync
const INDEXER_START_TIMESTAMP = Math.floor(new Date().getTime() / 1000);
export const isIndexingAtHead = (timestamp: number): boolean => {
return timestamp >= INDEXER_START_TIMESTAMP;
}
// Convert wei to ether for human readability
export const weiToEth = (bigIntNumber: bigint): string => {
// Convert BigInt to string
const numberString = bigIntNumber.toString();
const decimalPointsInEth = 18;
// Extract integer part and decimal part
const integerPart = numberString.substring(
0,
numberString.length - decimalPointsInEth
);
const decimalPart = numberString.slice(-decimalPointsInEth);
// Insert decimal point
const decimalString =
(integerPart ? integerPart : "0") +
"." +
decimalPart.padStart(decimalPointsInEth, "0");
// Add negative sign if necessary
return decimalString.slice(0, -14);
};
```
就是这样!现在我们可以运行索引器,当索引器检测到 WMON 转账时,Telegram 机器人就会开始在 Telegram 频道中发送消息!
目前,索引器正在追赶链的最新区块。完成同步后,索引器将能够识别最新的 WMON 转账。
我们现在可以先关闭索引器,继续进行 Telegram 集成。
## 创建 Telegram 机器人
1. 访问 [BotFather](https://t.me/botfather) 创建您的机器人并获取 API token
2. 将这些环境变量添加到您的 `.env` 文件:
```
ENVIO_BOT_TOKEN=
ENVIO_TELEGRAM_CHAT_ID=
```
获取您的 chat ID:
1. 创建一个 Telegram 群组并添加您的机器人
2. 向机器人发送 `/start`:`@YourBot /start`
3. 访问 `https://api.telegram.org/bot/getUpdates`
4. 查找频道的 chat ID(应以"-"开头)
如果您没有看到 chat ID,请尝试将机器人从群组中移除后重新添加。
Telegram 机器人现已就绪。
## 将 Telegram API 集成到 HyperIndex 事件处理器
在项目目录的 `src` 文件夹内创建 `libs` 文件夹,在其中创建 `telegram.ts` 文件并添加以下代码:
```ts lines title="src/libs/telegram.ts" theme={null}
import axios from "axios";
import { CHAT_ID, BOT_TOKEN } from "../constants";
export const sendMessageToTelegram = async (message: string): Promise => {
try {
const apiUrl = `https://api.telegram.org/bot${BOT_TOKEN}/sendMessage`;
await axios.post(apiUrl, {
chat_id: CHAT_ID,
text: message,
parse_mode: "HTML",
});
} catch (error) {
console.error("Error sending message:", error);
}
};
```
您会遇到一些错误,让我们来修复它们。
安装 `axios` 包
```bash theme={null}
pnpm i axios
```
在 `src` 文件夹中创建一个名为 `constants.ts` 的文件并添加以下代码:
```ts lines title="src/constants.ts" theme={null}
export const EXPLORER_URL_MONAD = "https://testnet.monadvision.com/";
// Threshold for WMON transfer amount above which the bot sends a notification
export const THRESHOLD_WEI: string = process.env.ENVIO_THRESHOLD_WEI ?? "1000000000000000000"; // in wei
export const BOT_TOKEN = process.env.ENVIO_BOT_TOKEN; // Telegram bot token
export const CHAT_ID = process.env.ENVIO_TELEGRAM_CHAT_ID; // WMON Transfers Notification Channel ID
// Function to get explorer url for the provided address
export const explorerUrlAddress = (address: string) =>
EXPLORER_URL_MONAD + "address/" + address;
// Function to get explorer url for the provided transaction hash
export const explorerUrlTx = (txHash: string) =>
EXPLORER_URL_MONAD + "tx/" + txHash;
```
我们现在可以编辑 `src` 文件夹中的 `EventHandlers.ts`,添加发送 Telegram 消息的代码:
```ts lines title="src/EventHandlers.ts" theme={null}
import {
WrappedMonad,
} from "generated";
import { isIndexingAtHead, weiToEth } from "./libs/helpers";
import { sendMessageToTelegram } from "./libs/telegram";
import { THRESHOLD_WEI, explorerUrlAddress, explorerUrlTx } from "./constants";
// Other event handlers can be removed...
WrappedMonad.Transfer.handler(async ({ event, context }) => {
const from_address = event.params.src;
const to_address = event.params.dst;
if (isIndexingAtHead(event.block.timestamp) && event.params.wad >= BigInt(THRESHOLD_WEI)) {
// Only send a message when the indexer is indexing event from the time it was started and not historical transfers, and only message if the transfer amount is greater than or equal to THRESHOLD_WEI.
// Example message
// WMON Transfer ALERT: A new transfer has been made by 0x65C3564f1DD63eA81C11D8FE9a93F8FFb5615233 to 0xBA5Cf1c0c1238F60832618Ec49FC81e8C7C0CF01 for 2.0000 WMON! 🔥 - View on Explorer
const msg = `WMON Transfer ALERT: A new transfer has been made by ${from_address} to ${to_address} for ${weiToEth(event.params.wad)} WMON! 🔥 - View on Explorer`;
await sendMessageToTelegram(msg);
}
});
```
现在让我们修复导入错误。
在 `src/libs` 文件夹中创建 `helpers.ts` 文件,将以下代码粘贴进去:
```ts lines title="src/libs/helpers.ts" theme={null}
// Used to ensure notifications are only sent while indexing at the head and not historical sync
const INDEXER_START_TIMESTAMP = Math.floor(new Date().getTime() / 1000);
export const isIndexingAtHead = (timestamp: number): boolean => {
return timestamp >= INDEXER_START_TIMESTAMP;
}
// Convert wei to ether for human readability
export const weiToEth = (bigIntNumber: bigint): string => {
// Convert BigInt to string
const numberString = bigIntNumber.toString();
const decimalPointsInEth = 18;
// Extract integer part and decimal part
const integerPart = numberString.substring(
0,
numberString.length - decimalPointsInEth
);
const decimalPart = numberString.slice(-decimalPointsInEth);
// Insert decimal point
const decimalString =
(integerPart ? integerPart : "0") +
"." +
decimalPart.padStart(decimalPointsInEth, "0");
// Add negative sign if necessary
return decimalString.slice(0, -14);
};
```
就是这样!现在我们可以运行索引器,当索引器检测到 WMON 转账时,Telegram 机器人就会开始在 Telegram 频道中发送消息!
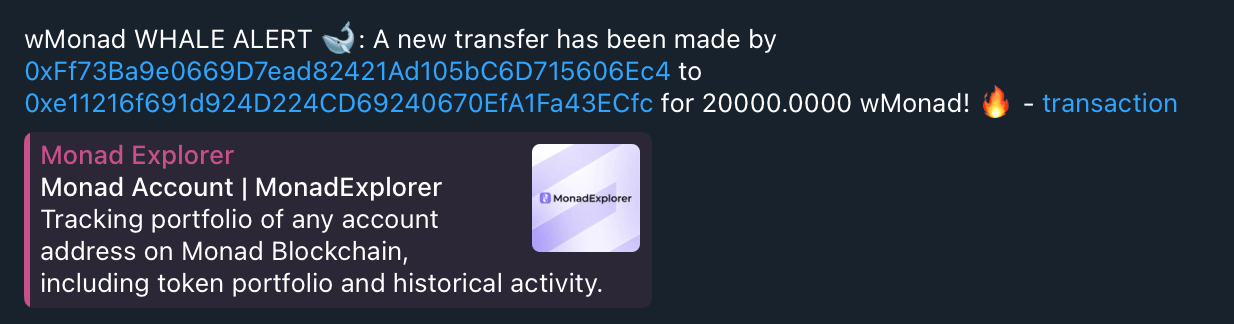 *注意:截图是在消息格式修改之前拍摄的。如果您按照本指南操作,消息格式会略有不同。*
您可能不会立即看到消息,因为索引器需要一些时间才能追上最新的区块。
只有当索引器在已最终确定的区块中检测到 WMON 转账,且时间戳大于或等于索引器启动时间时,机器人才会为这些转账发送通知。
*注意:截图是在消息格式修改之前拍摄的。如果您按照本指南操作,消息格式会略有不同。*
您可能不会立即看到消息,因为索引器需要一些时间才能追上最新的区块。
只有当索引器在已最终确定的区块中检测到 WMON 转账,且时间戳大于或等于索引器启动时间时,机器人才会为这些转账发送通知。