What is x402?
x402 is the HTTP 402 “Payment Required” status code reborn as a minimal protocol for internet‑native micropayments. Instead of subscriptions or paywalls that require accounts, x402 lets any HTTP endpoint become instantly payable:- Client requests a resource
- Server responds 402 with a small JSON payment requirement
- Client signs a payment authorization and resends the request
- Server verifies and serves the content
Beyond legacy limitations
x402 is designed for a modern internet economy, solving key limitations of legacy systems:- Reduce fees and friction: Direct onchain payments without intermediaries, high fees, or manual setup.
- Micropayments & usage-based billing: Charge per call or feature with simple, programmable pay-as-you-go flows.
- Machine-to-machine transactions: Let AI agents pay and access services autonomously with no keys or human input needed.
Why x402 on Monad?
Monad is a fully EVM‑compatible Layer 1 with:- 10,000 TPS
- ~0.4s block times
- Single‑slot finality
- Parallel execution
- Extremely low fees
Core Flow (Direct Payment)
Facilitator Flow (Recommended for Production)
A facilitator service is optional but recommended in production. Facilitators can batch transactions, cover gas, handle refunds, and simplify client logic.Building an x402-based app using Monad x402 facilitator
Prerequisites
- Node.js 18+
- An EVM wallet
- Access to Monad testnet funds (USDC test tokens below)
Monad Facilitator only supports x402 version 2 and above.Migration guide that explains the differences: https://docs.x402.org/guides/migration-v1-to-v2
How to get USDC tokens on Monad testnet
How to get USDC tokens on Monad testnet
You can get USDC tokens for Monad testnet using Circle’s faucet: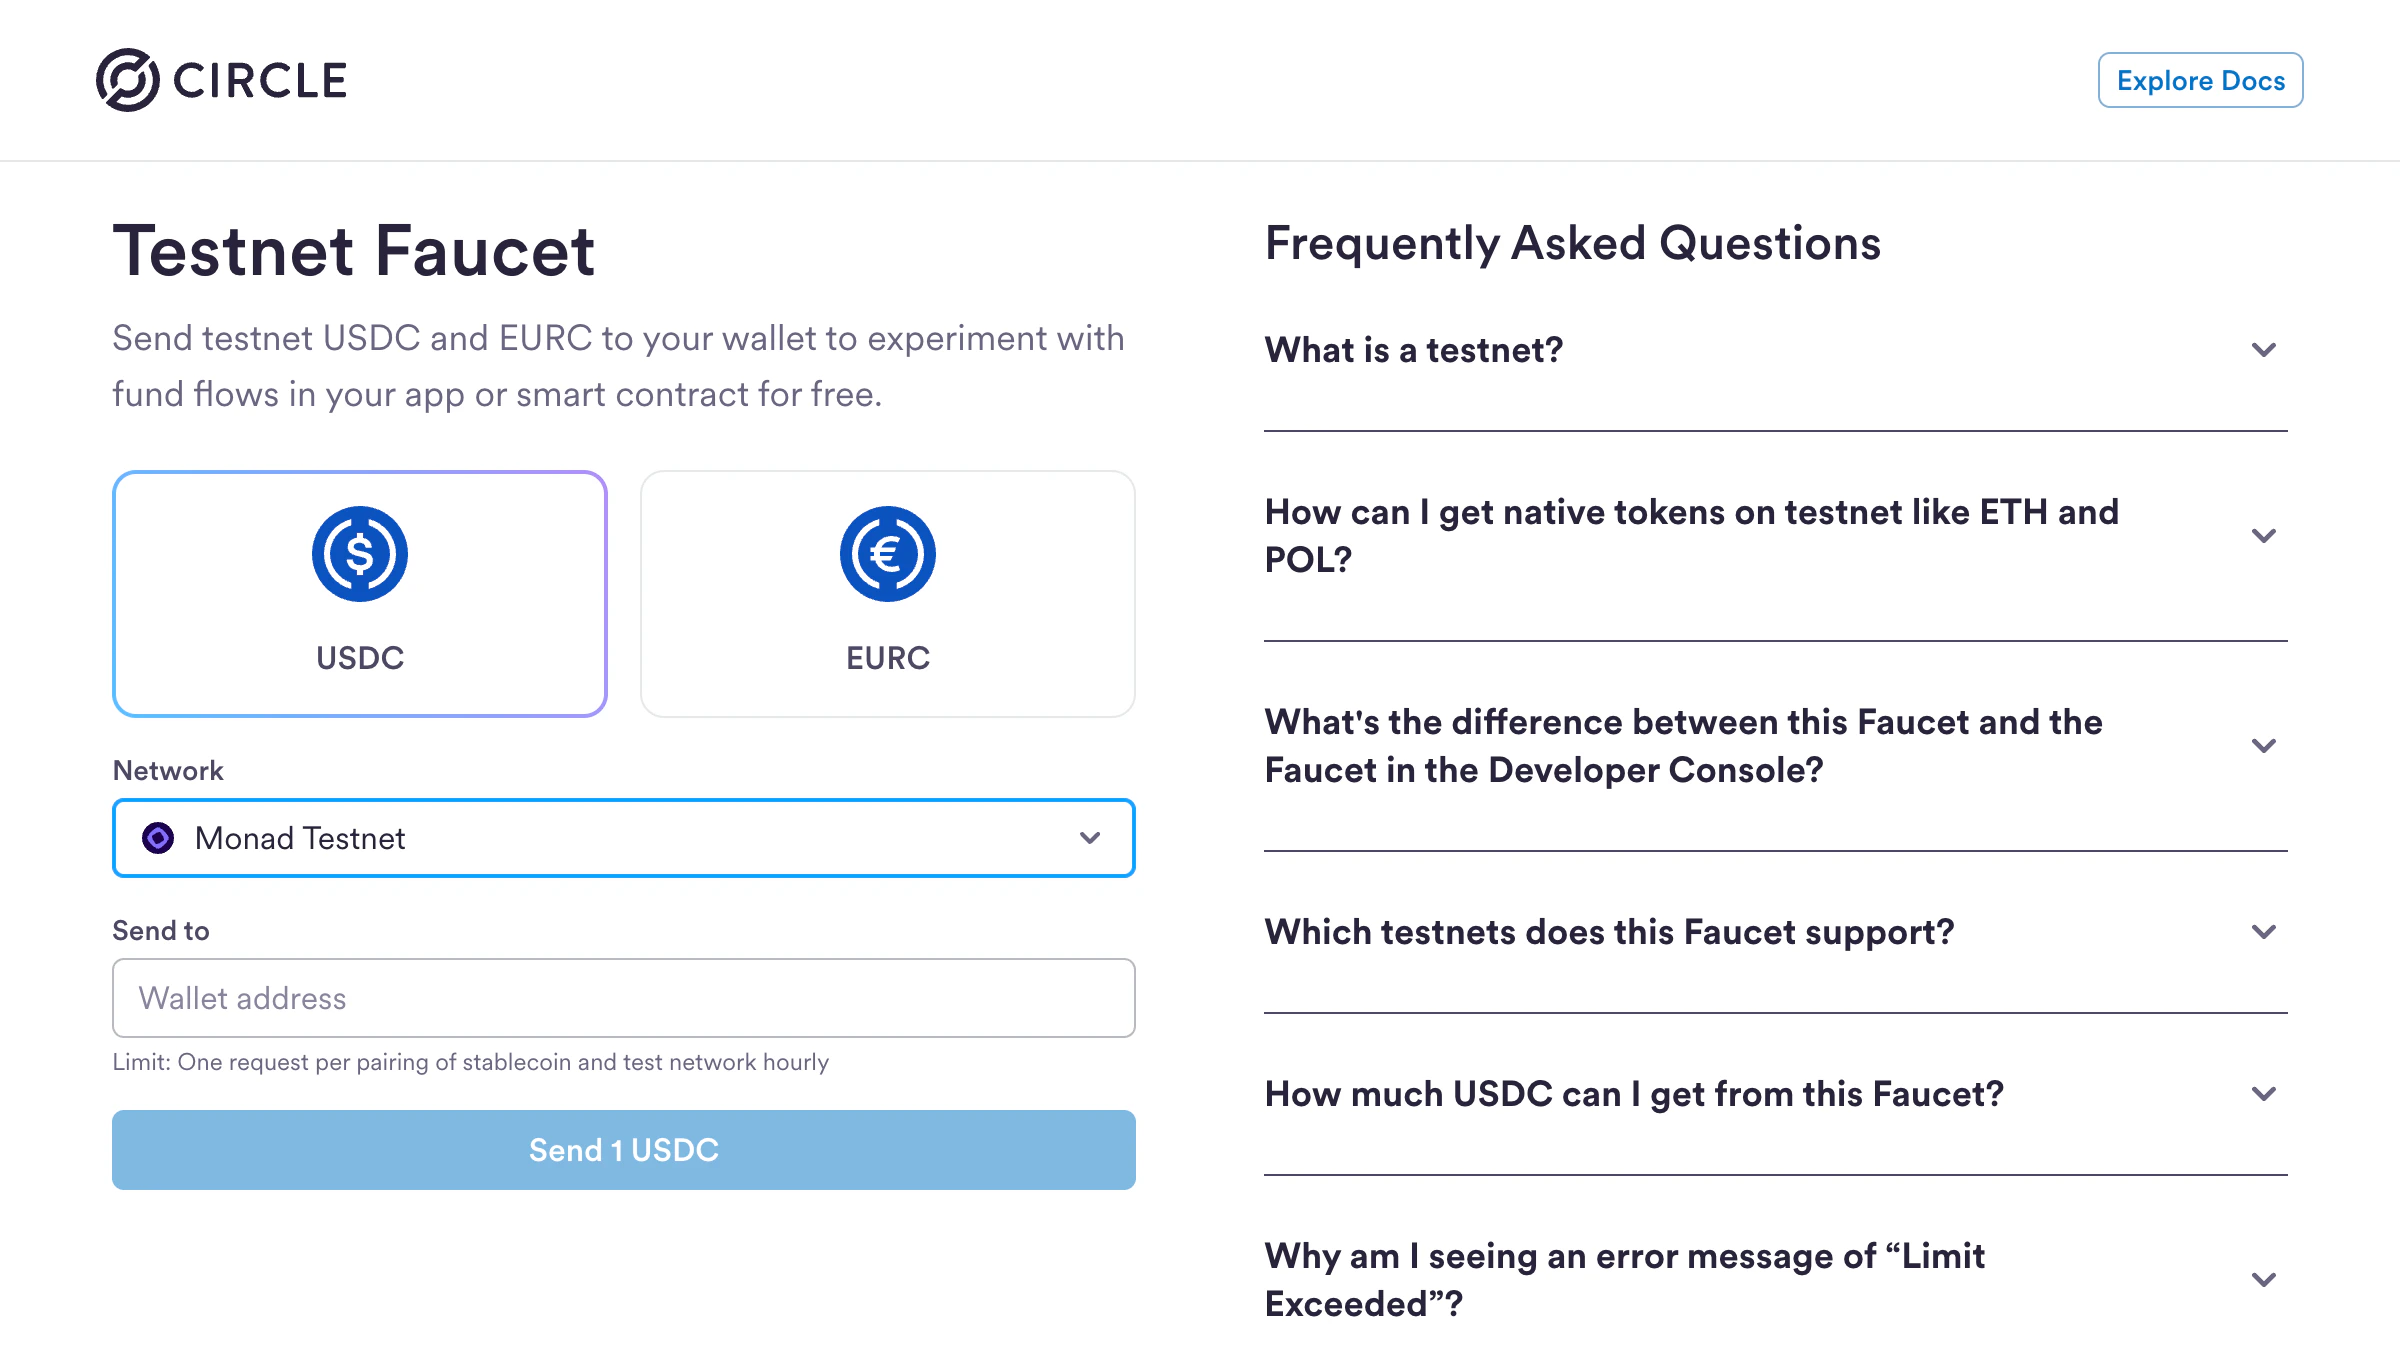
- Visit https://faucet.circle.com
- Select USDC as the token
- Select Monad Testnet from the Network dropdown
- Enter your wallet address
- Click Send 1 USDC
Step 1: Initialize a Next.js App
Create a new Next.js project:- ✅ TypeScript
- ✅ ESLint
- ✅ Tailwind CSS
- ✅
src/directory - ✅ App Router
- ✅ Customize default import alias:
@/*(default)
Use
@x402/evm >= 2.2.0 for the exact scheme. If you are using the upto scheme, use @x402/evm 2.12.0 — see Supported payment schemes for details..env.local file for your environment variables:
Step 2: Create a payTo address
A payTo address is used to receive payments and interact with the blockchain from your backend.
Copy the wallet address and add it to your .env.local file as PAY_TO_ADDRESS
Step 3: Create a server side payable endpoint
src/app/api/premium/route.ts
Step 4: Client-side setup (consuming paid endpoint)
Below is an example of consuming the paid endpoint using a Next.js app, however the endpoint can be consumed via an agent script as well.src/app/page.tsx
Running Your x402 App
Now you’re ready to test your x402 payment flow:-
Start your development server:
- Open http://localhost:3000 in your browser
- Click “Pay & Unlock Content”
- Connect your wallet
- Approve the USDC payment
- See the content unlock instantly!
Facilitator API
For developers who are interested in using the barebones Facilitator API, here are the supported endpoints with examples. Facilitator URL:https://x402-facilitator.molandak.org
Network support: Mainnet and Testnet.
Supported payment schemes
The Monad facilitator advertises two x402 v2 schemes viaGET /supported:
For USDC on Monad, exact is the recommended scheme per the x402 specification. Upto requires the canonical
x402UptoPermit2Proxy at 0x4020A4f3b7b90ccA423B9fabCc0CE57C6C240002 (see Canonical Contracts) and an extra.facilitatorAddress advertised by the facilitator that the client must bind into the Permit2 witness.
Possible HTTP status codes
In addition to the standard200 / 4xx / 5xx codes, the facilitator may return:
412 PRECONDITION_FAILED— Returned when a Permit2 payment cannot proceed because the user’s Permit2 allowance for the proxy contract is insufficient (PERMIT2_ALLOWANCE_REQUIRED). The client must approve the proxy via Permit2 and retry. Distinct from400(malformed body) and402(the resource server’s payment-required response).
GET /supported
Returns supported networks, schemes, and signer addresses.
POST /verify
Verify a payment signature.
POST /settle
Execute the payment on-chain. Facilitator pays gas.
What’s Next?
You’ve successfully built an x402 payment-enabled app on Monad! Here are some ideas to extend your implementation:- Add more payable endpoints - Create different pricing tiers for various content or API calls
- Build AI agent integrations - Enable autonomous agents to pay for and access your APIs