In this guide, you will learn how to use the Monad Farcaster Mini App Template to build apps. The template demonstrates all Mini App capabilities and lets you easily modify it, so you can build Mini Apps.Documentation Index
Fetch the complete documentation index at: https://docs.monad.xyz/llms.txt
Use this file to discover all available pages before exploring further.
Cloning the Template
You can the following command to clone the Mini App template to your local machine:Install the dependencies
Copy .env.example over to .env.local
Run the template
View the App in Farcaster Embed tool
Farcaster has a neat Embed tool that you can use to inspect the Mini App before you publish it. Unfortunately, the embed tool can only work with remote URL. Inputting a localhost URL does not work. As a workaround, you may make the local app accessible remotely using a tool likecloudflared or ngrok. In this guide we will use cloudflared.
Install Cloudflared
Expose localhost
Run the following command in your terminal:Set NEXT_PUBLIC_URL environment variable in .env.local file
Use the provided url
cloudflared will generate a random subdomain and print it in the terminal for you to use. Any traffic to this URL will get sent to your local server.
Enter the provided URL in the Farcaster Embed tool.
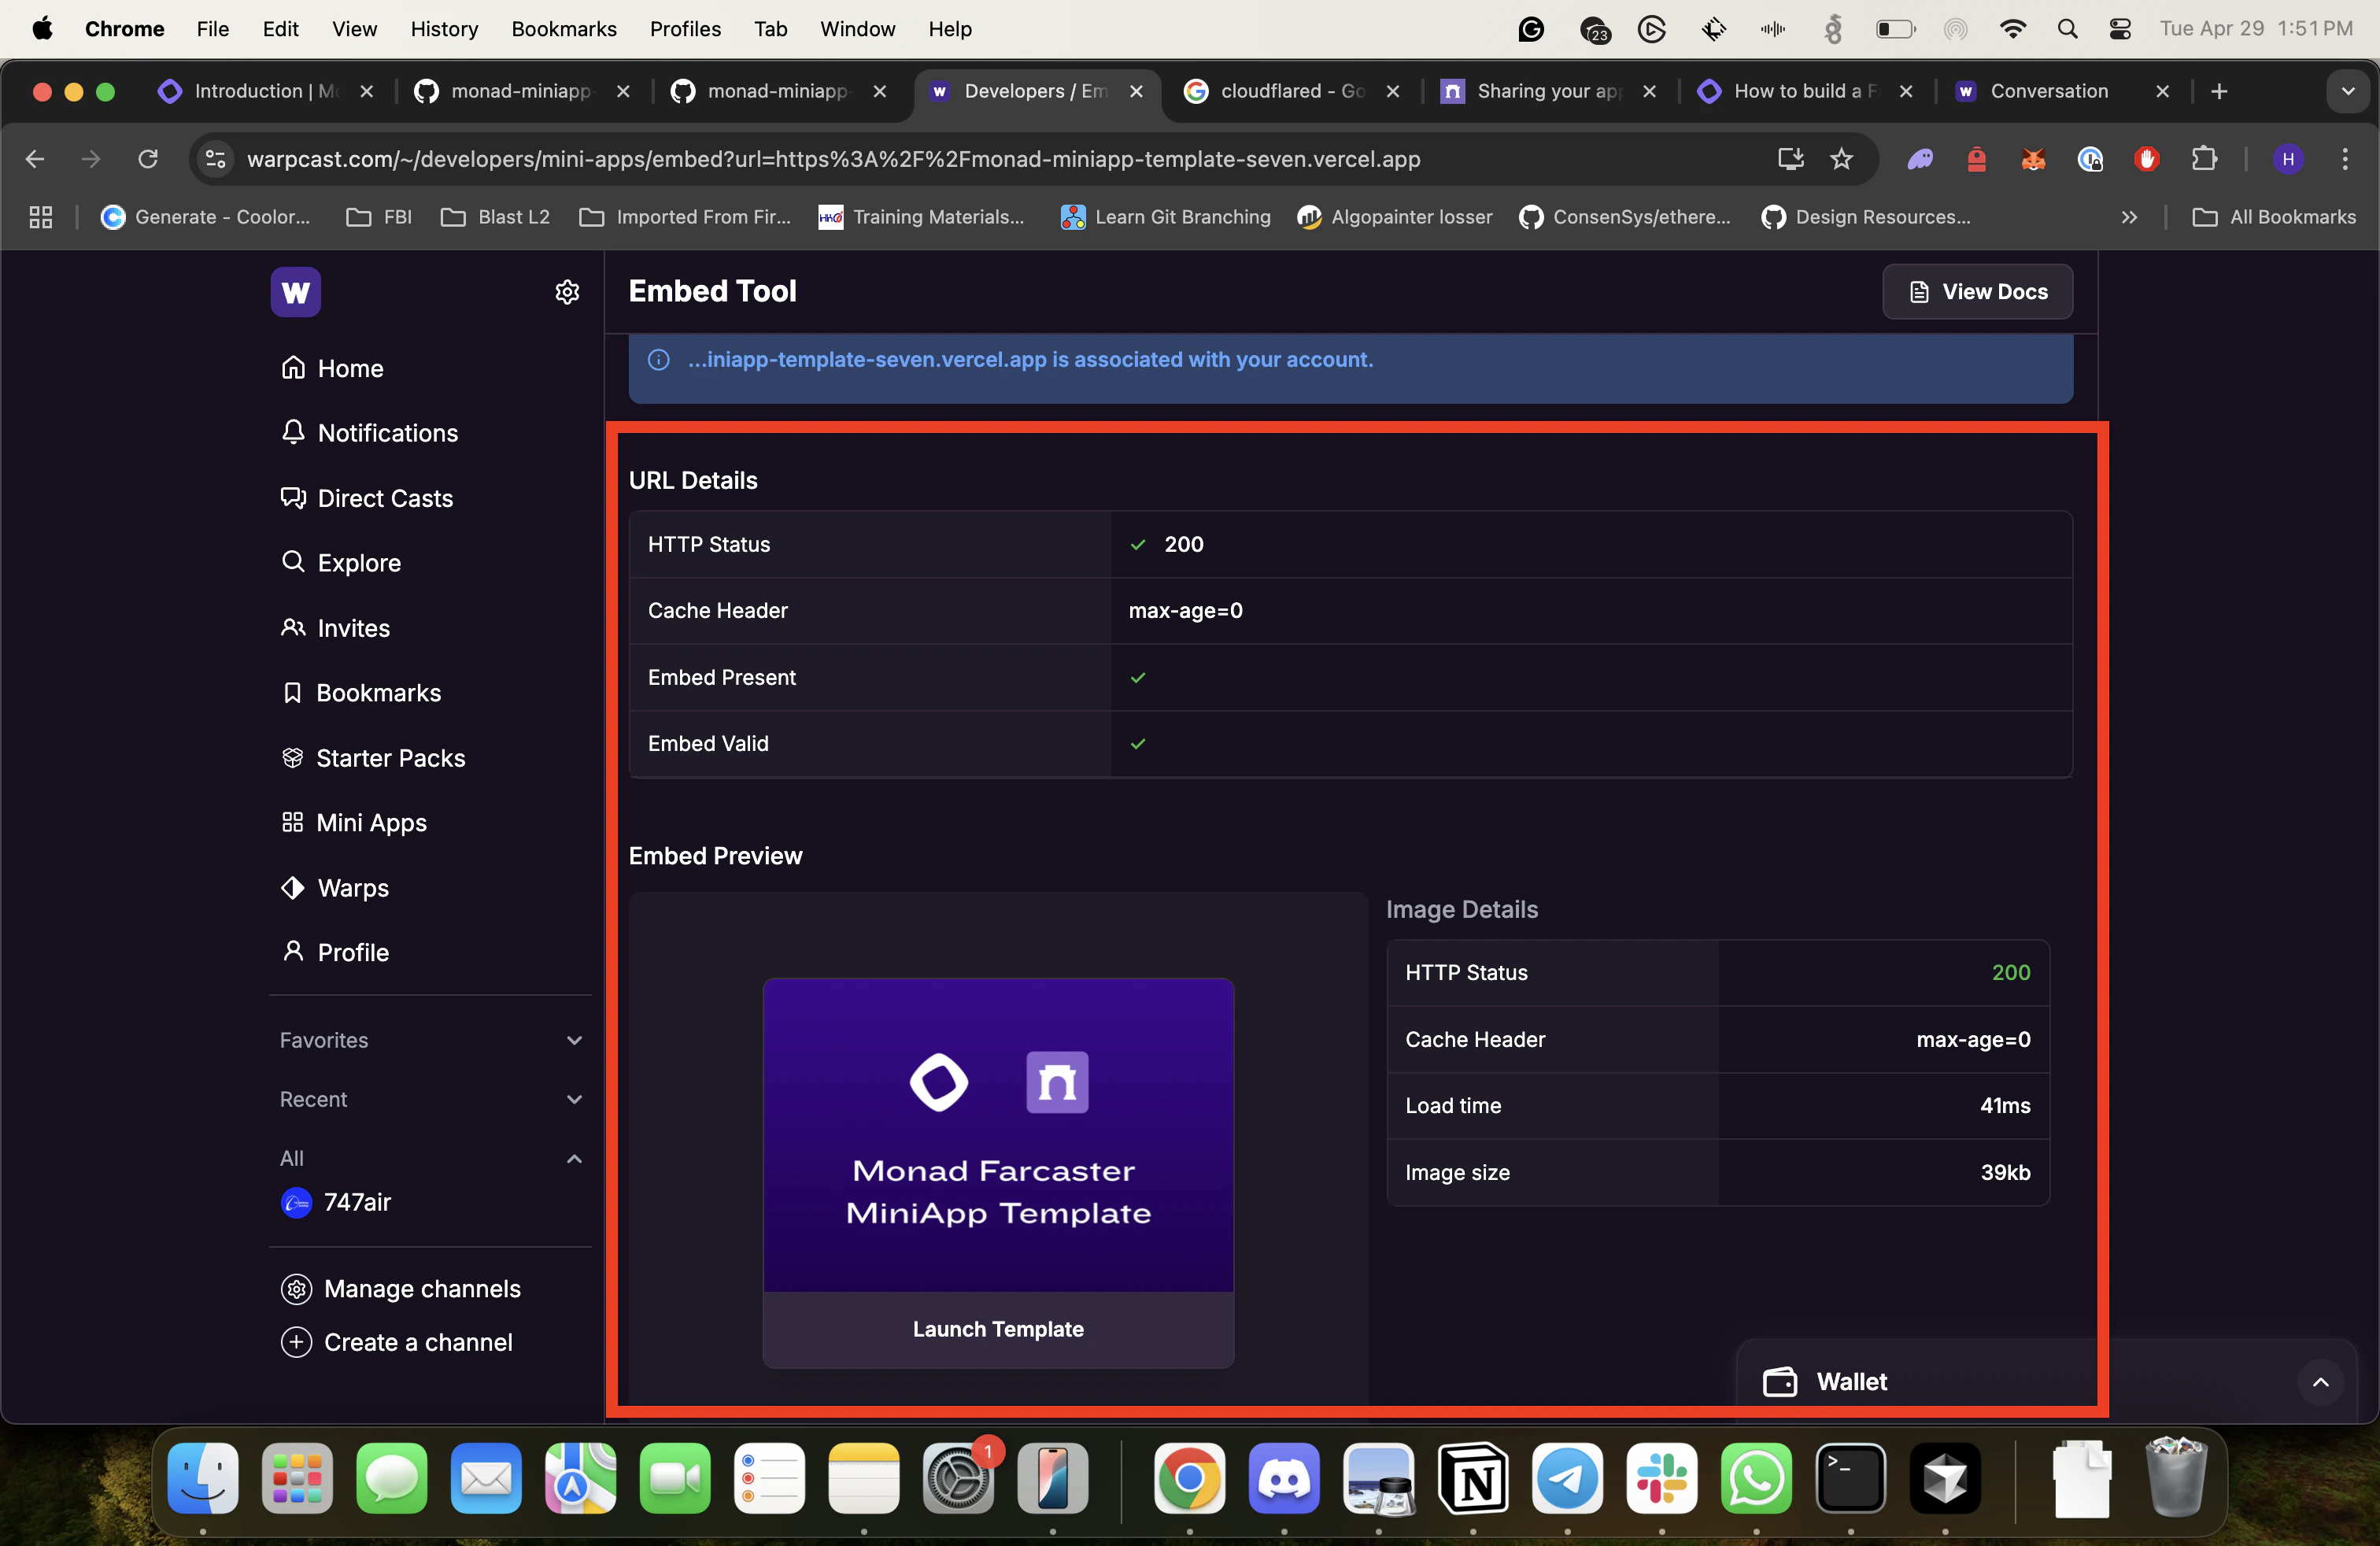
Customizing the Mini App Embed
Mini App Embed is how the Mini App shows up in the feed or in a chat conversation when the URL of the app is shared. The Mini App Embed looks like this: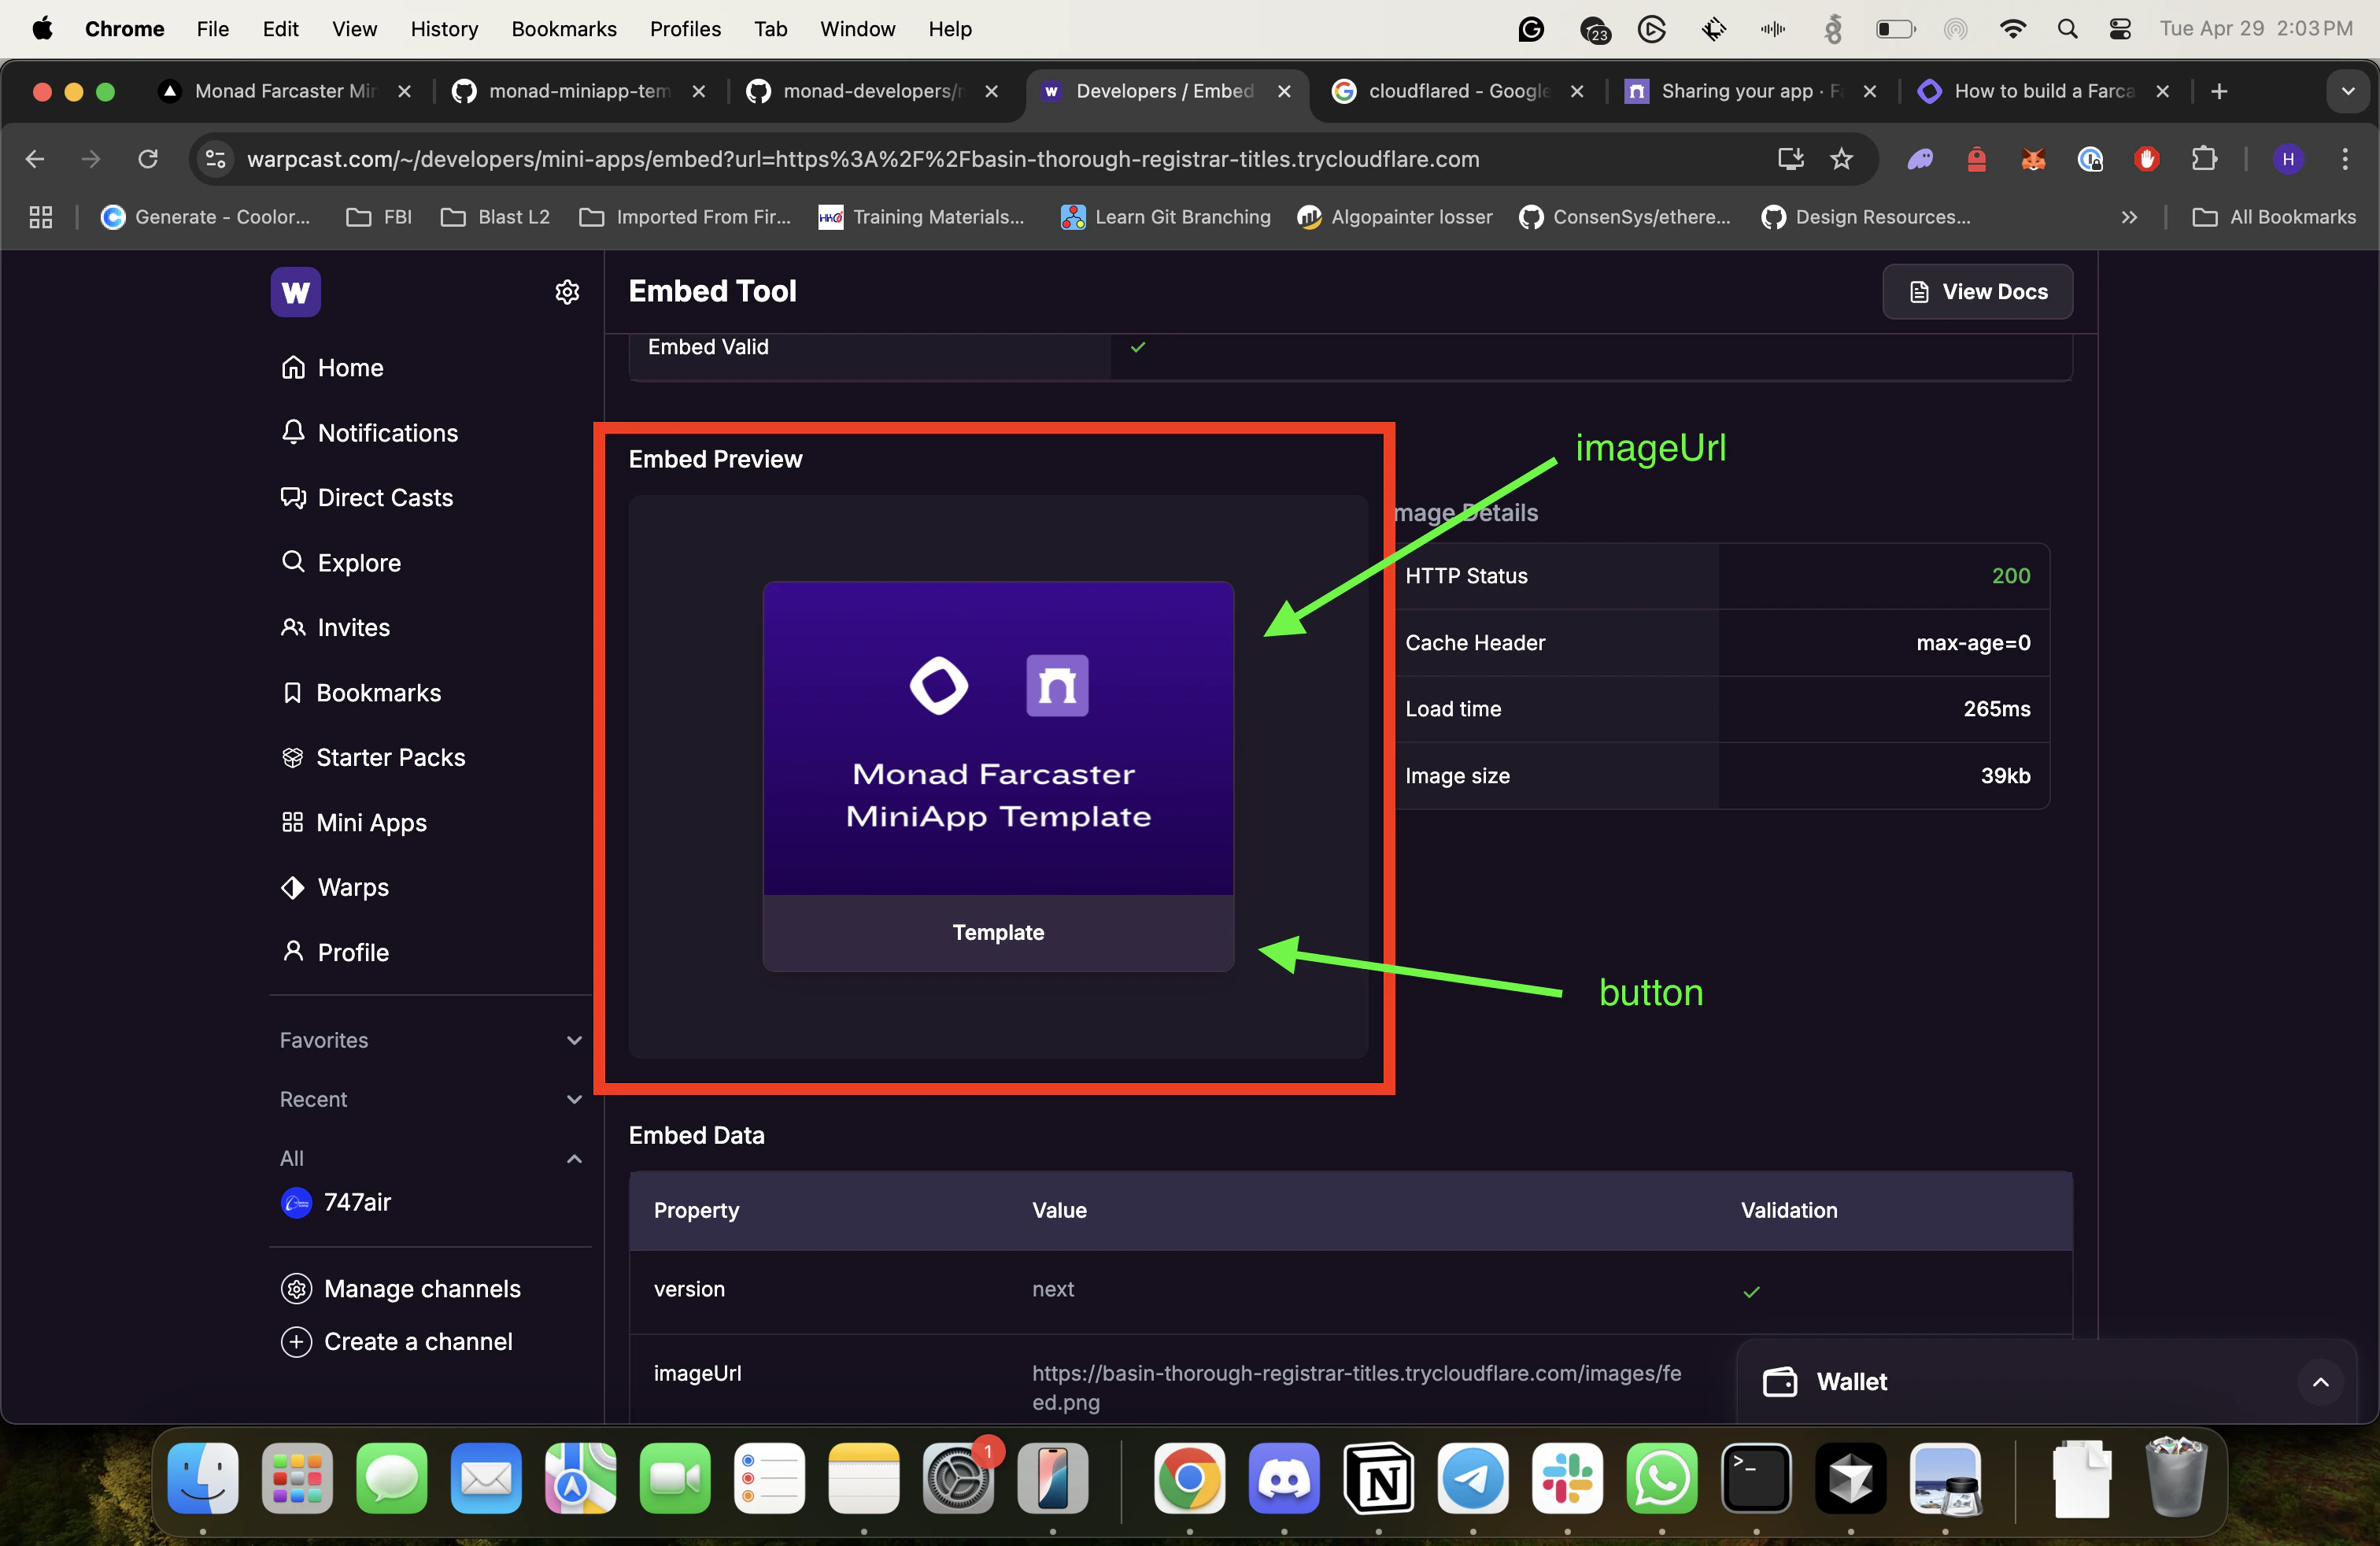
app/page.tsx:
app/page.tsx
public/images folder in the template.
Once you are happy with the changes, click Refetch in the Embed tool to get the latest configuration.
If you are developing locally, ensure that your Next.js app is running locally and the cloudflare tunnel is open.
Customizing the Splash Screen
Upon opening the Mini App, the first thing the user will see is the Splash screen: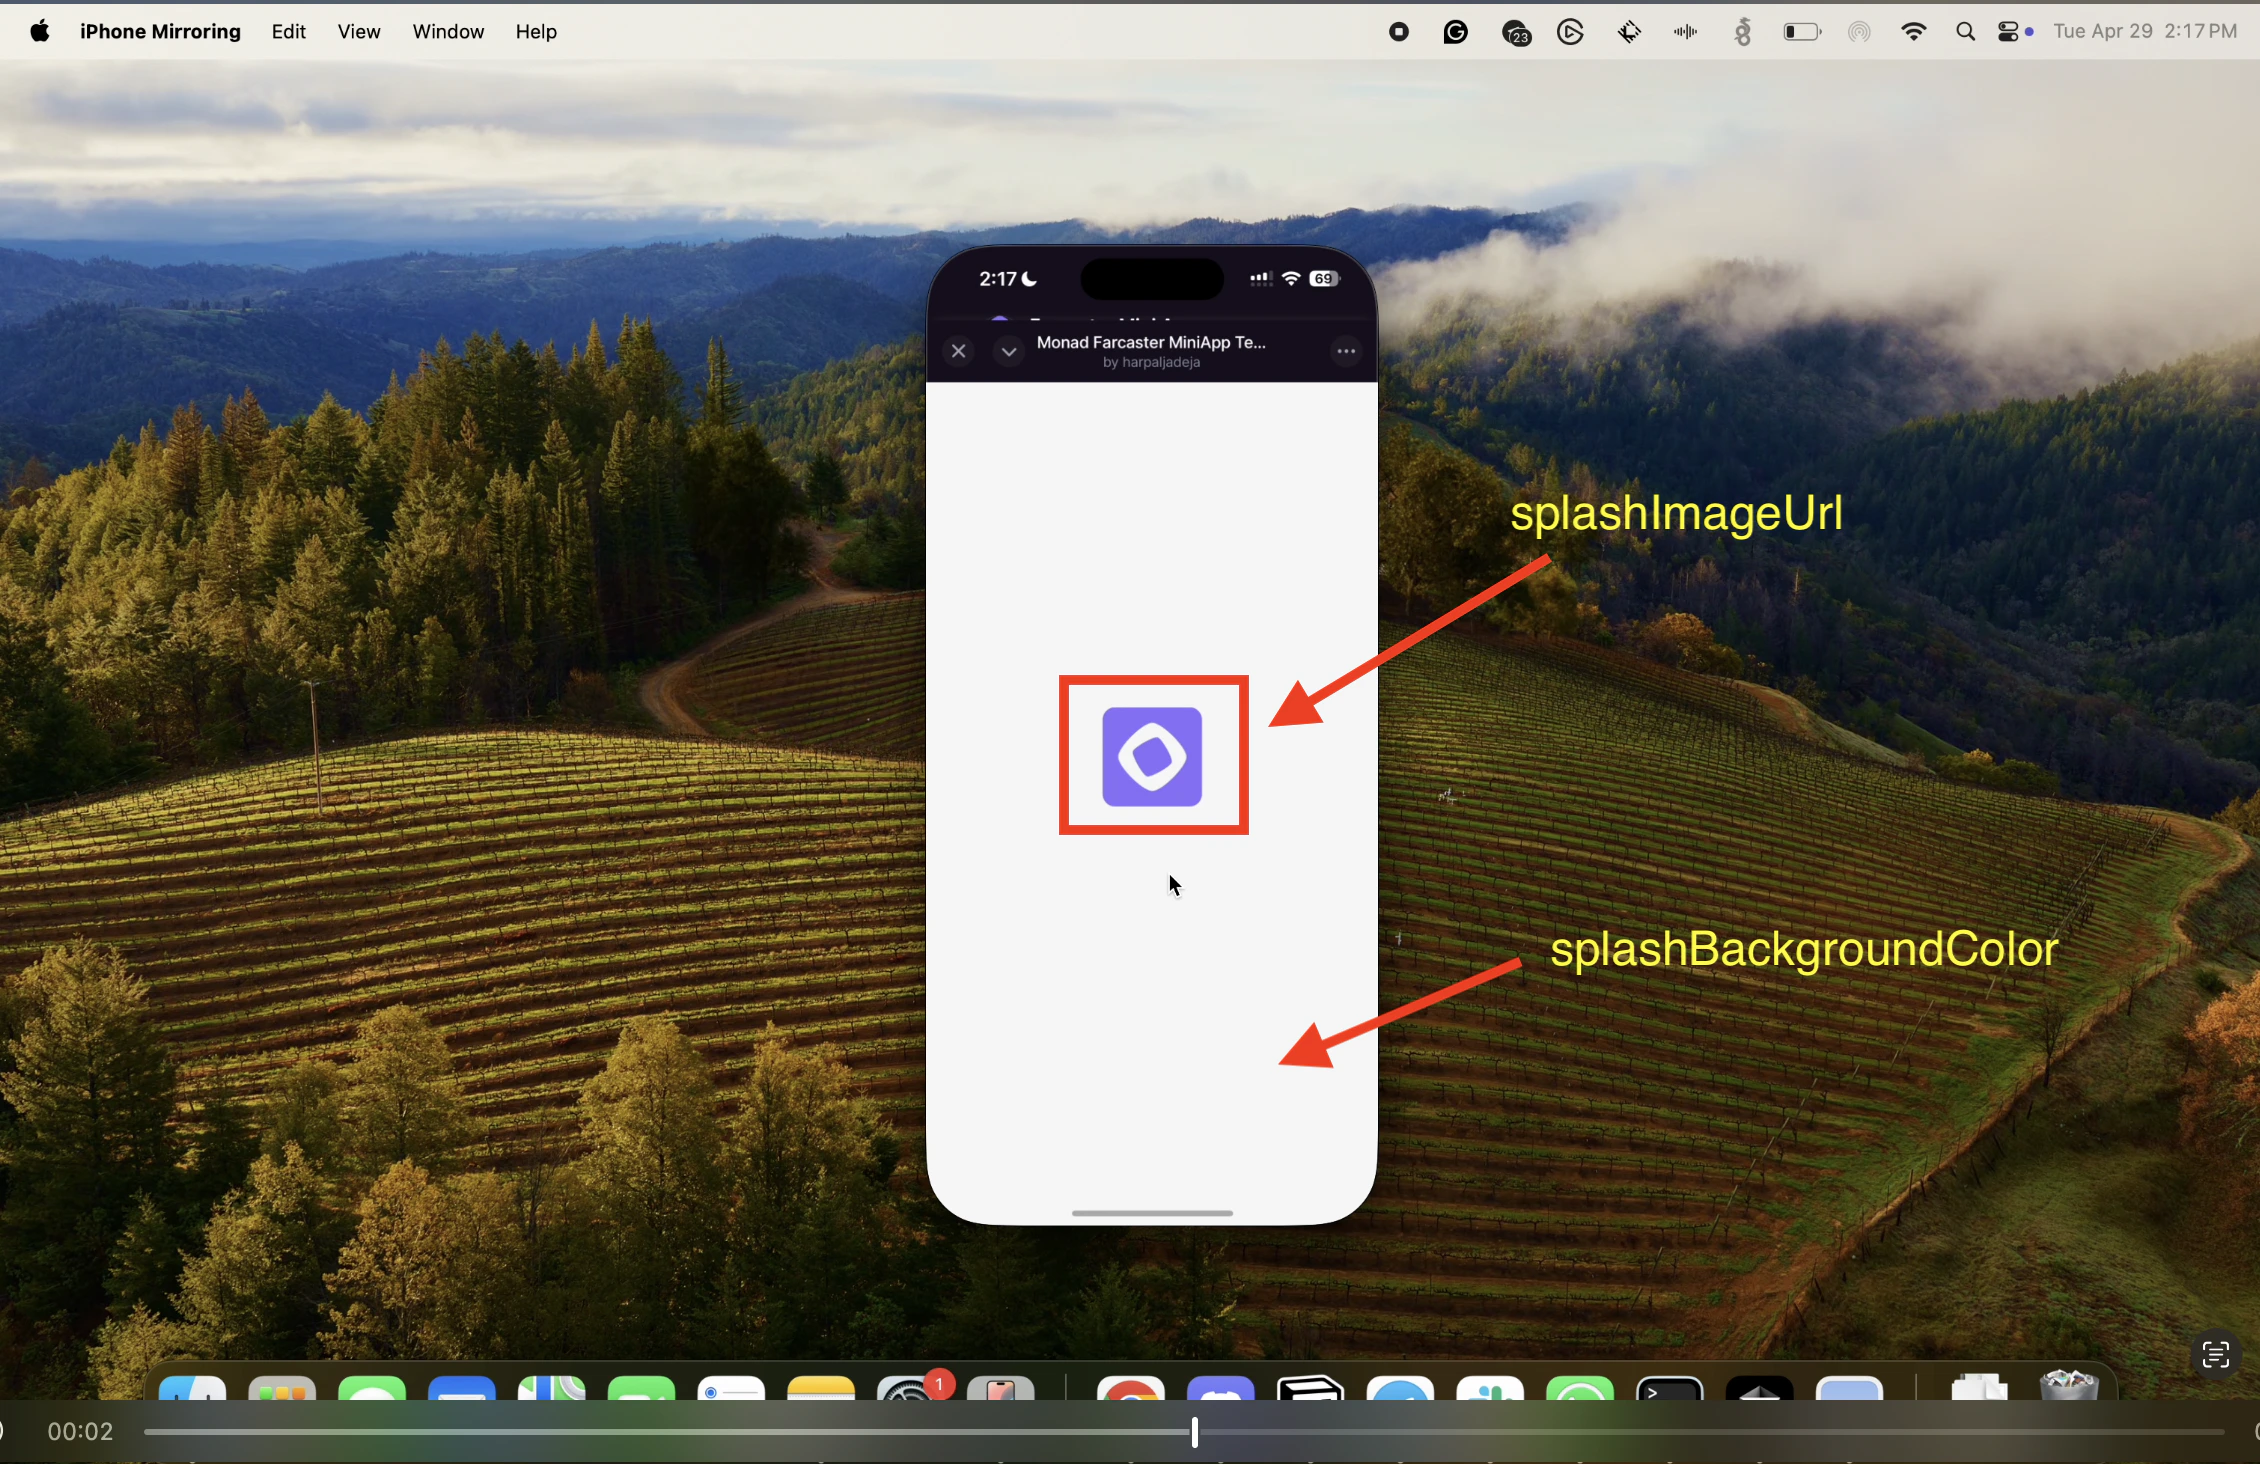
app/page.tsx file to customize the Splash screen.
app/page.tsx
splashImageUrl, you can either change the URL or replace the image in public/images folder in the template.
Modifying the Mini App
Upon opening the template Mini App, you should see a screen like this: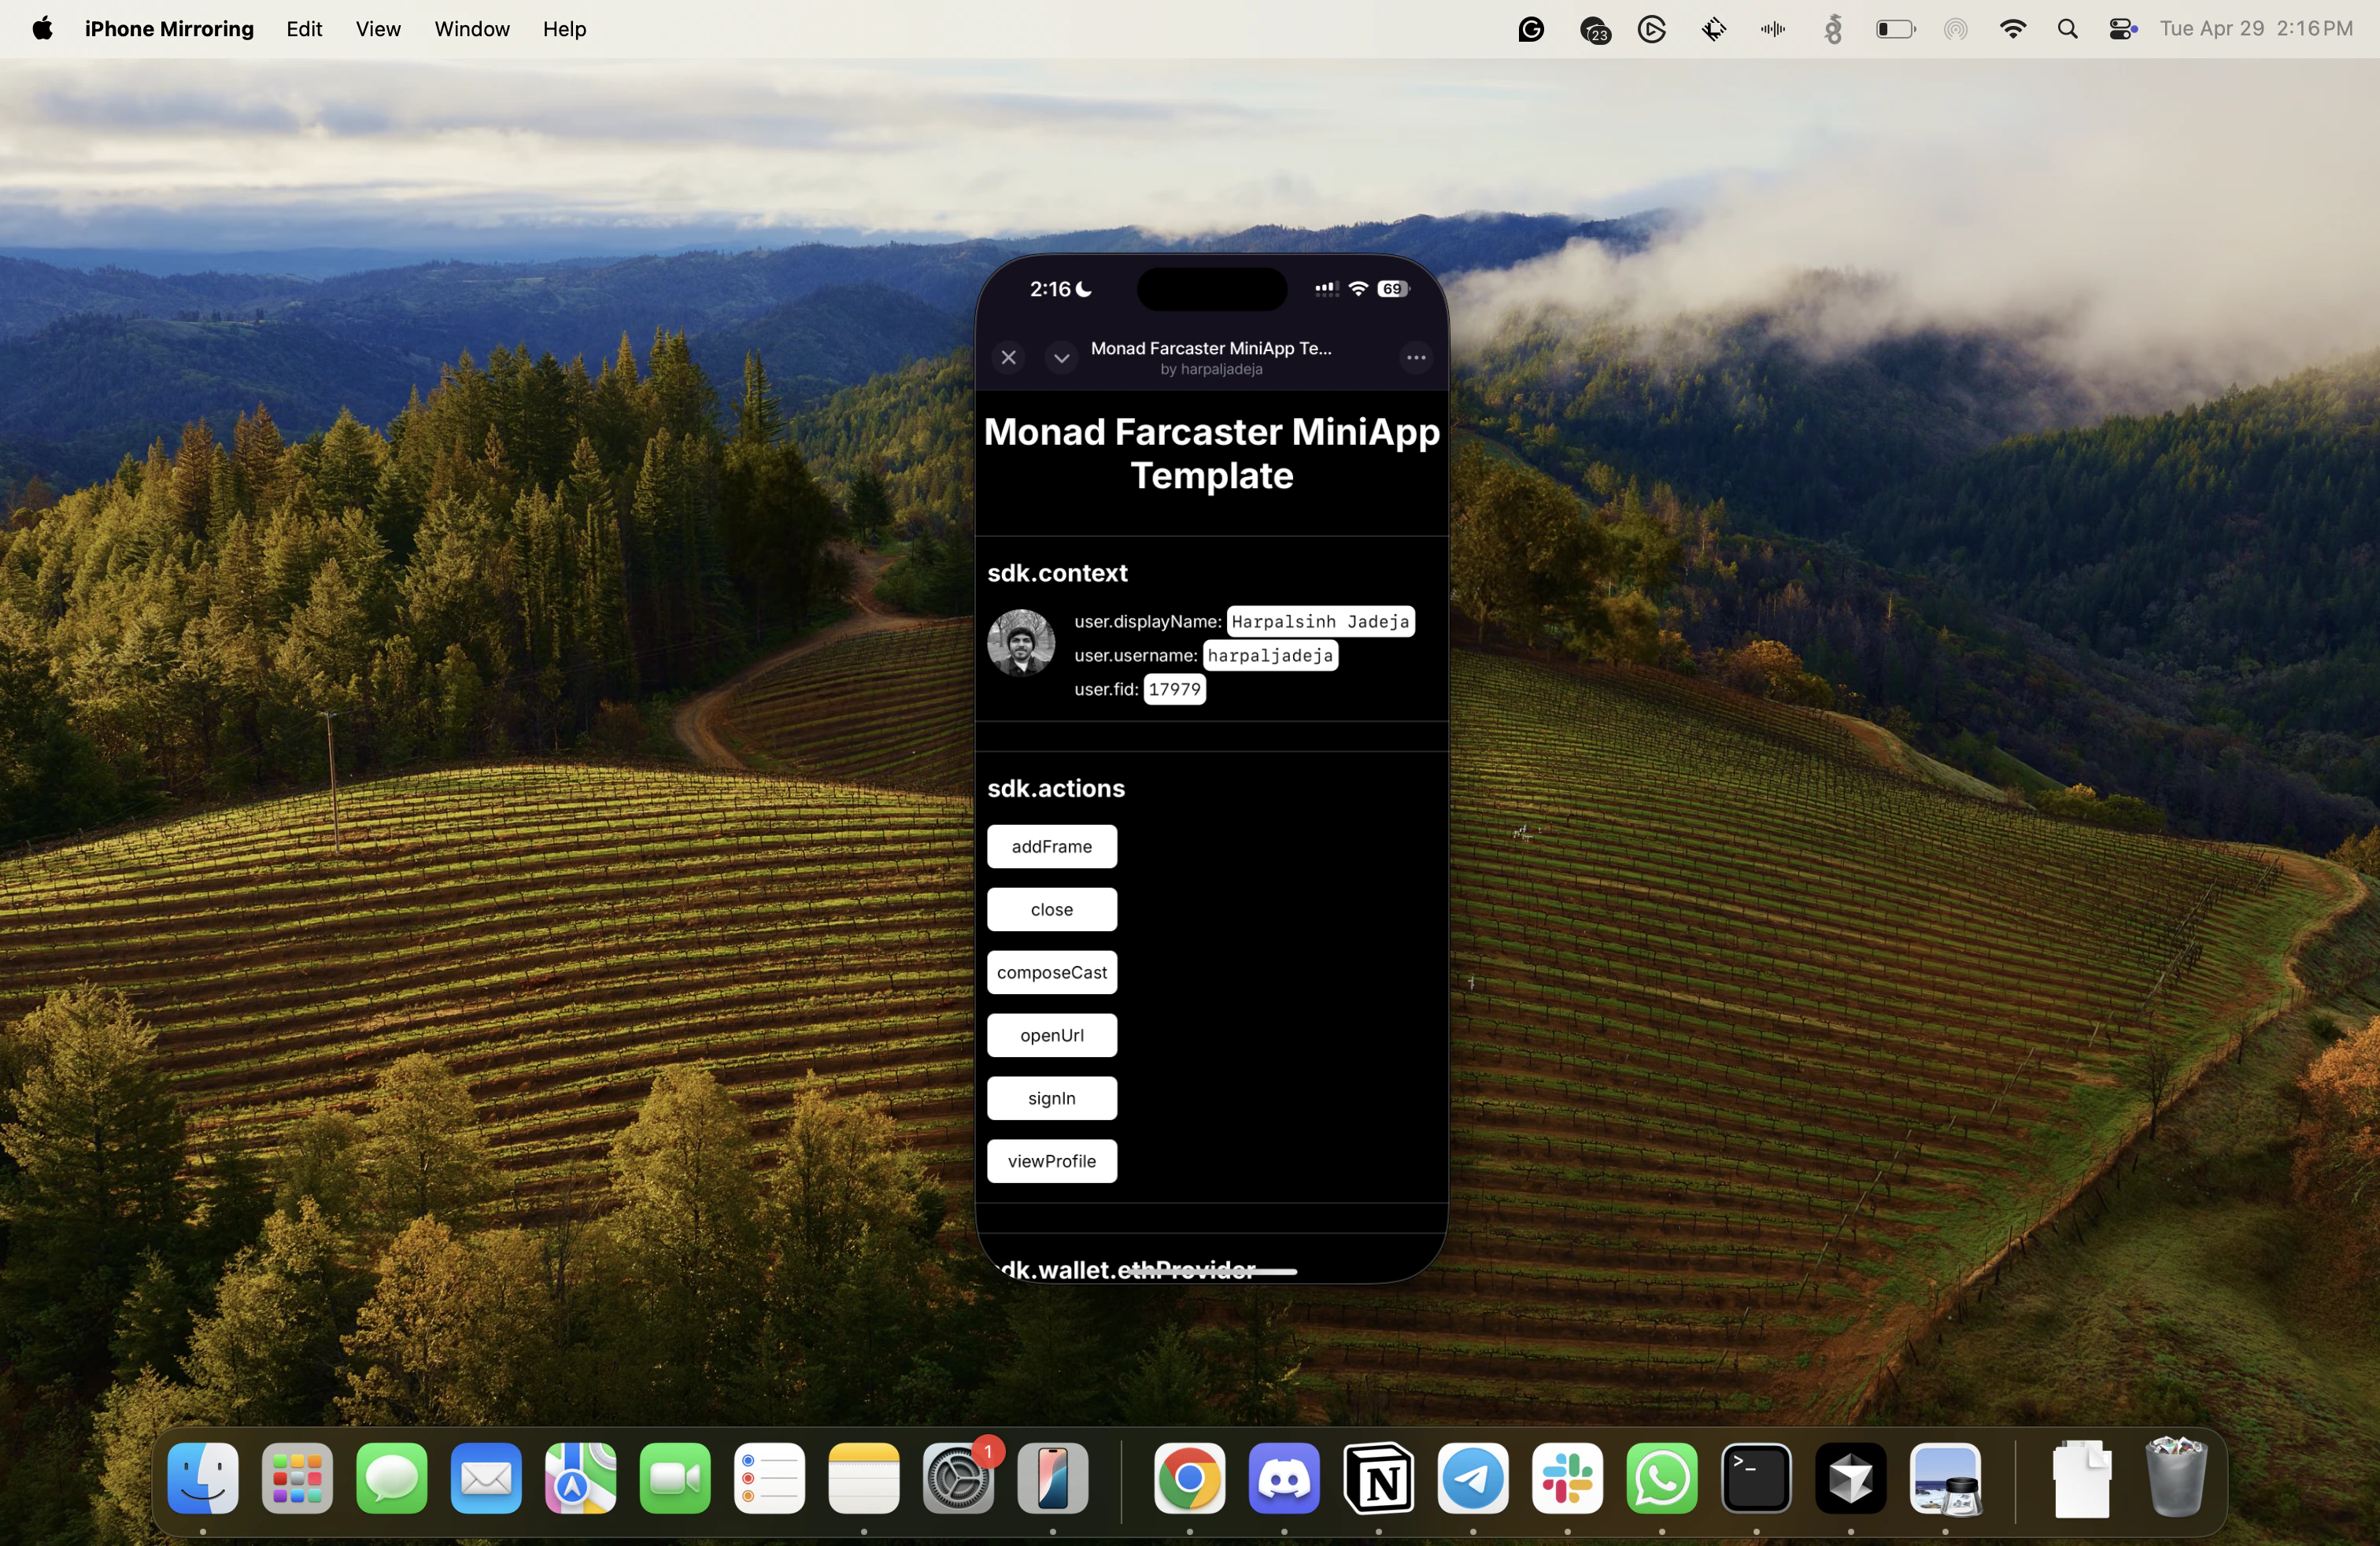
components/pages/app.tsx file:
components/pages/app.tsx
Accessing User Context
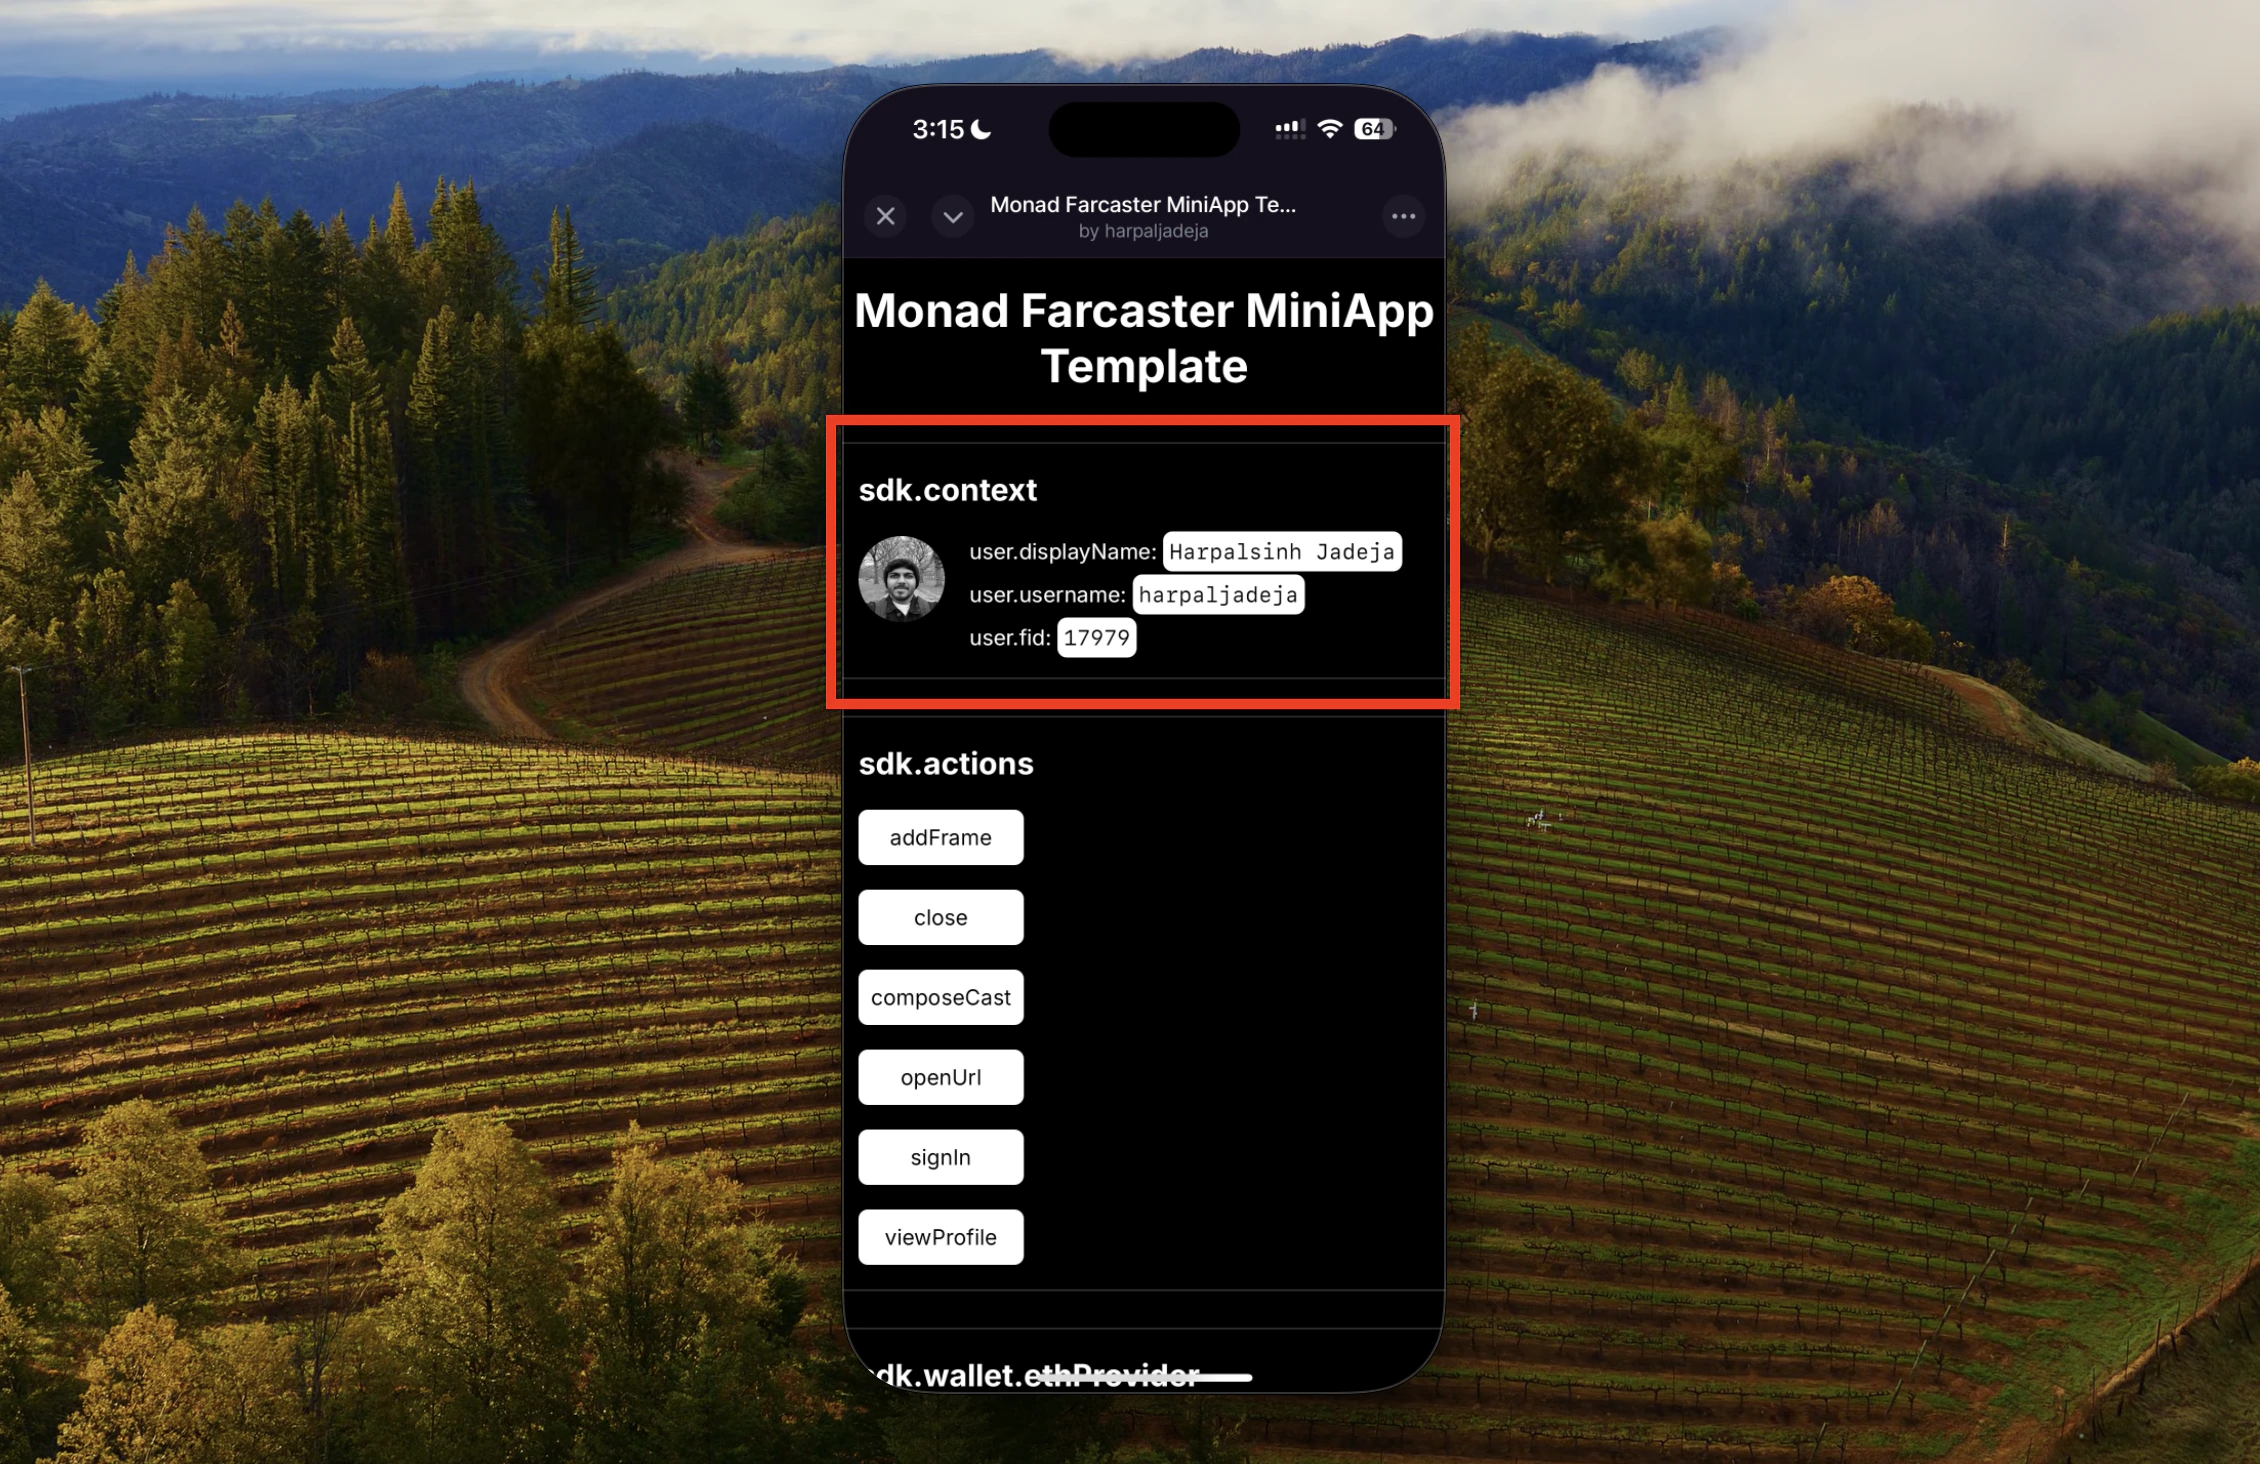
username, fid, displayName, pfpUrl and other fields.
The template provides a helpful hook useMiniAppContext that you can use to access these fields:
components/Home/User.tsx
components/Home/User.tsx file.
You can learn more about Context here.
Performing App Actions
 Mini Apps have the capability to perform native actions that enhance the user experience!
Actions like:
Mini Apps have the capability to perform native actions that enhance the user experience!
Actions like:
addFrame: Allows the user to save (bookmark) the app in a dedicated sectioncomposeCast: Allows the Mini App to prompt the user to cast with prefilled text and mediaviewProfile: Presents a profile of a Farcaster user in a client native UI
useMiniAppContext hook!
components/Home/FarcasterActions.tsx
components/Home/FarcasterActions.tsx file.
Prompting Wallet Actions
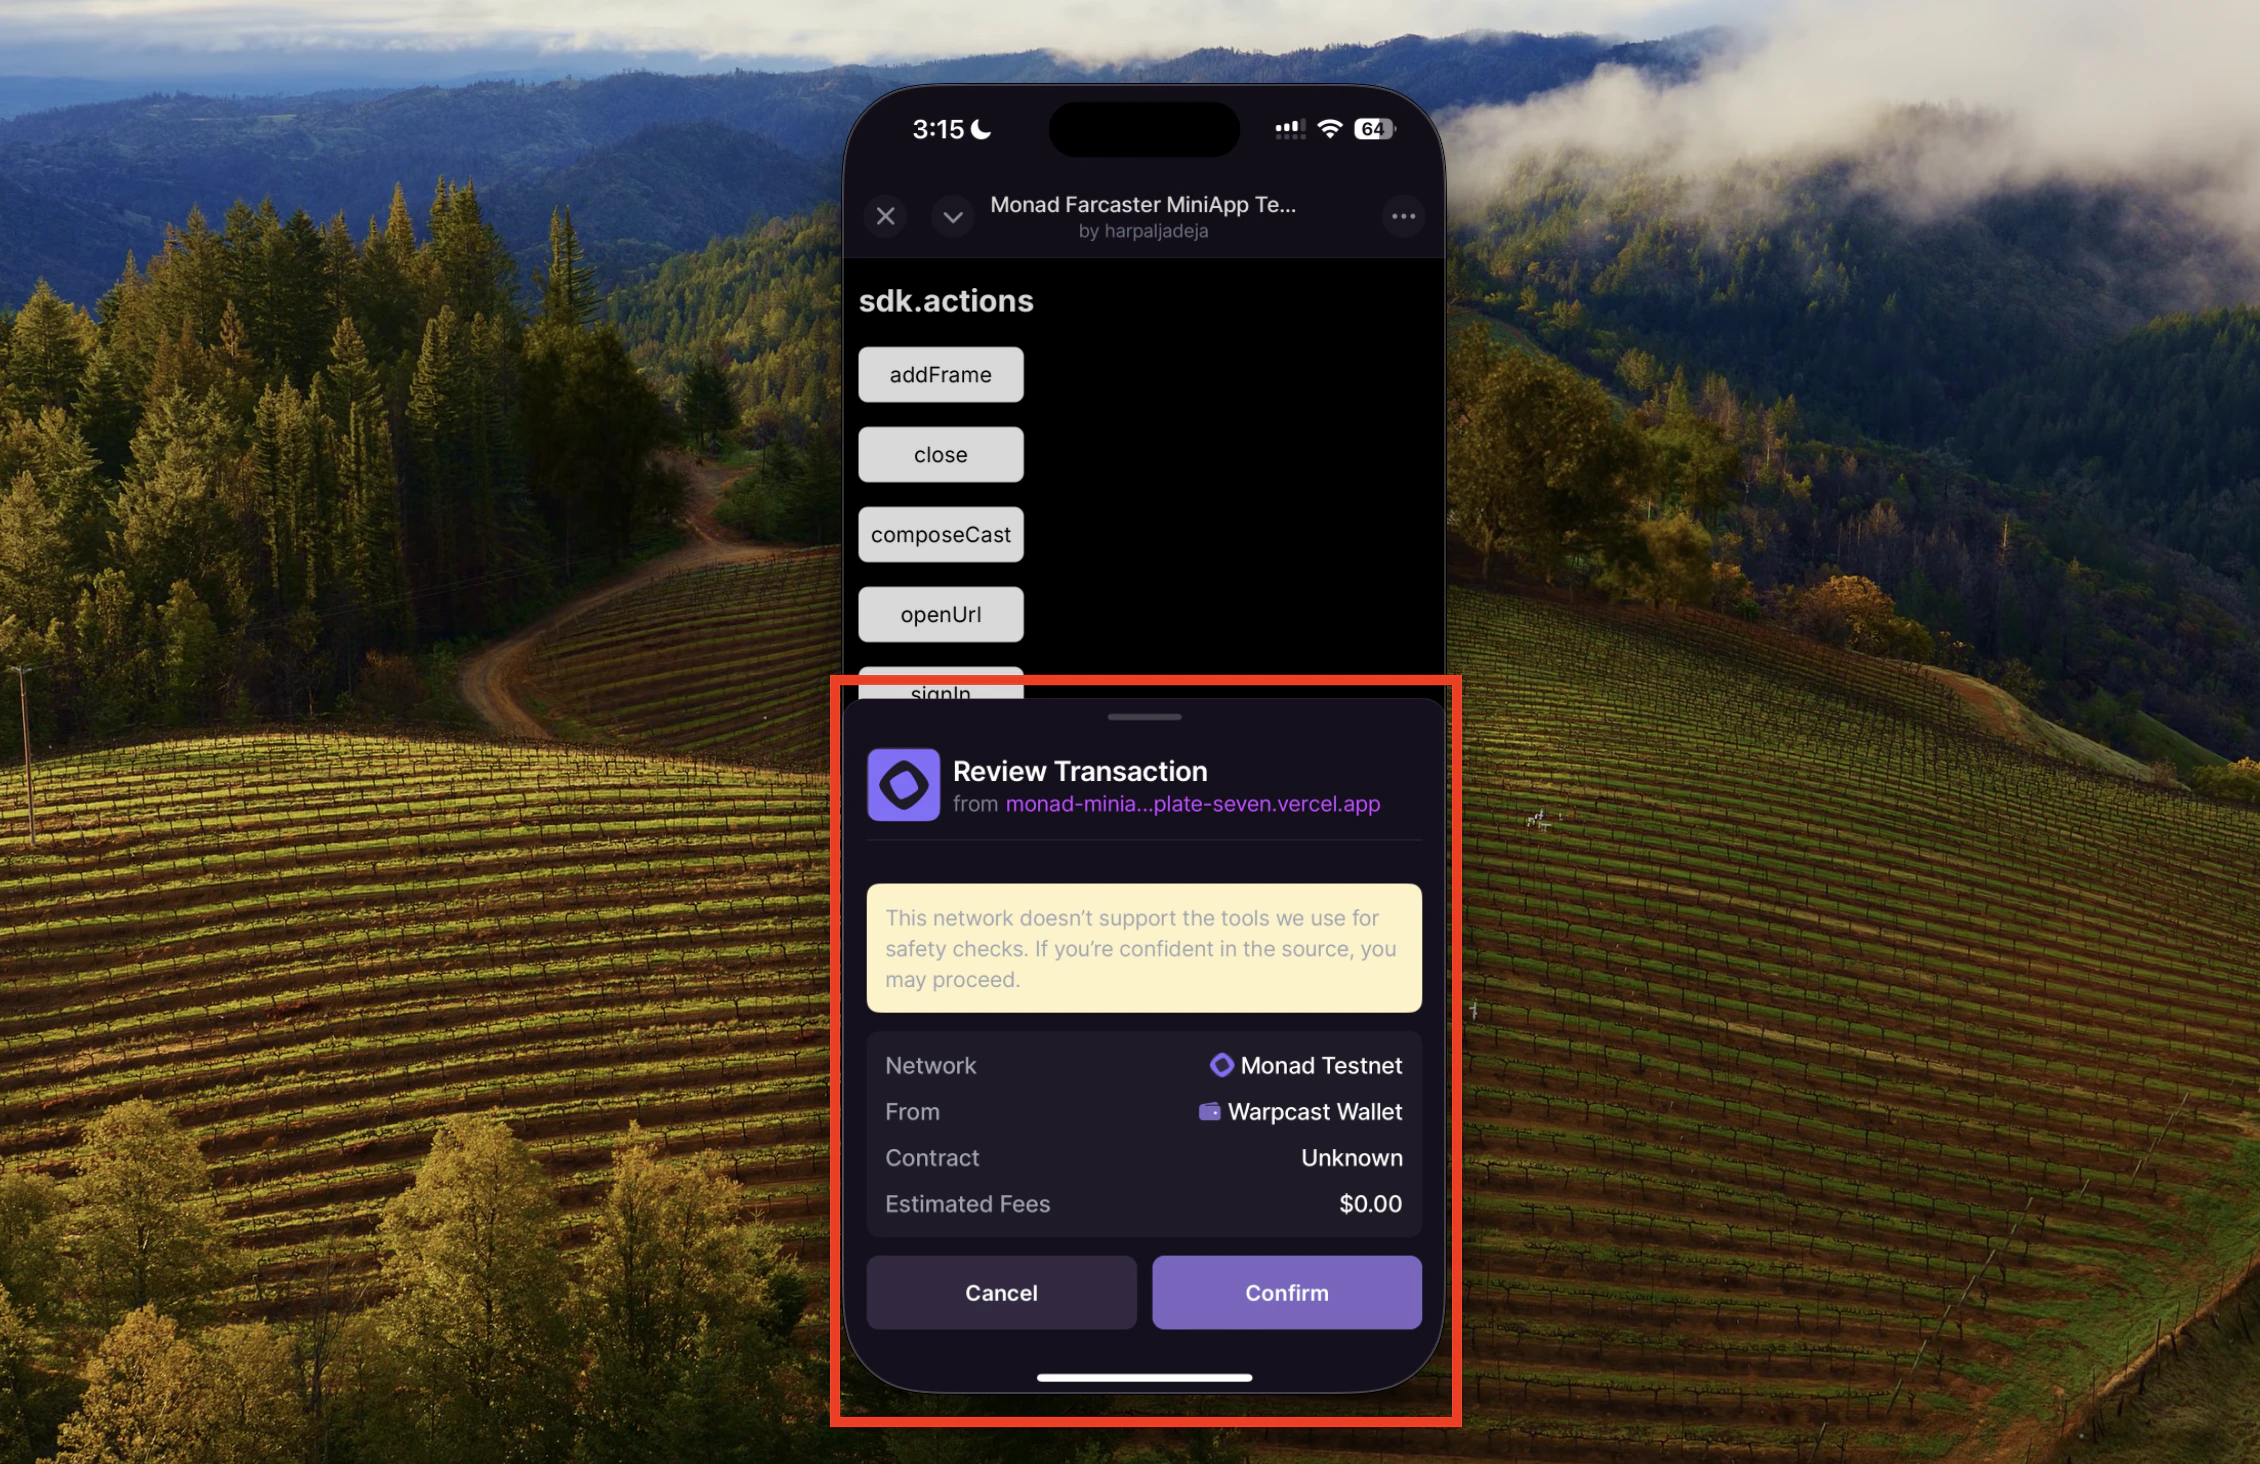
components/Home/WalletActions.tsx file.
components/Home/WalletActions.tsx