How to use the Next.js PWA Privy embedded wallet template
This guide walks you through using the template which uses Next.js, Serwist (offline capabilities), and Privy embedded wallet to build a Progressive Web App (PWA) on Monad.
This template also has a no-privy branch that you can switch to in order to start without Privy.
You can switch using the following command:
git checkout no-privyPrerequisites
- Node.js (v18 or higher)
- a Privy account
Setting up Privy
- Create your Privy app:
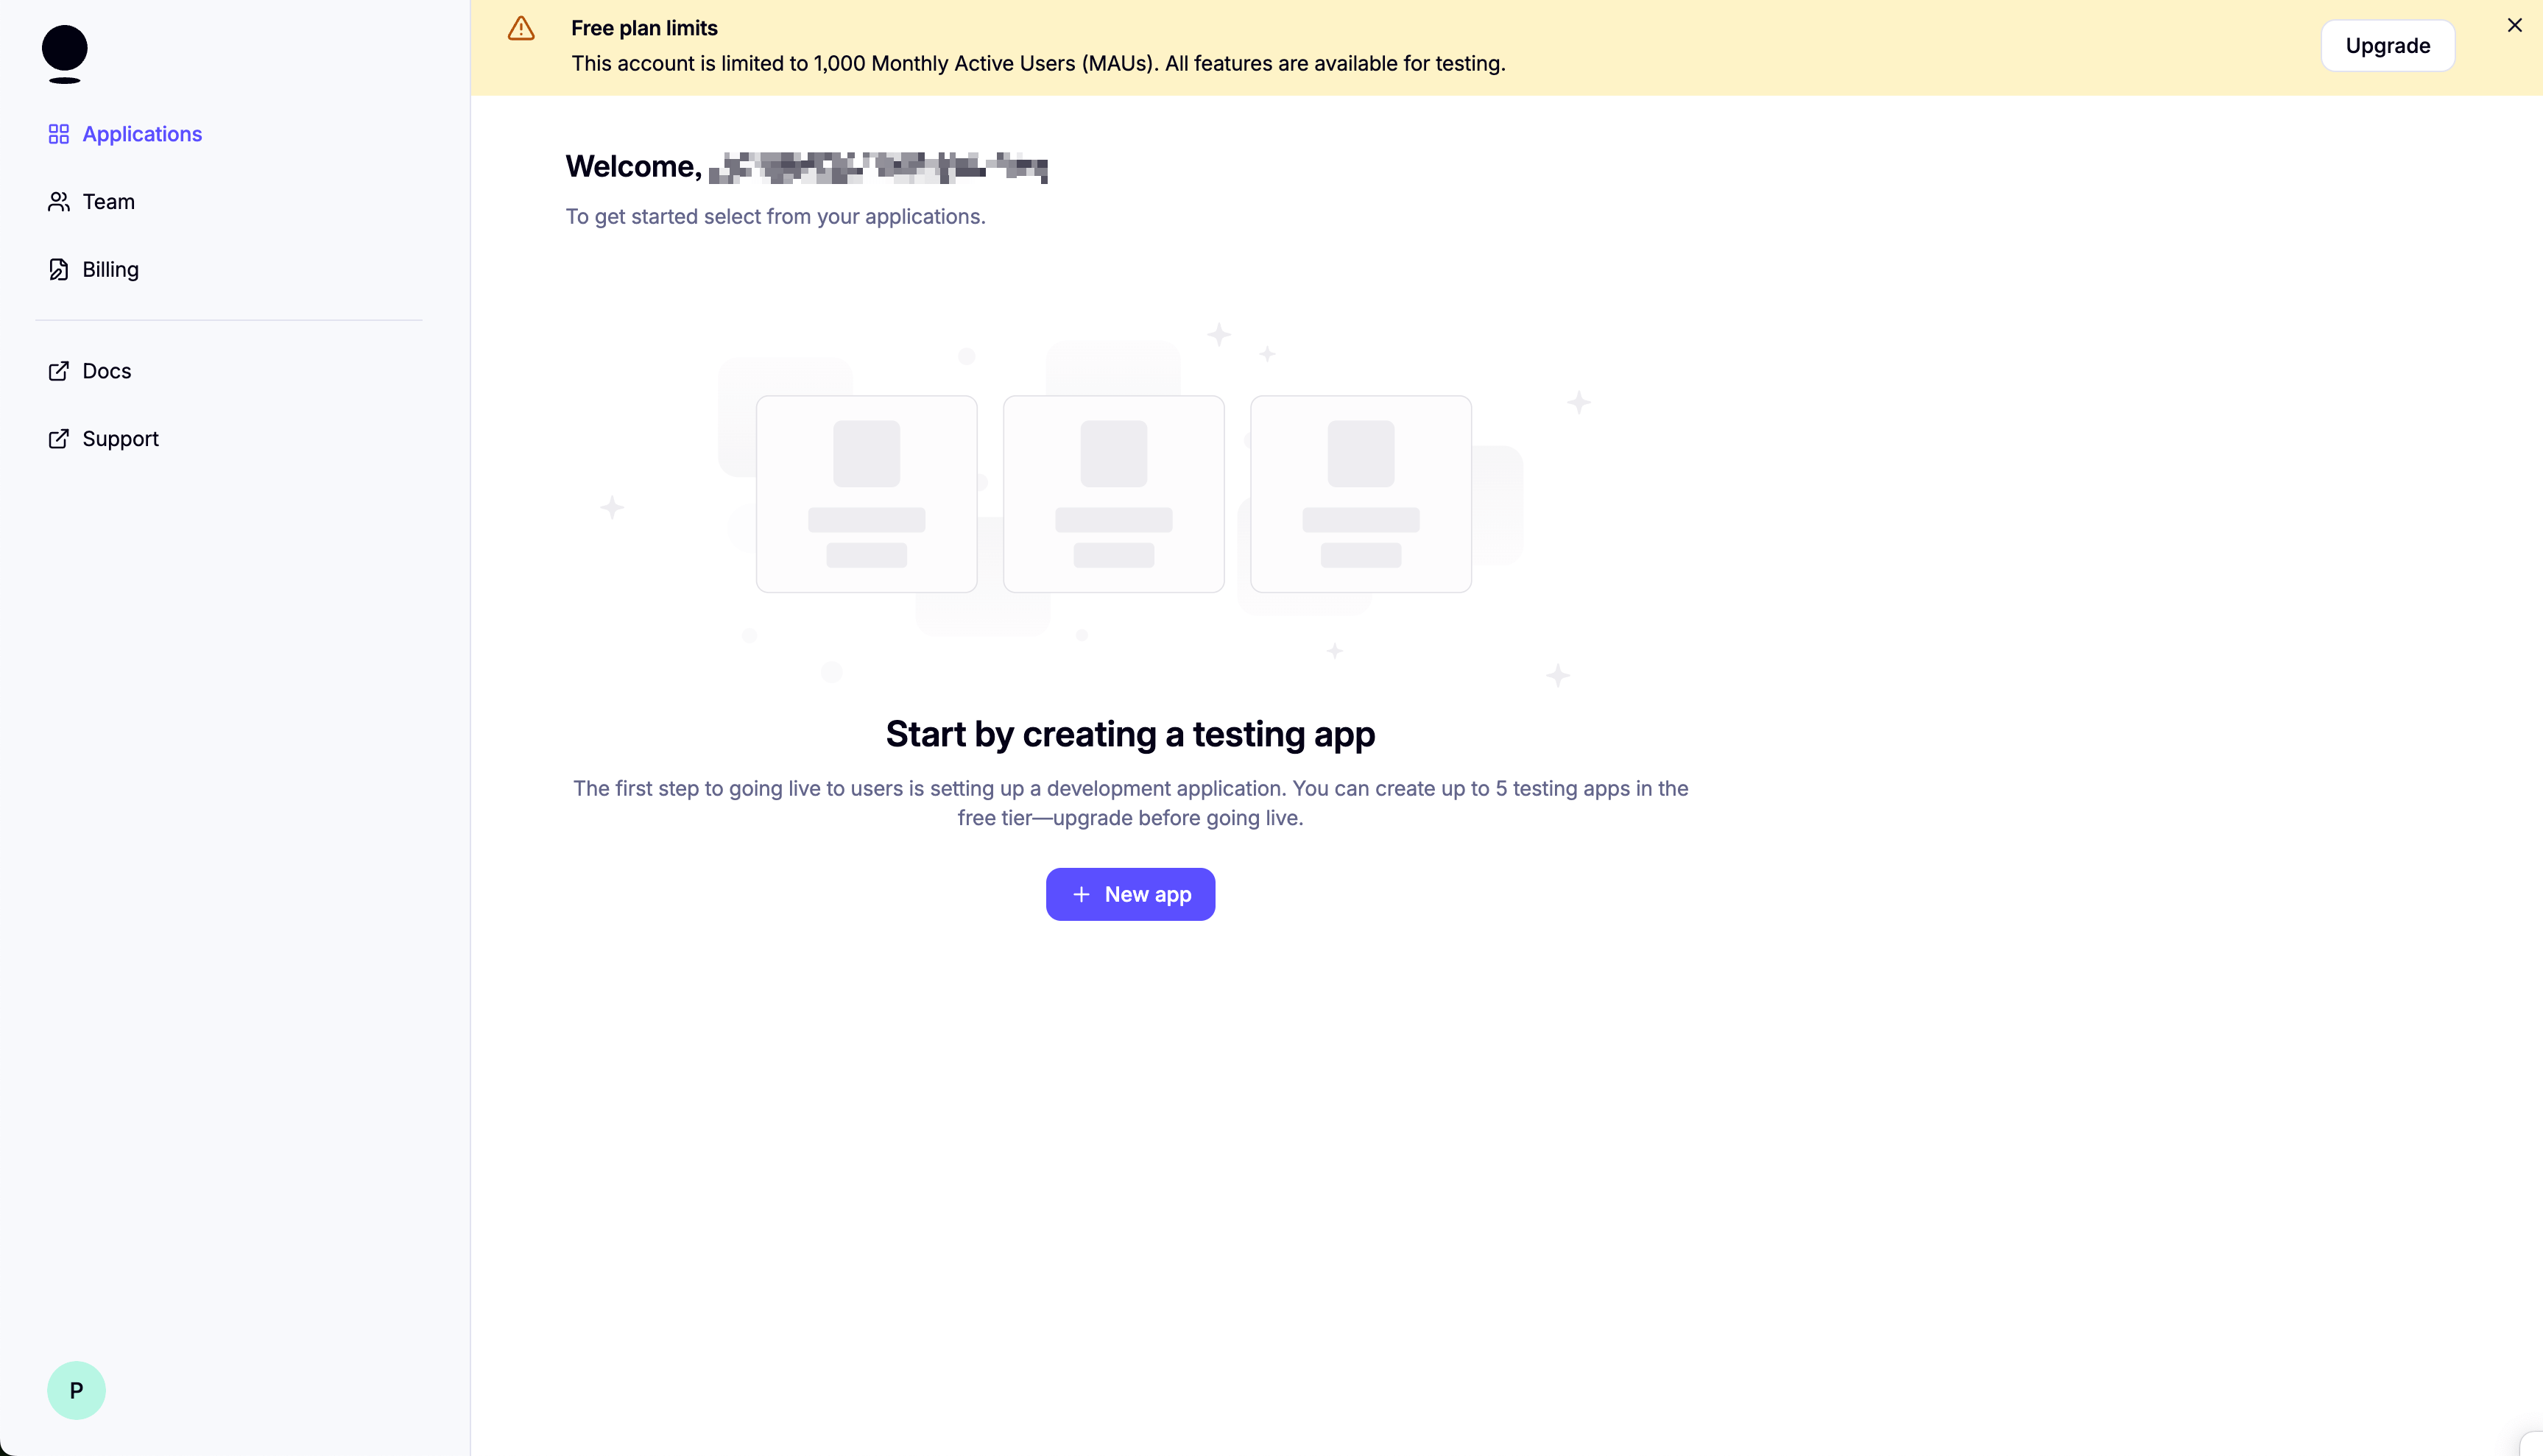
Select "Web" as the platform. Then, click "Create app".
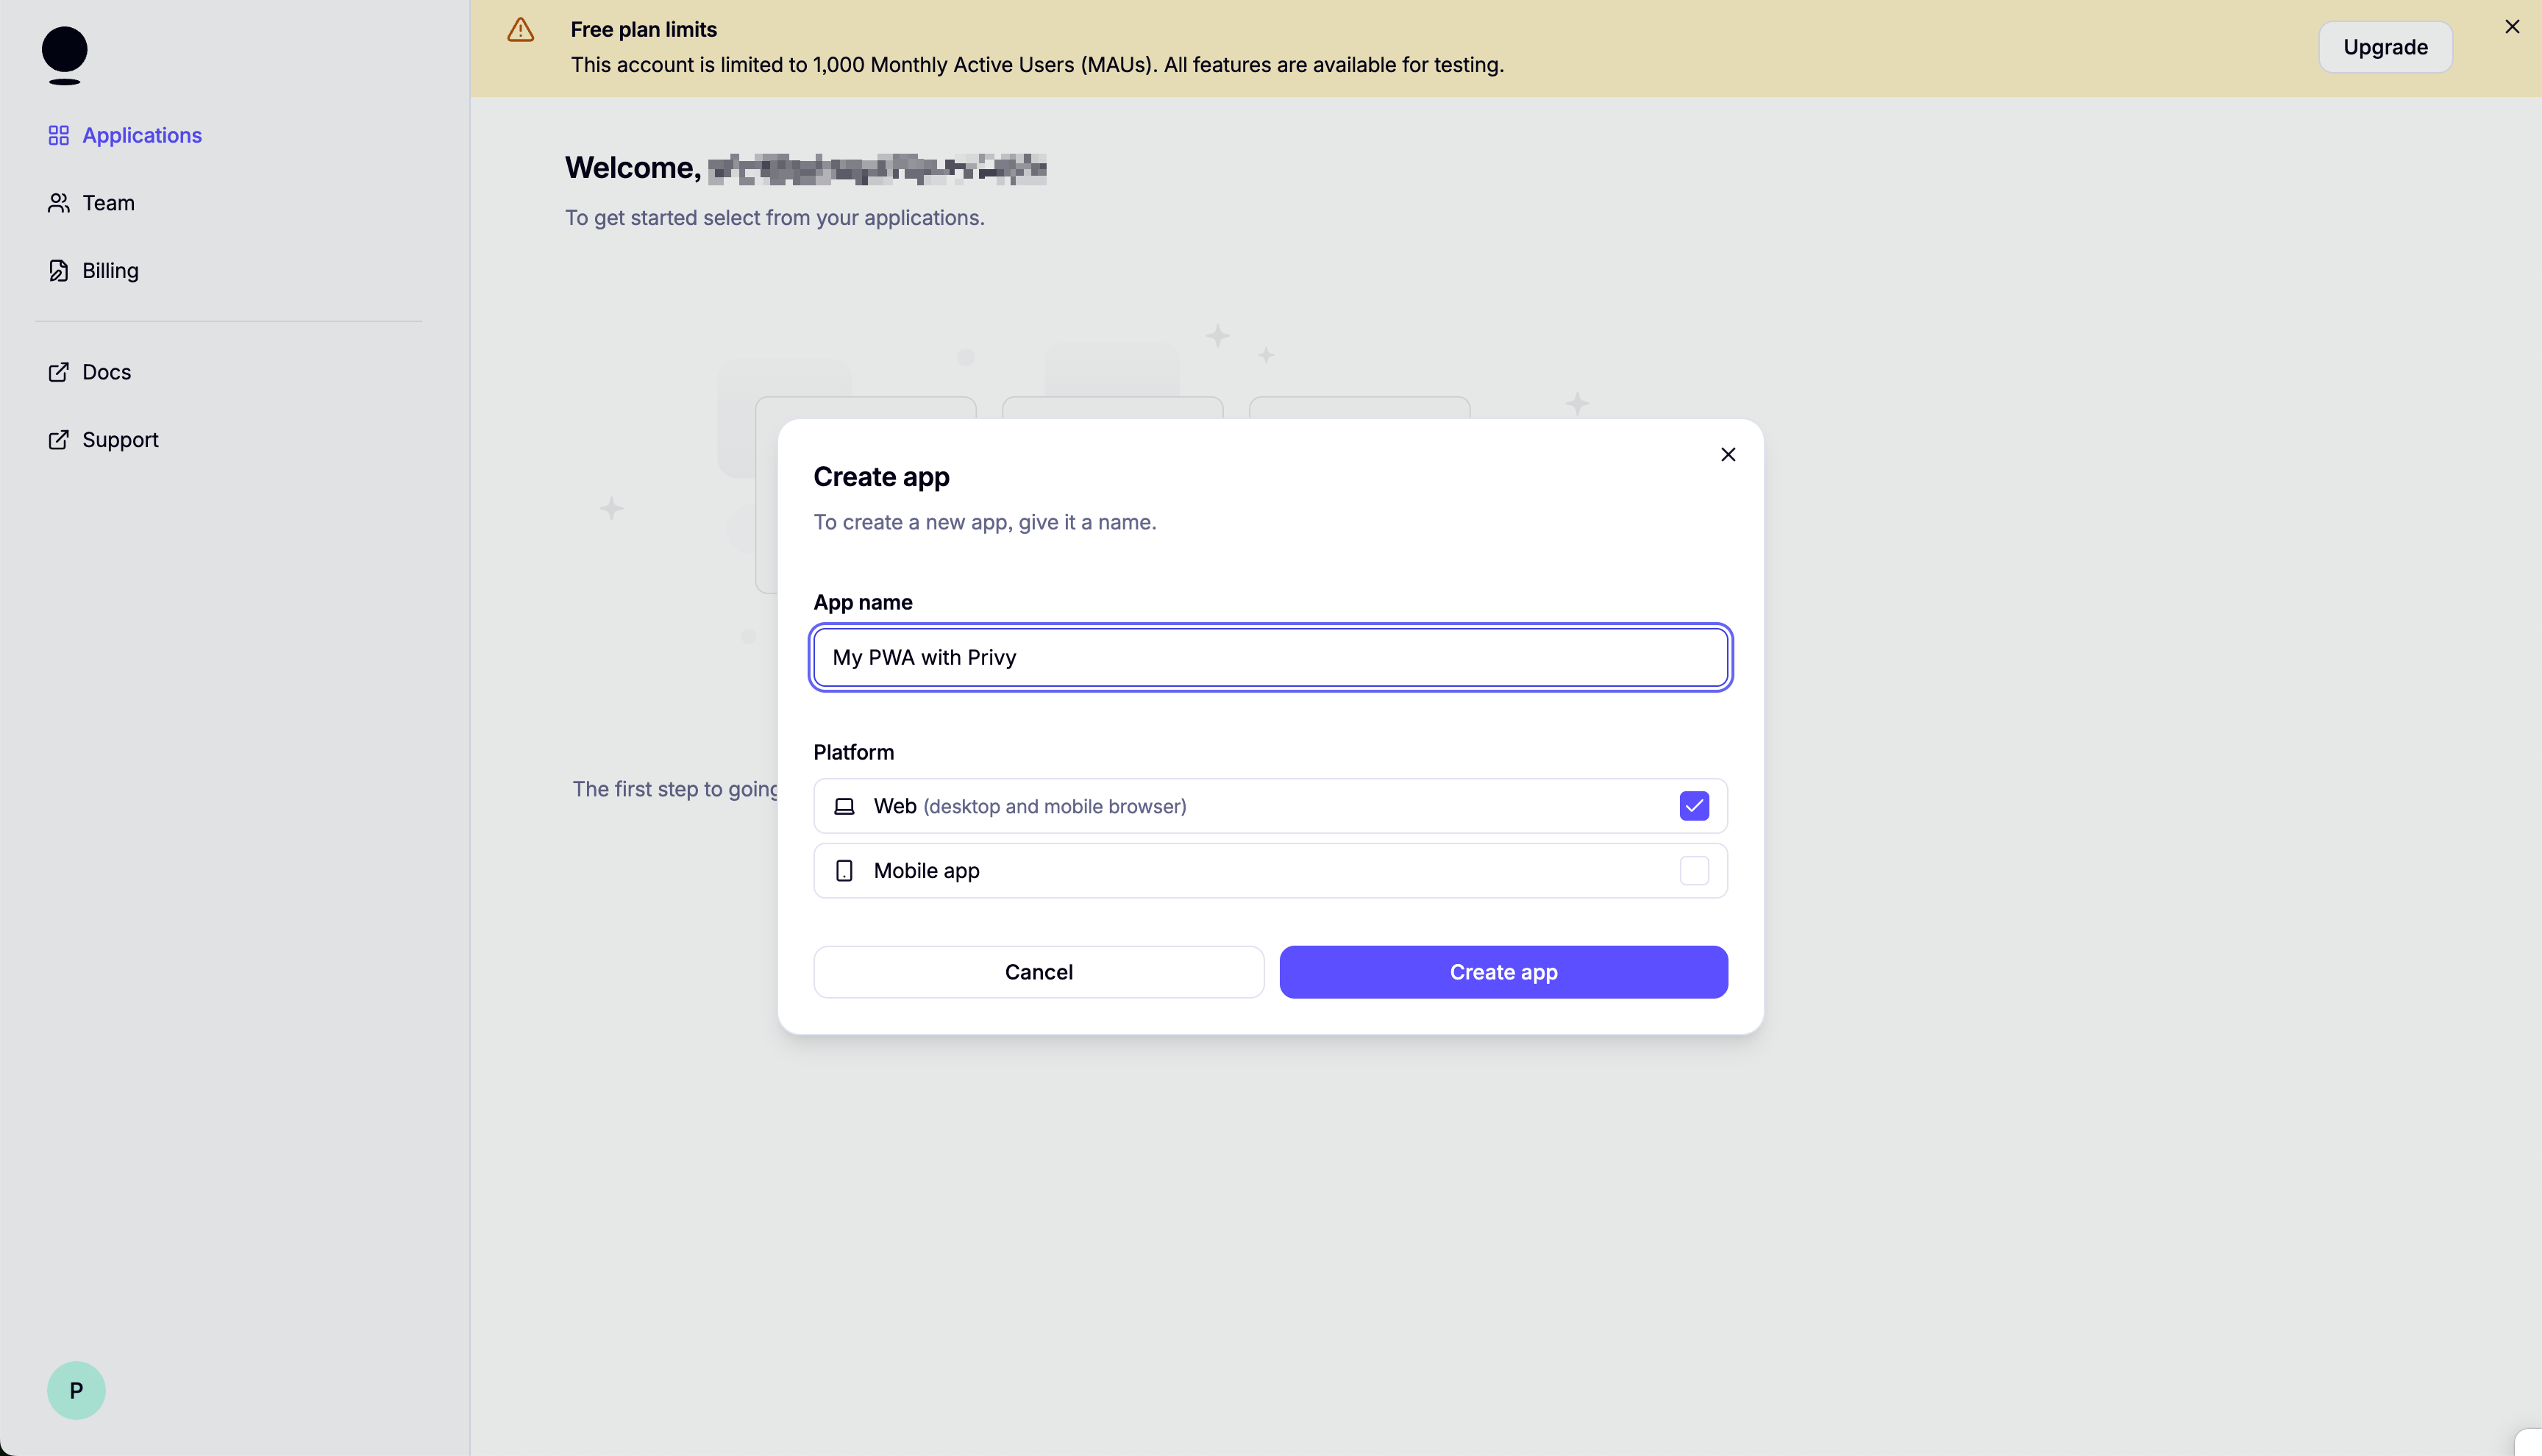
On the next screen, make sure to save your App ID.
- Set up login methods:
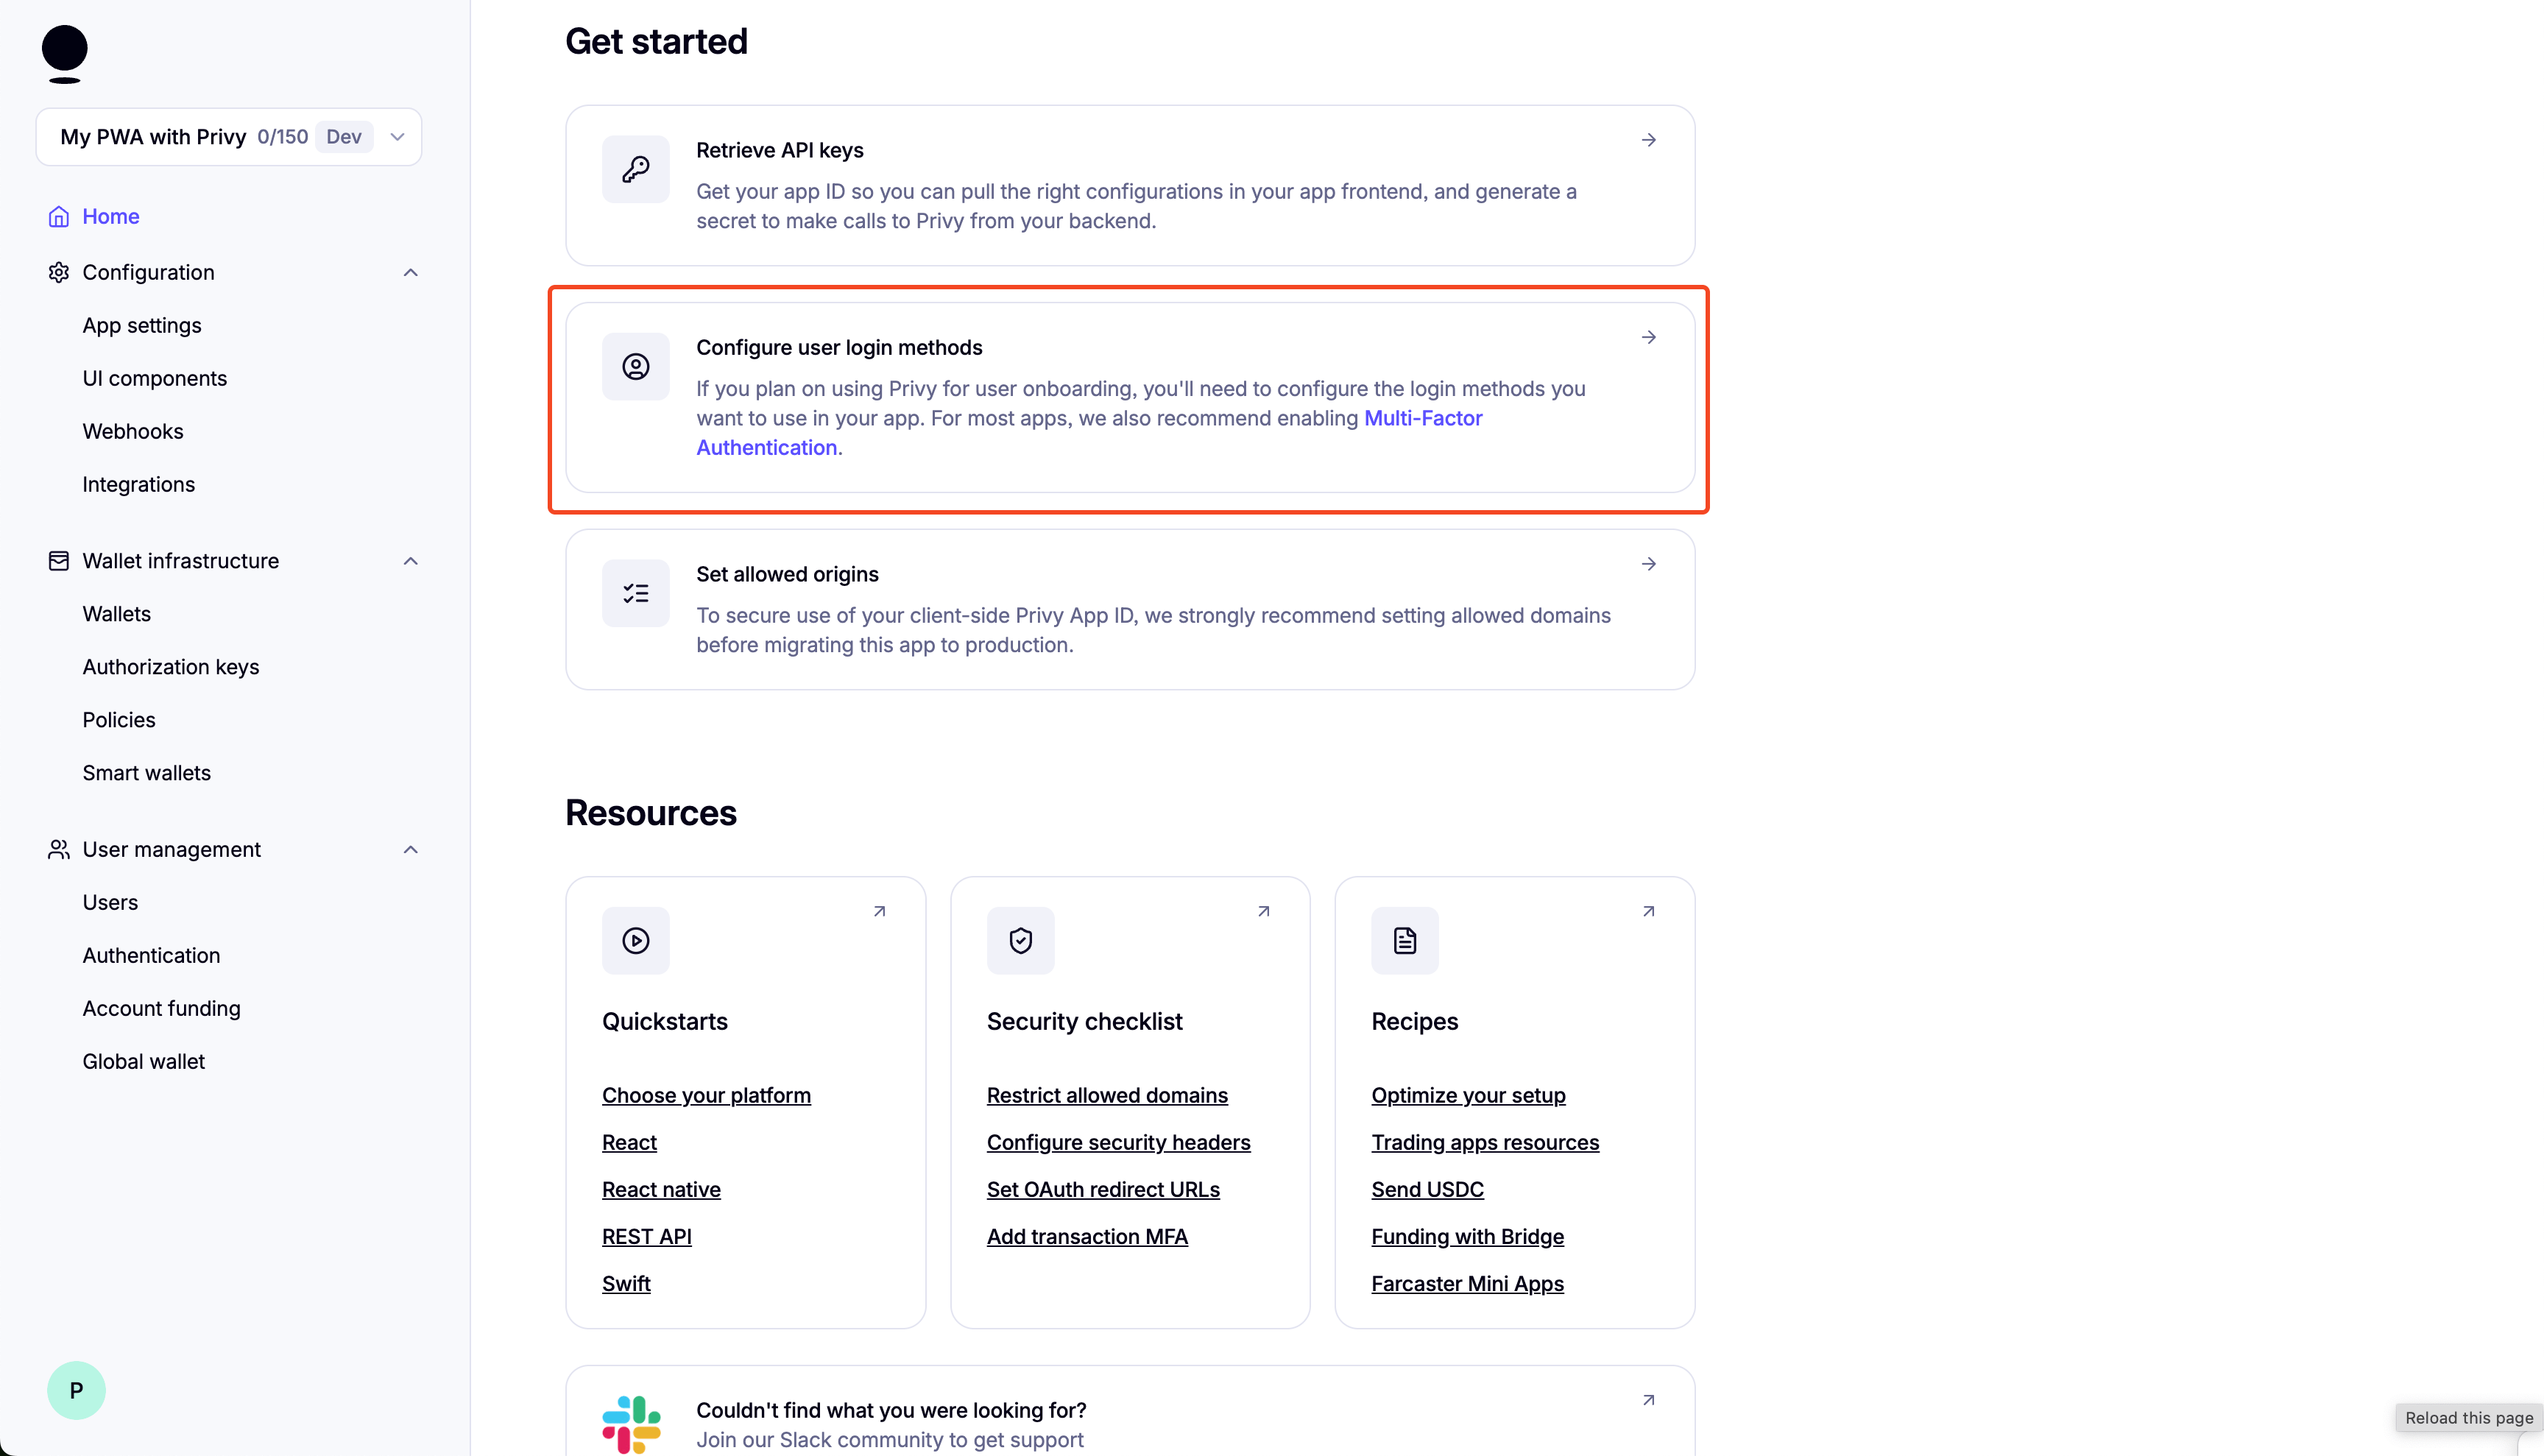
- Disable External Wallets:
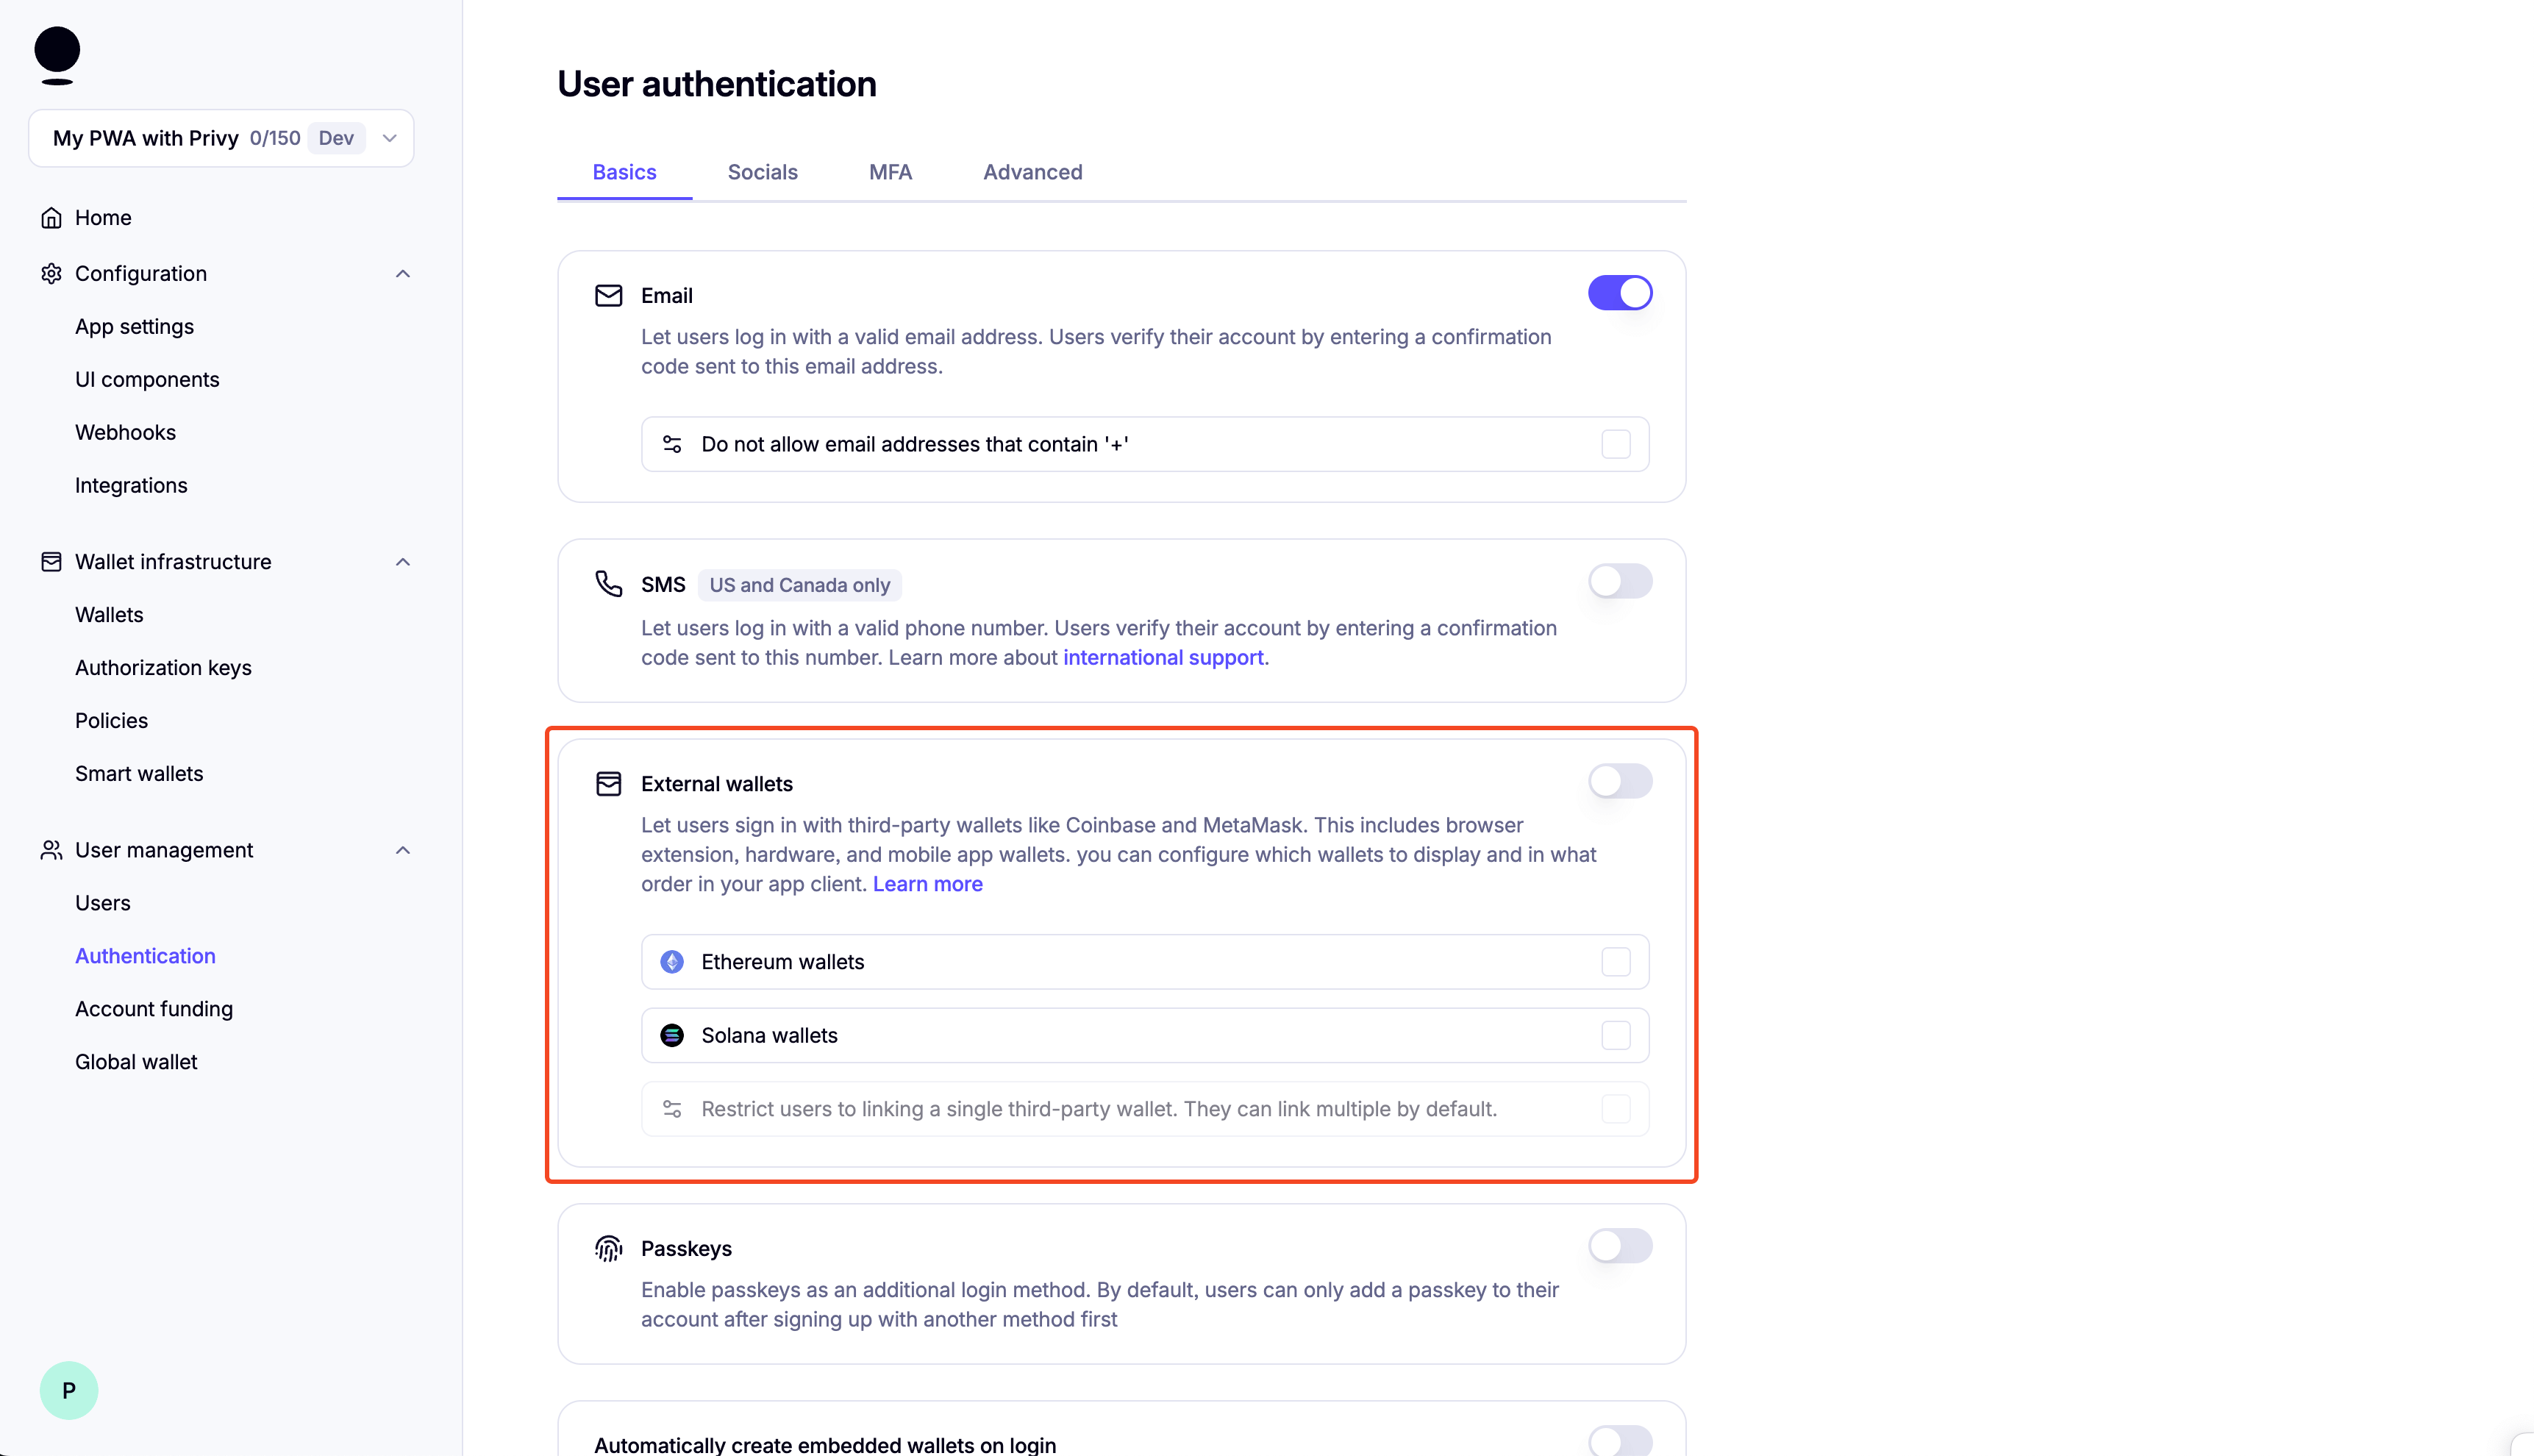
- Scroll down and enable "Automatically create embedded wallets on login" and select "EVM Wallets":
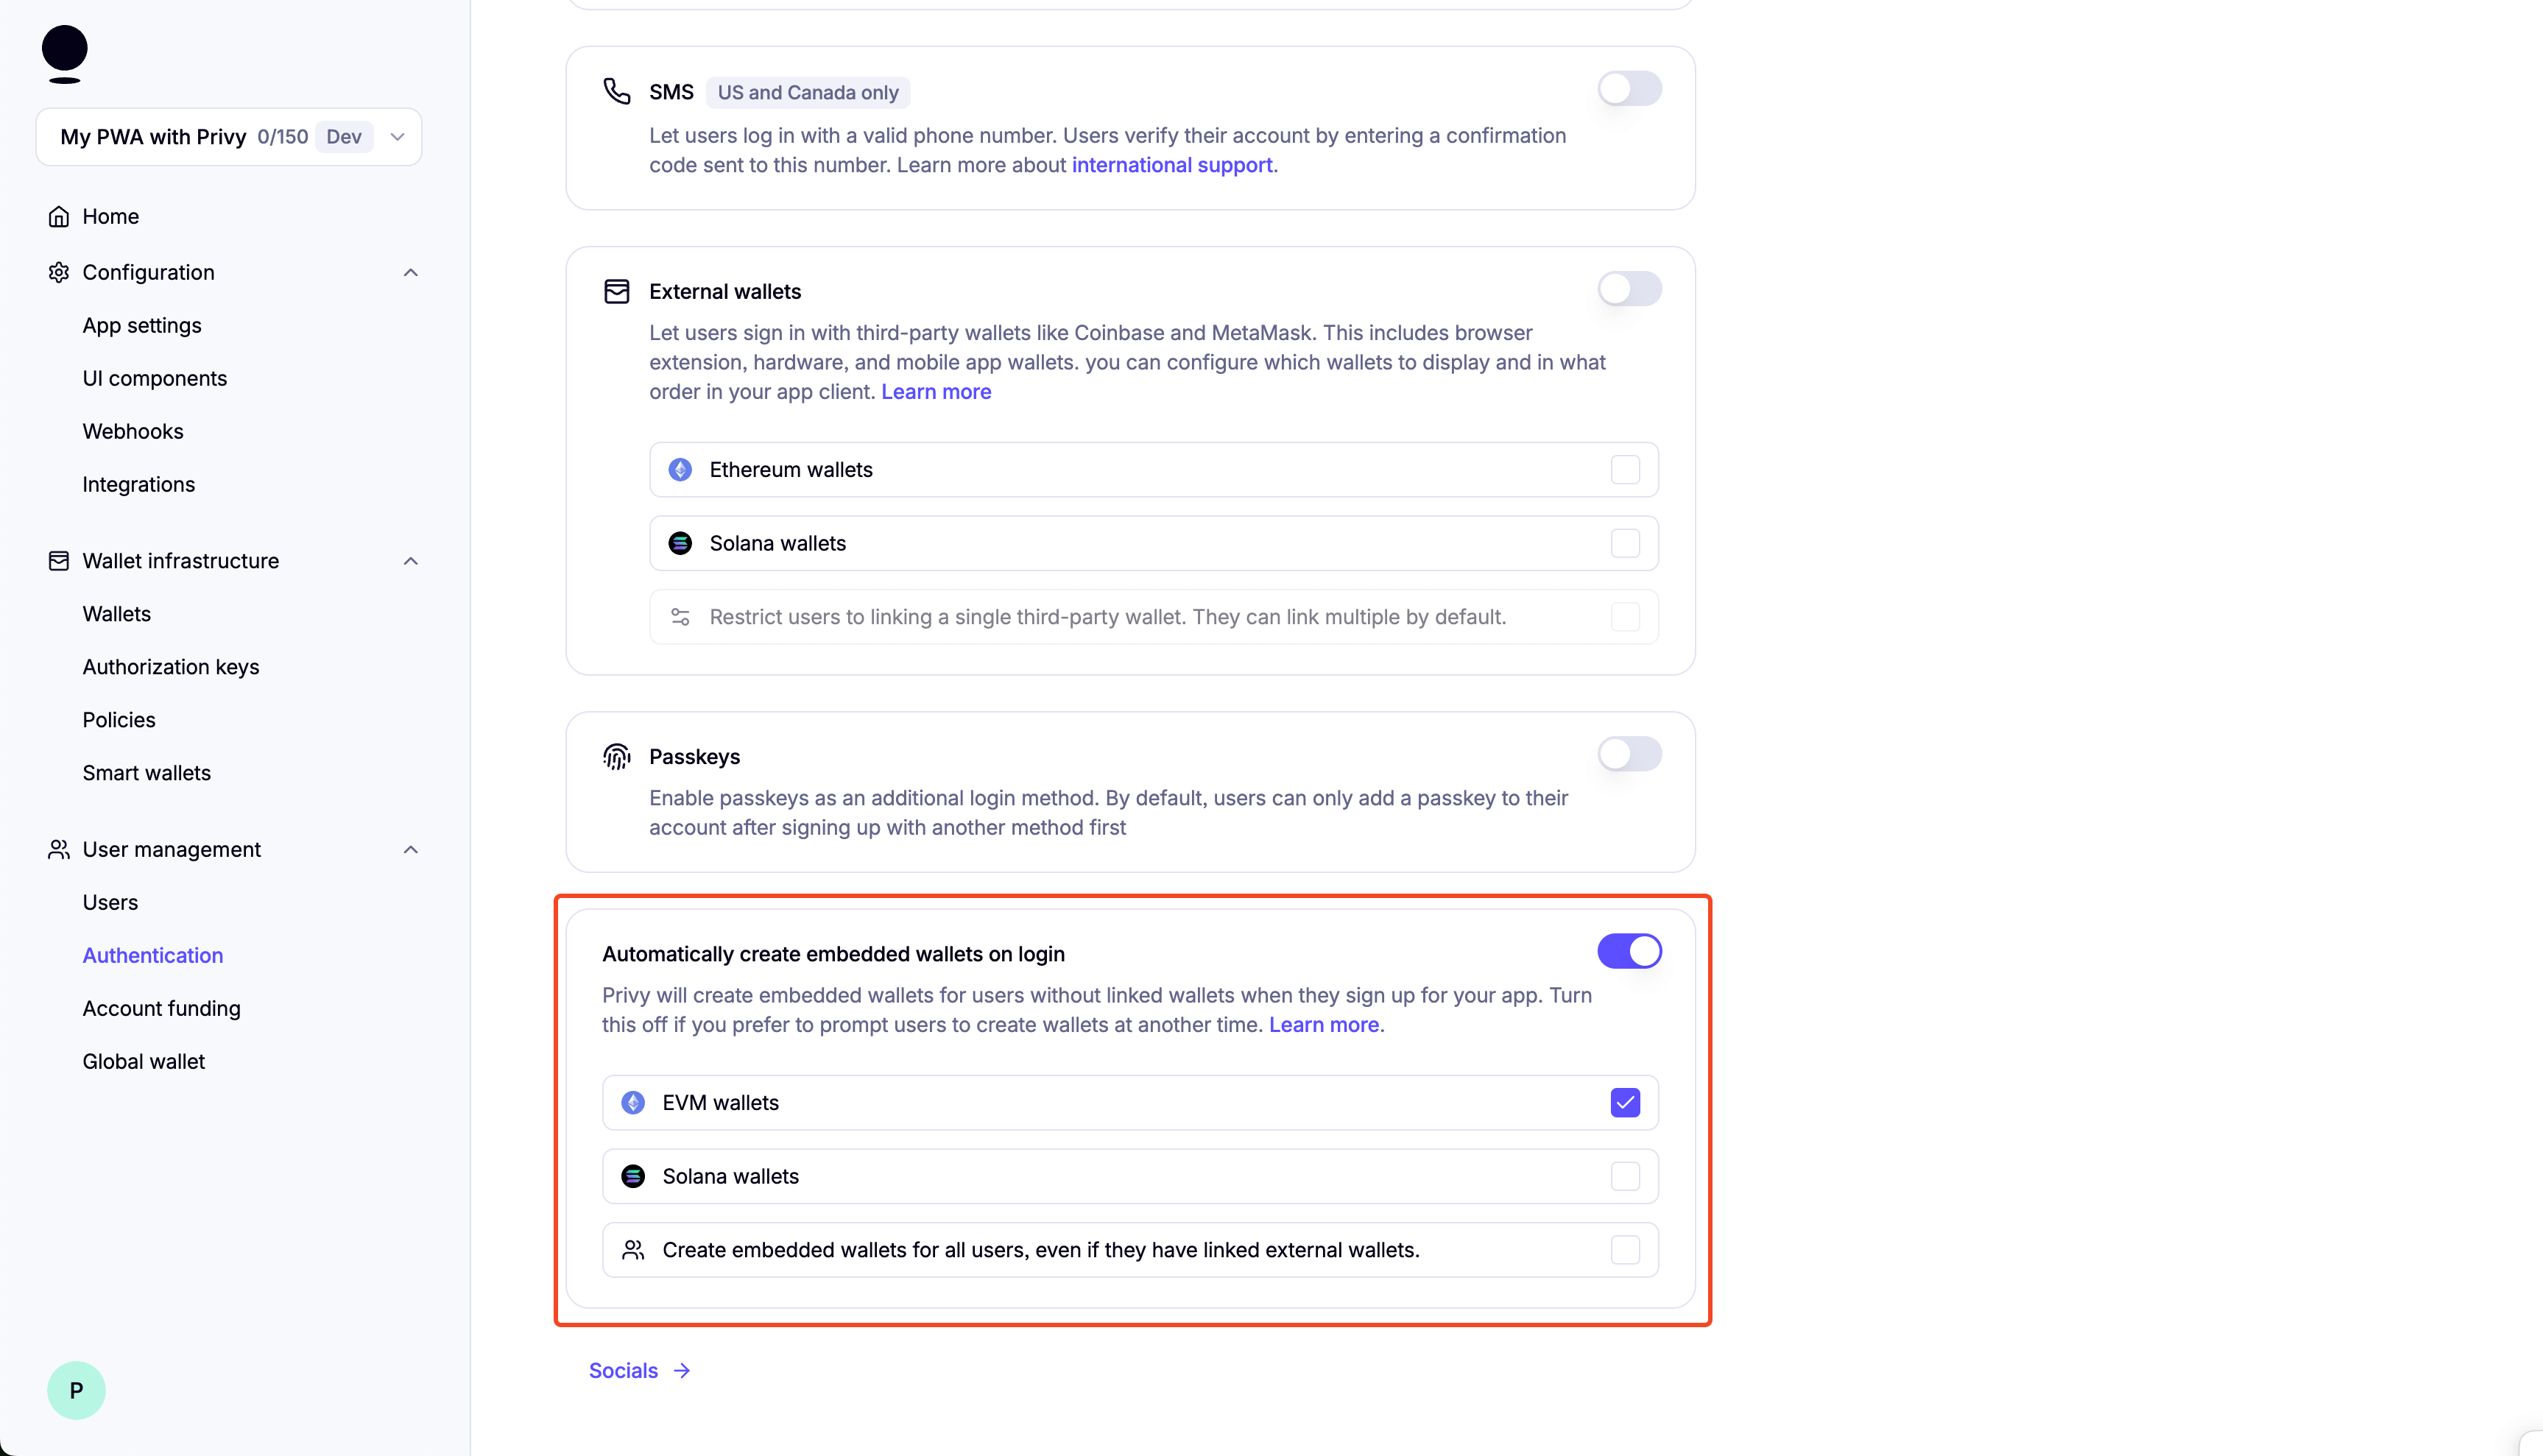
You can enable "Test Accounts" for testing purposes:
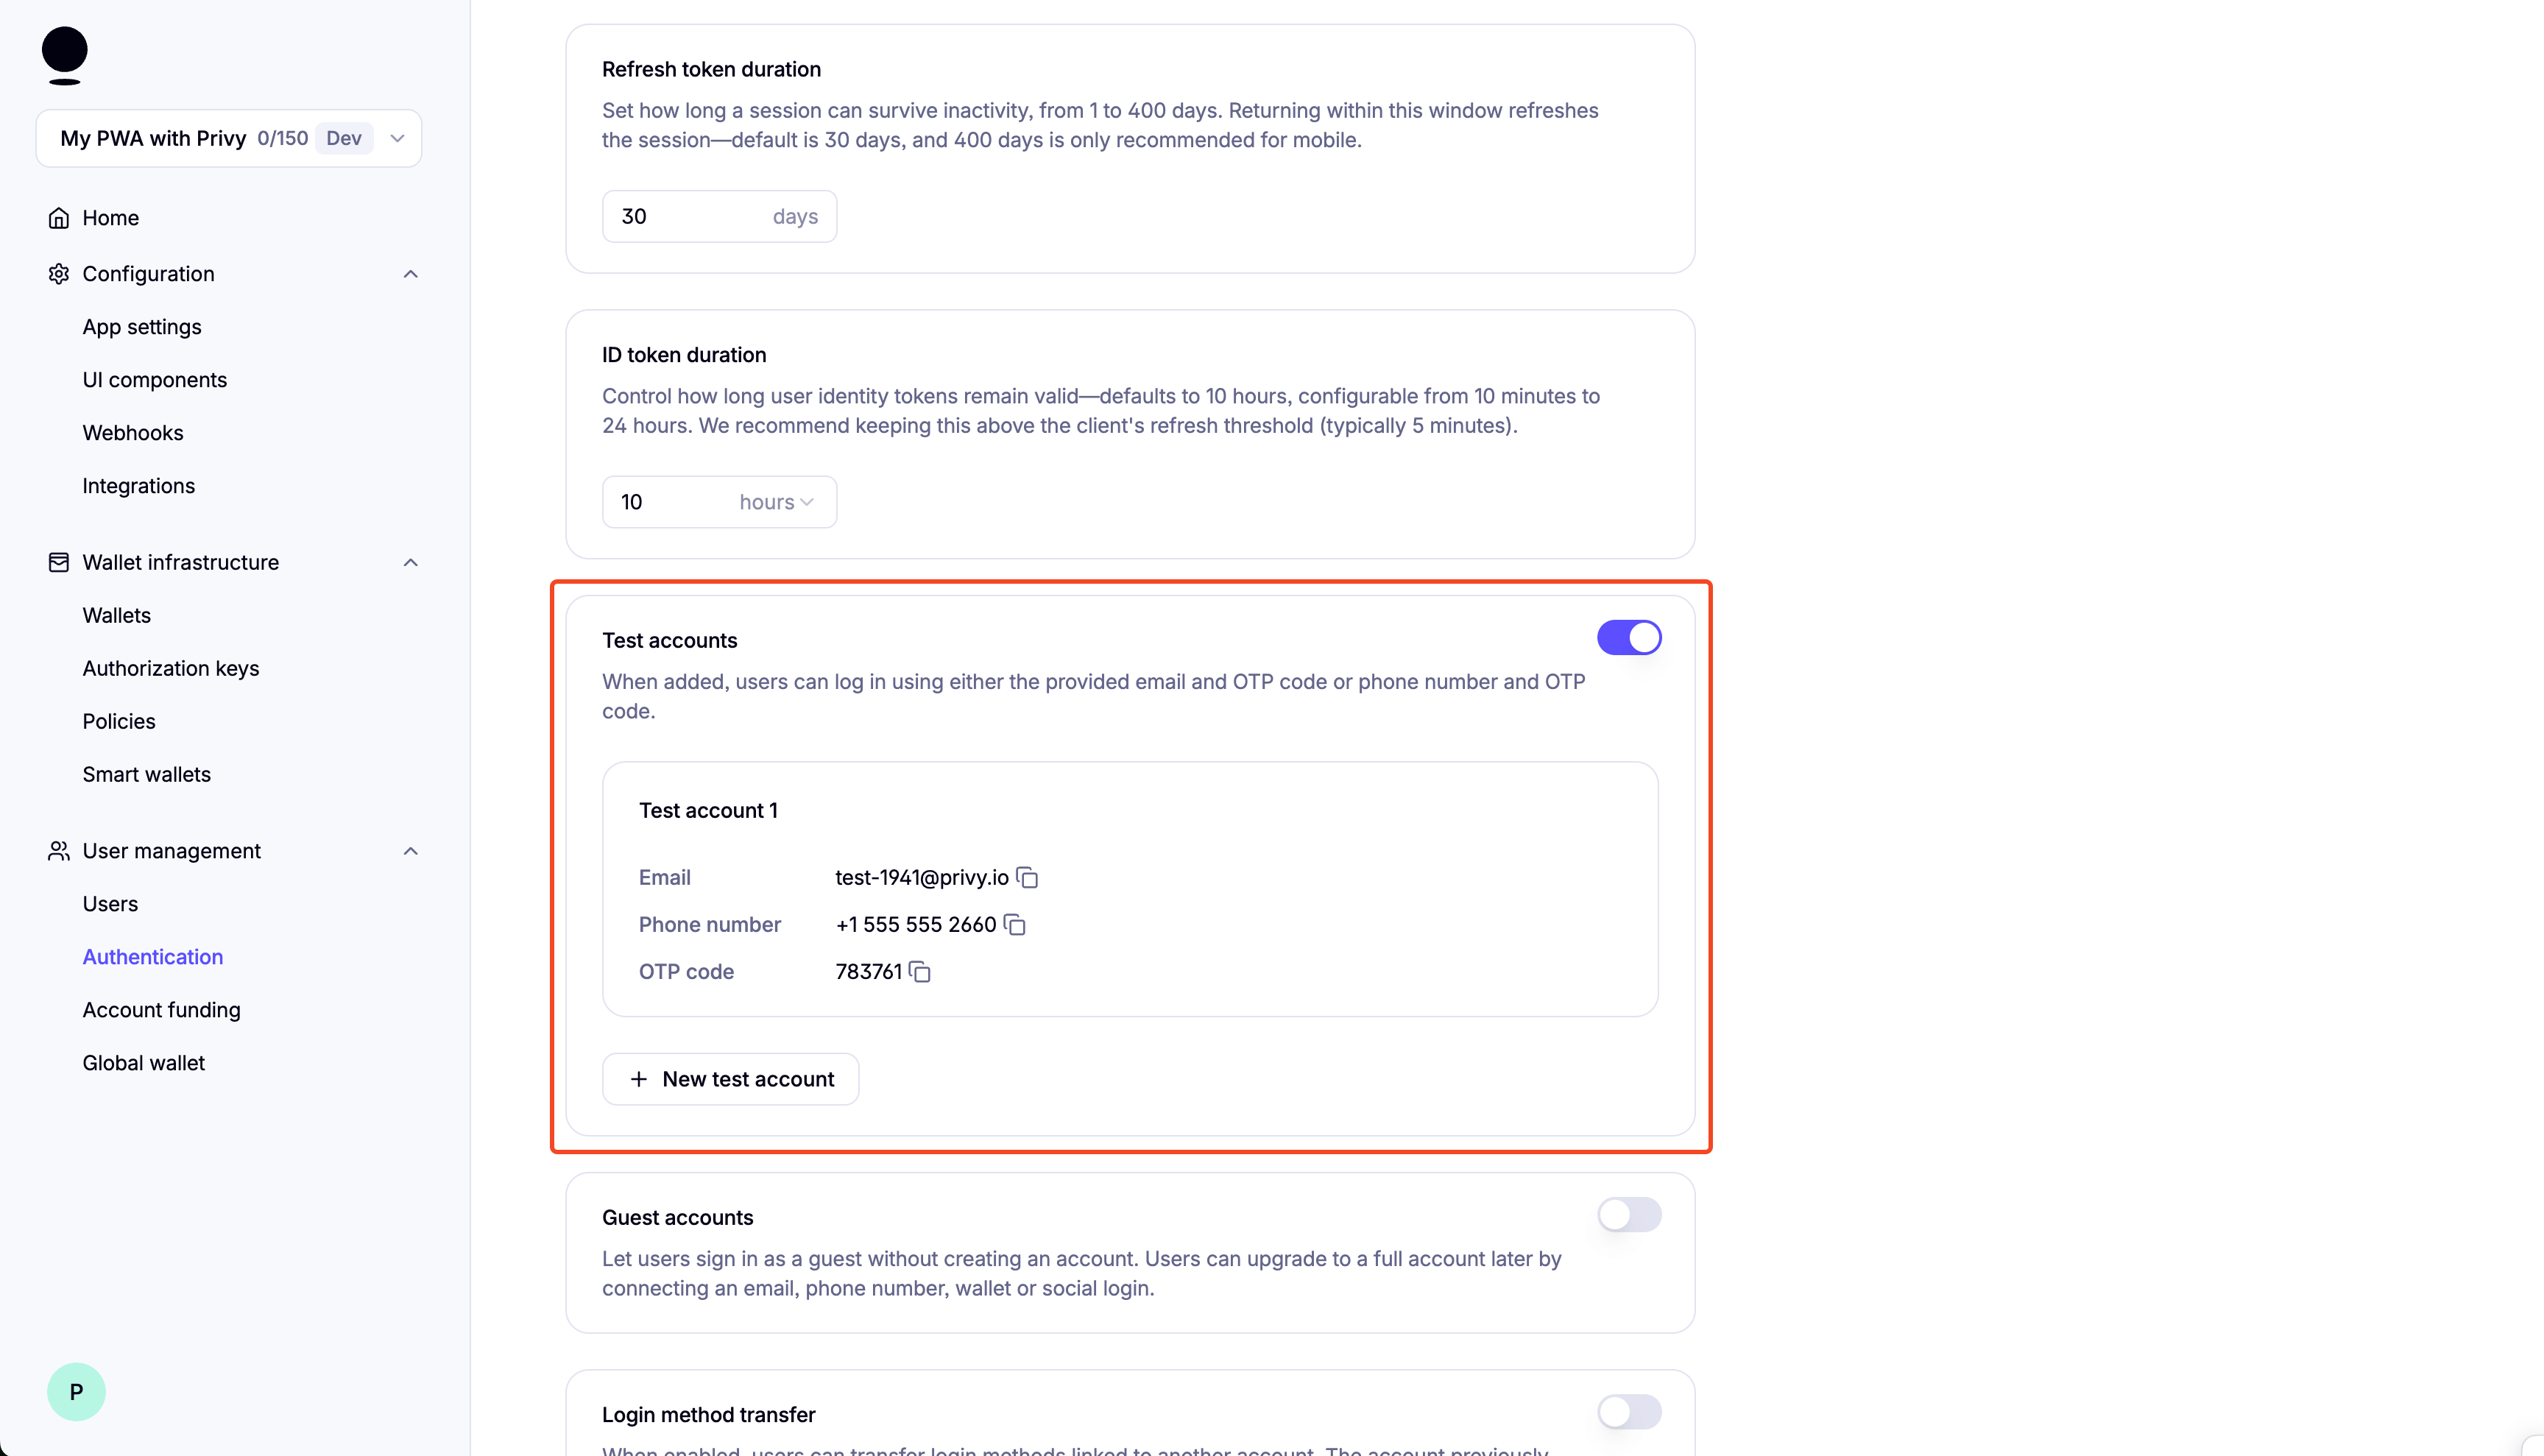
Setup
-
Clone the repository:
git clone https://github.com/monad-developers/next-serwist-privy-embedded-wallet.git -
cdinto the project directory:cd next-serwist-privy-embedded-wallet -
Install dependencies:
npm install -
Create a
.env.localfile in the root directory:cp .env.example .env.local -
Start adding your environment variables to the
.env.localfile:# PrivyNEXT_PUBLIC_PRIVY_APP_ID=your_privy_app_id_hereNEXT_PUBLIC_PRIVY_CLIENT_ID= # optional, you can leave this empty# VAPID Keys for push notificationsNEXT_PUBLIC_VAPID_PUBLIC_KEY=your_vapid_public_key_hereVAPID_PRIVATE_KEY=your_vapid_private_key_hereIf you lost your Privy App ID, you can find it in the Privy dashboard.
-
Generate VAPID keys for web push notifications:
npx web-push generate-vapid-keys --jsonCopy the generated keys to your .env.local file (replace the placeholder values from step 5).
-
Running the Application:
Development Mode:
npm run devThe application will be available at http://localhost:3000.
Production Mode:
For full PWA functionality (including install prompts):
npm run build && npm run start
Folder structure of the template
next-serwist-privy-embedded-wallet/├── app/│ ├── components/ # React components│ │ ├── InstallPWA.tsx # PWA install prompt│ │ └── ...│ ├── ~offline/ # Offline page│ └��── ...├── public/ # Static assets└── ...Changing the app name
- Edit
public/manifest.json:- Change the
nameandshort_namefields
- Change the
- Run
npm run buildto update the app
Notification Setup
To receive push notifications from this app, you need to enable notifications in your browser and/or system settings:
Browser Settings
Chrome/Edge
- Click the lock icon 🔒 in the address bar
- Set "Notifications" to "Allow"
- Or go to Settings → Privacy and security → Site Settings → Notifications
Firefox
- Click the shield icon 🛡️ in the address bar
- Turn off "Enhanced Tracking Protection" for this site (if needed)
- Allow notifications when prompted
- Or go to Settings → Privacy & Security → Permissions → Notifications
Safari
- Go to Safari → Settings → Websites → Notifications
- Find your site and set it to "Allow"
System Settings
macOS
- System Preferences → Notifications & Focus
- Find your browser and ensure notifications are enabled
- Check "Allow notifications from websites" in browser settings
Windows
- Settings → System → Notifications & actions
- Ensure your browser can send notifications
- Check browser notification settings
iOS
- Settings → Notifications → [Your Browser]
- Enable "Allow Notifications"
- Also enable in browser settings
Android
- Settings → Apps → [Your Browser] → Notifications
- Enable notifications
- Check browser notification permissions
Backend Integration Required
SendNotification.tsx component is sample codeSendNotification.tsx requires backend implementation:
- Save subscription data when users subscribe (see TODO comments in code)
- Delete subscription data when users unsubscribe
- Implement
/notificationendpoint to send actual push notifications - Use
web-pushlibrary or similar for server-side notification delivery
Customizing Notification Content
To customize your push notification content, edit app/notification/route.ts and modify the title, message, icon, and other properties in the sendNotification call.
Modifying the App Icon & Splash Screen
App Icons
Replace the icon files in the public/icons/ directory with your custom icons:
icon-512x512.png- Main app icon (512×512px)android-chrome-192x192.png- Android icon (192×192px)apple-touch-icon.png- iOS home screen icon (180×180px)
Also update the favicon:
public/favicon.ico- Browser faviconapp/favicon.ico- Next.js app favicon
Splash Screen
Splash screens are automatically generated from your app icon and theme colors defined in public/manifest.json. To customize:
- Update the
theme_colorandbackground_colorinpublic/manifest.json - Ensure your main icon (
icon-512x512.png) represents your brand - Run
npm run buildto apply changes
Use tools like PWA Asset Generator to create all required icon sizes from a single source image.
Deploying to Vercel
Using Vercel Dashboard
-
Connect your repository:
- Push your code to GitHub
- Visit vercel.com and import your repository
-
Configure environment variables:
- In your Vercel project dashboard, go to Settings → Environment Variables
- Add the same variables from your
.env.local:NEXT_PUBLIC_PRIVY_APP_IDNEXT_PUBLIC_PRIVY_CLIENT_IDNEXT_PUBLIC_VAPID_PUBLIC_KEYVAPID_PRIVATE_KEY
-
Deploy: Vercel will automatically build and deploy your app
-
Update Privy settings: In your Privy dashboard, add your Vercel domain (e.g.,
your-app.vercel.app) to the allowed origins
PWA features (install prompts, offline support, push notifications) work automatically on HTTPS domains like Vercel deployments.
Using Vercel CLI
Alternatively, deploy using the Vercel CLI:
-
Install Vercel CLI:
npm i -g vercel -
Login to Vercel:
vercel login -
Deploy:
vercelFollow the prompts to configure your project.
-
Add environment variables:
vercel env add NEXT_PUBLIC_PRIVY_APP_IDvercel env add NEXT_PUBLIC_PRIVY_CLIENT_IDvercel env add NEXT_PUBLIC_VAPID_PUBLIC_KEYvercel env add VAPID_PRIVATE_KEYOr you can go to the Vercel dashboard and add the environment variables there.
-
Redeploy with environment variables:
vercel --prod
Learn more
- Serwist: docs | guides
- Privy: create a wallet | send a transaction | sign a transaction
- Monad: supported tooling and infra