Introduction
In this guide, you will create an ERC20 token on Monad Testnet and index its transfers with GhostGraph. You’ll learn how to:- Deploy a basic ERC20 token contract
- Test the contract locally
- Deploy to Monad Testnet
- Set up event tracking with GhostGraph
Prerequisites
Before starting, ensure you have:- Node.js installed (v16 or later)
- Git installed
- Foundry installed
- Some MONAD testnet tokens (for gas fees)
- Basic knowledge of Solidity and ERC20 tokens
Project Setup
First, clone the starter repository:CatToken Contract Implementation
Thesrc/CatToken.sol contract implements a basic ERC20 token with a fixed supply. Here’s the code:
src/CatToken.sol
- Creates a token with name “CatToken” and symbol “CAT”
- Mints 1 billion tokens to the deployer’s address
- Uses OpenZeppelin’s battle-tested ERC20 implementation
Testing the Contract
Navigate to the test filetest/CatToken.t.sol:
test/CatToken.t.sol
Deployment Setup
1. Create a .env file:
2. Add your credentials to .env file:
3. Create deployment script script/DeployCatToken.s.sol:
script/DeployCatToken.s.sol
Deploying CatToken on Monad Testnet
1. Load environment variables:
2. Deploy the contract:
TOKEN_ADDRESS into your .env file
You should now have
Verify Smart Contract
1. Load environment variables:
2. Verify the contract:

Script for Token Transfers Transactions Onchain
We perform some token transfer transactions onchain to trigger theTransfer event that GhostGraph will index.
View the transfer script script/TransferCatTokens.s.sol:
script/TransferCatTokens.s.sol
Setting Up GhostGraph Indexing
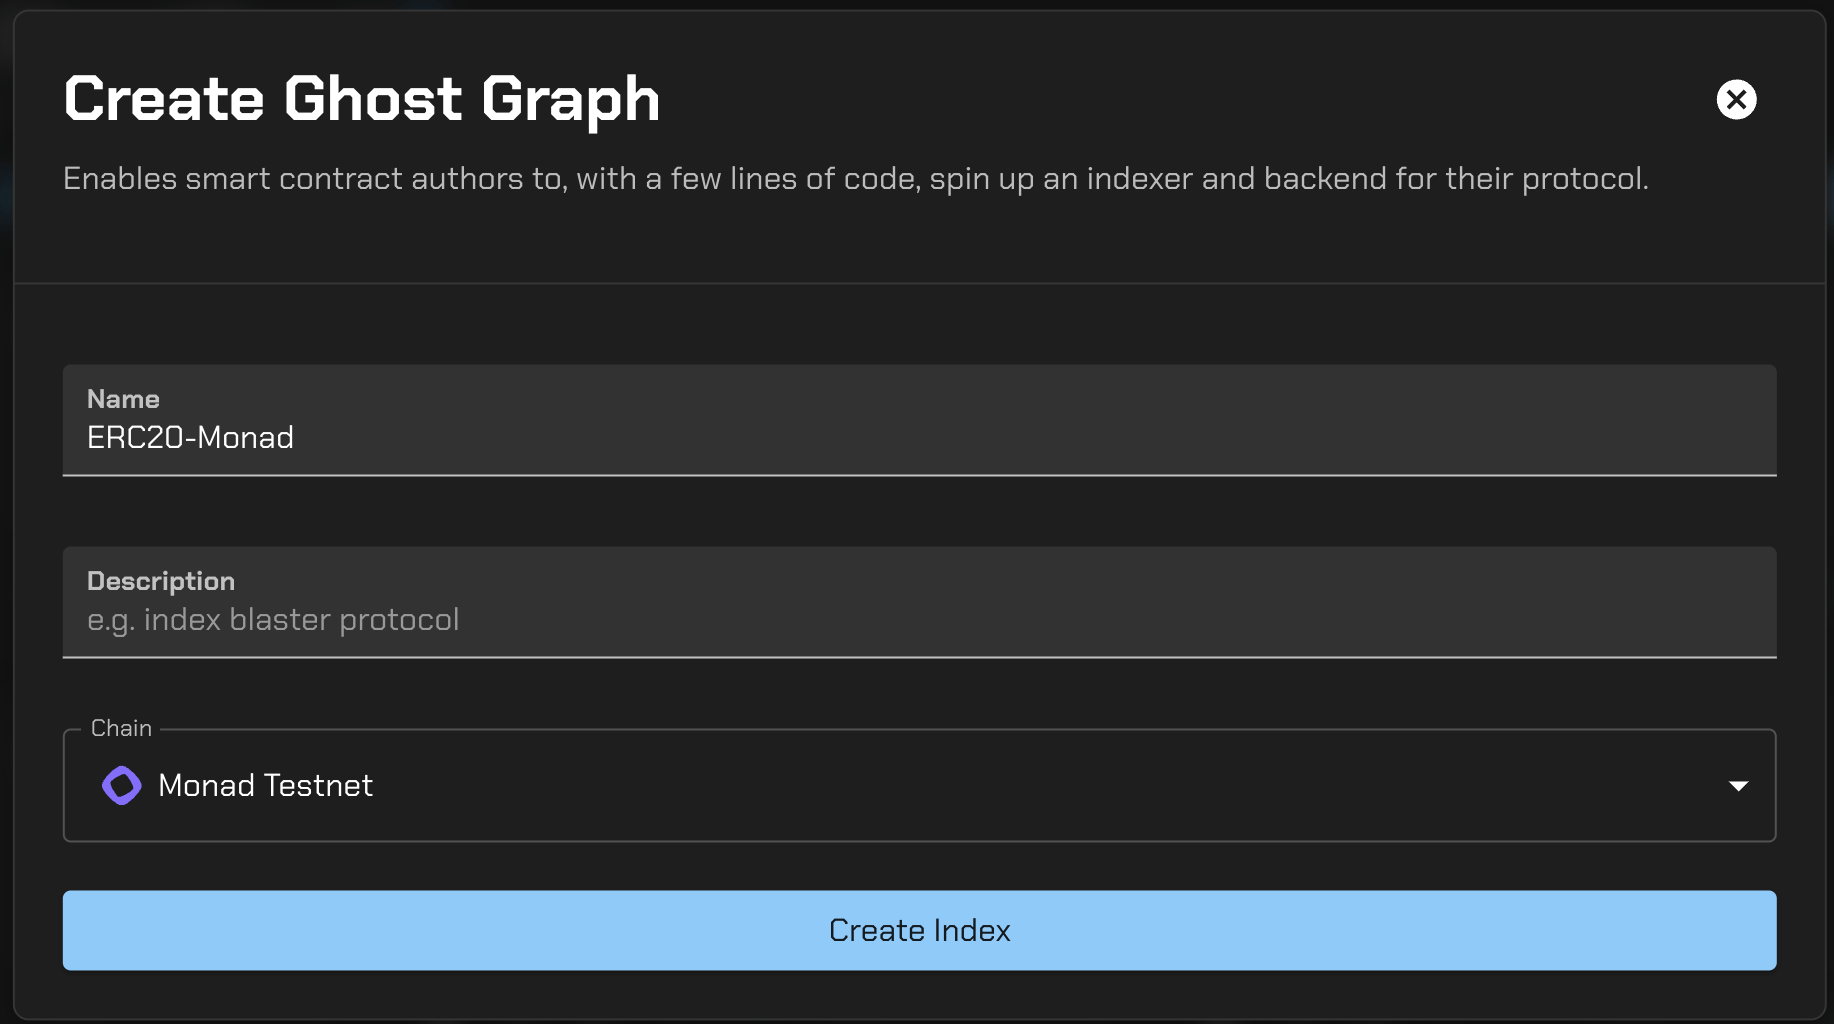
- Visit GhostGraph and click sign up for an account
- Create a new GhostGraph
- Copy and paste this into
events.solfile. We are interested in tracking token flow. Let’s insert this event here. To learn more about events: https://docs.tryghost.xyz/ghostgraph/getting-started/define-events
events.sol
- Copy and paste this into
schema.solfile. In this case, we are creating a few struct which we will use to save entity into the Ghost database. To learn more about schema: https://docs.tryghost.xyz/ghostgraph/getting-started/define-schema
schema.sol
-
Click on
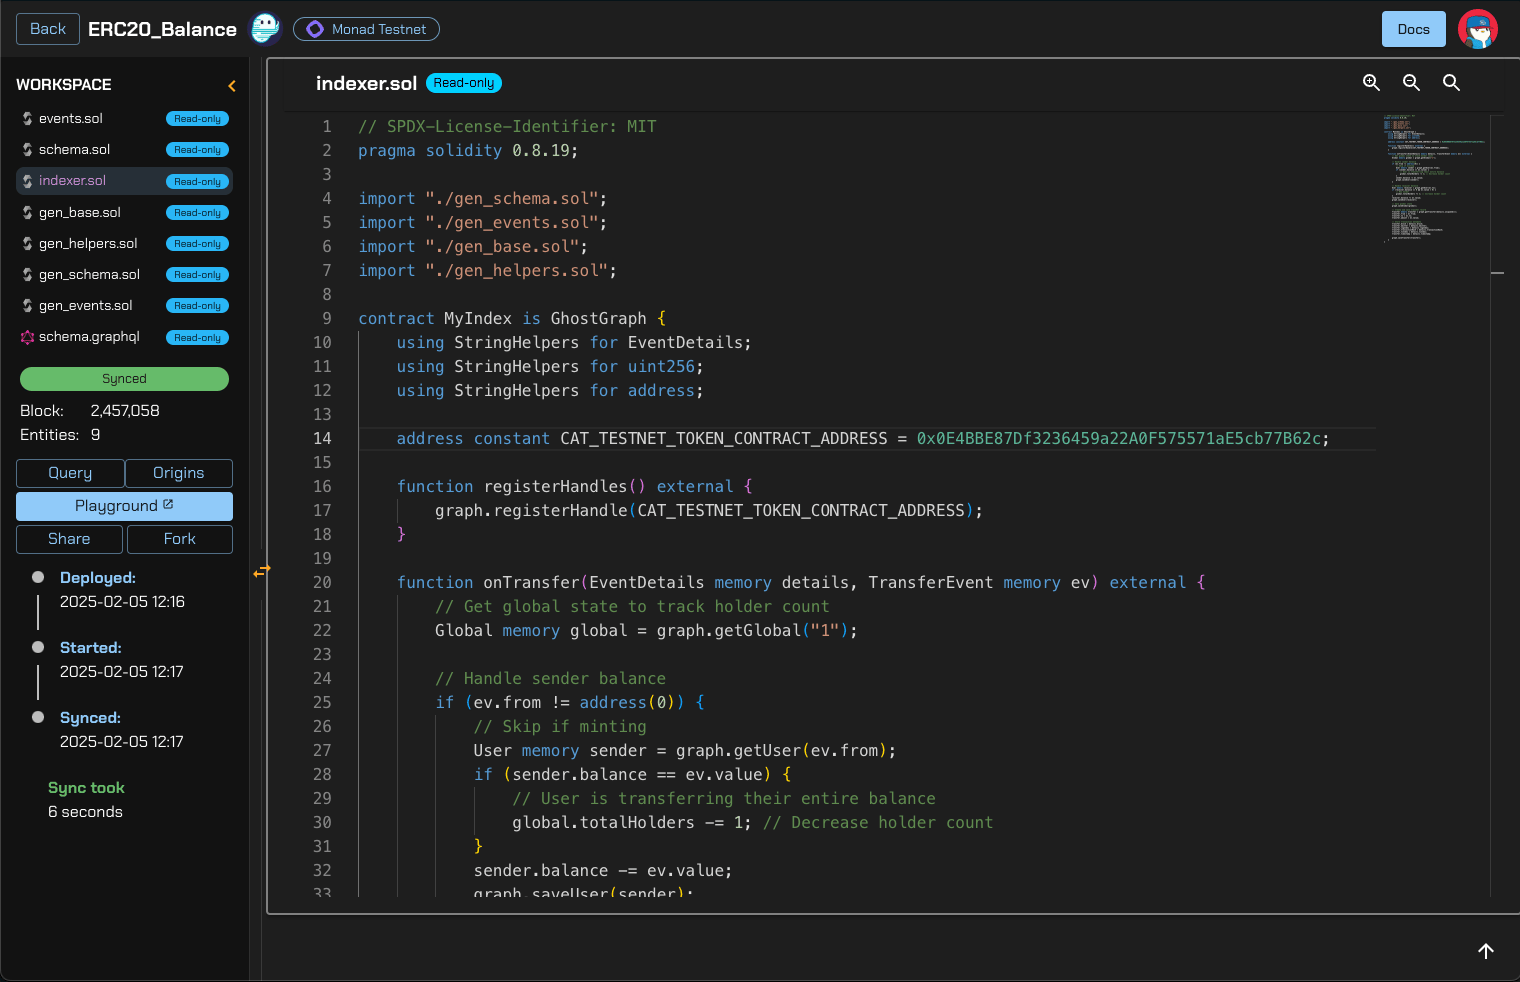
generate codebutton to generateindexer.solfile along with some other readonly files. This file will be where the logic and transformations resides. -
Copy and paste this into
indexer.solbe sure to insert your token address to theCAT_TESTNET_TOKEN_CONTRACT_ADDRESSvariable.
indexer.sol
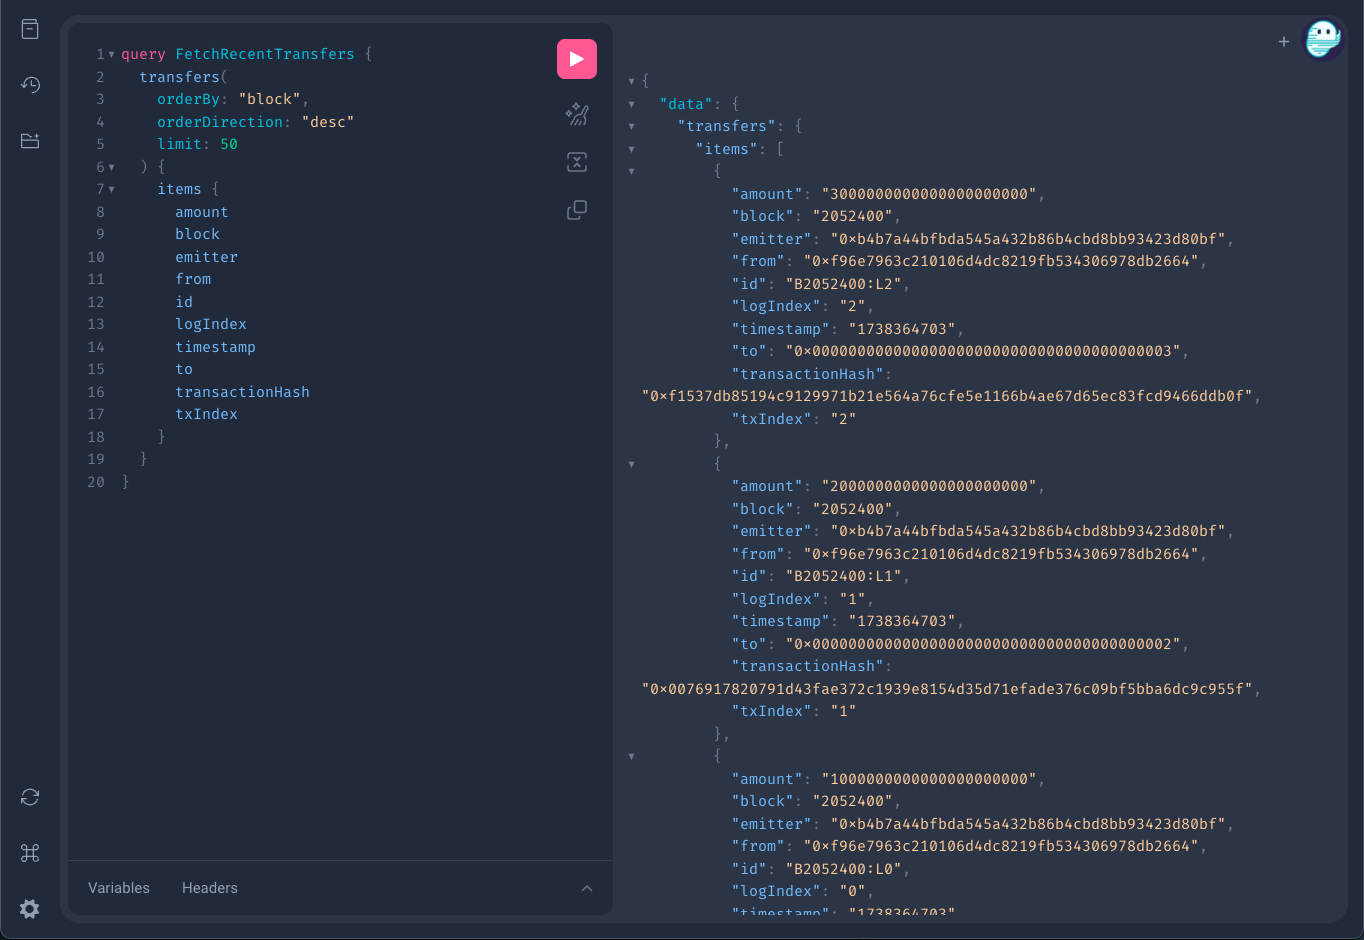
- Compile and deploy your GhostGraph. After a few seconds, you should see GhostGraph has successfully indexed your contract.
- Clicking on the playground will take you to the GraphQL playground, where you can ensure the data is indexed correctly. Let’s copy and paste this into our playground and click the play button to fetch the data from GhostGraph.
GraphQL Playground