Introduction
In this guide, you will create an ERC20 token on Monad Testnet and index its transfers with GhostGraph. You’ll learn how to:
- Deploy a basic ERC20 token contract
- Test the contract locally
- Deploy to Monad Testnet
- Set up event tracking with GhostGraph
Prerequisites
Before starting, ensure you have:
- Node.js installed (v16 or later)
- Git installed
- Foundry installed
- Some MONAD testnet tokens (for gas fees)
- Basic knowledge of Solidity and ERC20 tokens
Project Setup
First, clone the starter repository:
git clone https://github.com/chrischang/cat-token-tutorial.git
cd cat-token-tutorial
CatToken Contract Implementation
The src/CatToken.sol contract implements a basic ERC20 token with a fixed supply. Here’s the code:
// SPDX-License-Identifier: MIT
pragma solidity ^0.8.19;

import "@openzeppelin/contracts/token/ERC20/ERC20.sol";

contract CatToken is ERC20 {
    /**
     * @dev Constructor that gives msg.sender all existing tokens.
     * Initial supply is 1 billion tokens.
     */
    constructor() ERC20("CatToken", "CAT") {
        // Mint initial supply of 1 billion tokens to deployer
        // This will emit a Transfer event that GhostGraph   can index
        _mint(msg.sender, 1_000_000_000 * 10 ** decimals());
    }
}
- Creates a token with name “CatToken” and symbol “CAT”
- Mints 1 billion tokens to the deployer’s address
- Uses OpenZeppelin’s battle-tested ERC20 implementation
Testing the Contract
Navigate to the test file test/CatToken.t.sol:
// SPDX-License-Identifier: MIT
pragma solidity ^0.8.19;

import "forge-std/Test.sol";
import "../src/CatToken.sol";

contract CatTokenTest is Test {
    CatToken public token;
    address public owner;
    address public user;

    function setUp() public {
        owner = address(this);
        user = address(0x1);

        token = new CatToken();
    }

    function testInitialSupply() public view {
        assertEq(token.totalSupply(), 1_000_000_000 * 10**18);
        assertEq(token.balanceOf(owner), 1_000_000_000 * 10**18);
    }

    function testTransfer() public {
        uint256 amount = 1_000_000 * 10**18;
        token.transfer(user, amount);
        assertEq(token.balanceOf(user), amount);
        assertEq(token.balanceOf(owner), 999_000_000 * 10**18);
    }
}
Deployment Setup
1. Create a .env file:
2. Add your credentials to .env file:
PRIVATE_KEY=your_private_key_here
MONAD_TESTNET_RPC=https://testnet-rpc.monad.xyz
3. Create deployment script script/DeployCatToken.s.sol:
script/DeployCatToken.s.sol
// SPDX-License-Identifier: MIT
pragma solidity ^0.8.19;

import "forge-std/Script.sol";
import "../src/CatToken.sol";

contract DeployCatToken is Script {
    function run() external {
        // Retrieve private key from environment
        uint256 deployerPrivateKey = vm.envUint("PRIVATE_KEY");

        vm.startBroadcast(deployerPrivateKey);
        CatToken token = new CatToken();
        vm.stopBroadcast();

        // Log the token address - this will be needed for GhostGraph indexing and submit transactions
        console.log("CatToken deployed to:", address(token));
    }
}
Deploying CatToken on Monad Testnet
1. Load environment variables:
2. Deploy the contract:
forge script script/DeployCatToken.s.sol \
--rpc-url $MONAD_TESTNET_RPC \
--broadcast
TOKEN_ADDRESS into your .env file
You should now have
PRIVATE_KEY=your_private_key_here
MONAD_TESTNET_RPC=https://testnet-rpc.monad.xyz
TOKEN_ADDRESS=0x...
Verify Smart Contract
1. Load environment variables:
2. Verify the contract:
forge verify-contract \
  --rpc-url $MONAD_TESTNET_RPC \
  --verifier sourcify \
  --verifier-url 'https://sourcify-api-monad.blockvision.org/' \
  $TOKEN_ADDRESS \
  src/CatToken.sol:CatToken

Script for Token Transfers Transactions Onchain
We perform some token transfer transactions onchain to trigger the Transfer event that GhostGraph will index.
View the transfer script script/TransferCatTokens.s.sol:
script/TransferCatTokens.s.sol
// SPDX-License-Identifier: MIT
pragma solidity ^0.8.19;

import "forge-std/Script.sol";
import "../src/CatToken.sol";

contract TransferCatTokens is Script {
    function run() external {
        uint256 deployerPrivateKey = vm.envUint("PRIVATE_KEY");
        address token = vm.envAddress("TOKEN_ADDRESS");

        vm.startBroadcast(deployerPrivateKey);

        // Send tokens to test addresses
        CatToken(token).transfer(address(0x1), 1000 * 10**18);
        CatToken(token).transfer(address(0x2), 2000 * 10**18);
        CatToken(token).transfer(address(0x3), 3000 * 10**18);

        vm.stopBroadcast();
    }
}
forge script script/TransferCatTokens.s.sol \
--rpc-url $MONAD_TESTNET_RPC \
--broadcast
Setting Up GhostGraph Indexing
-
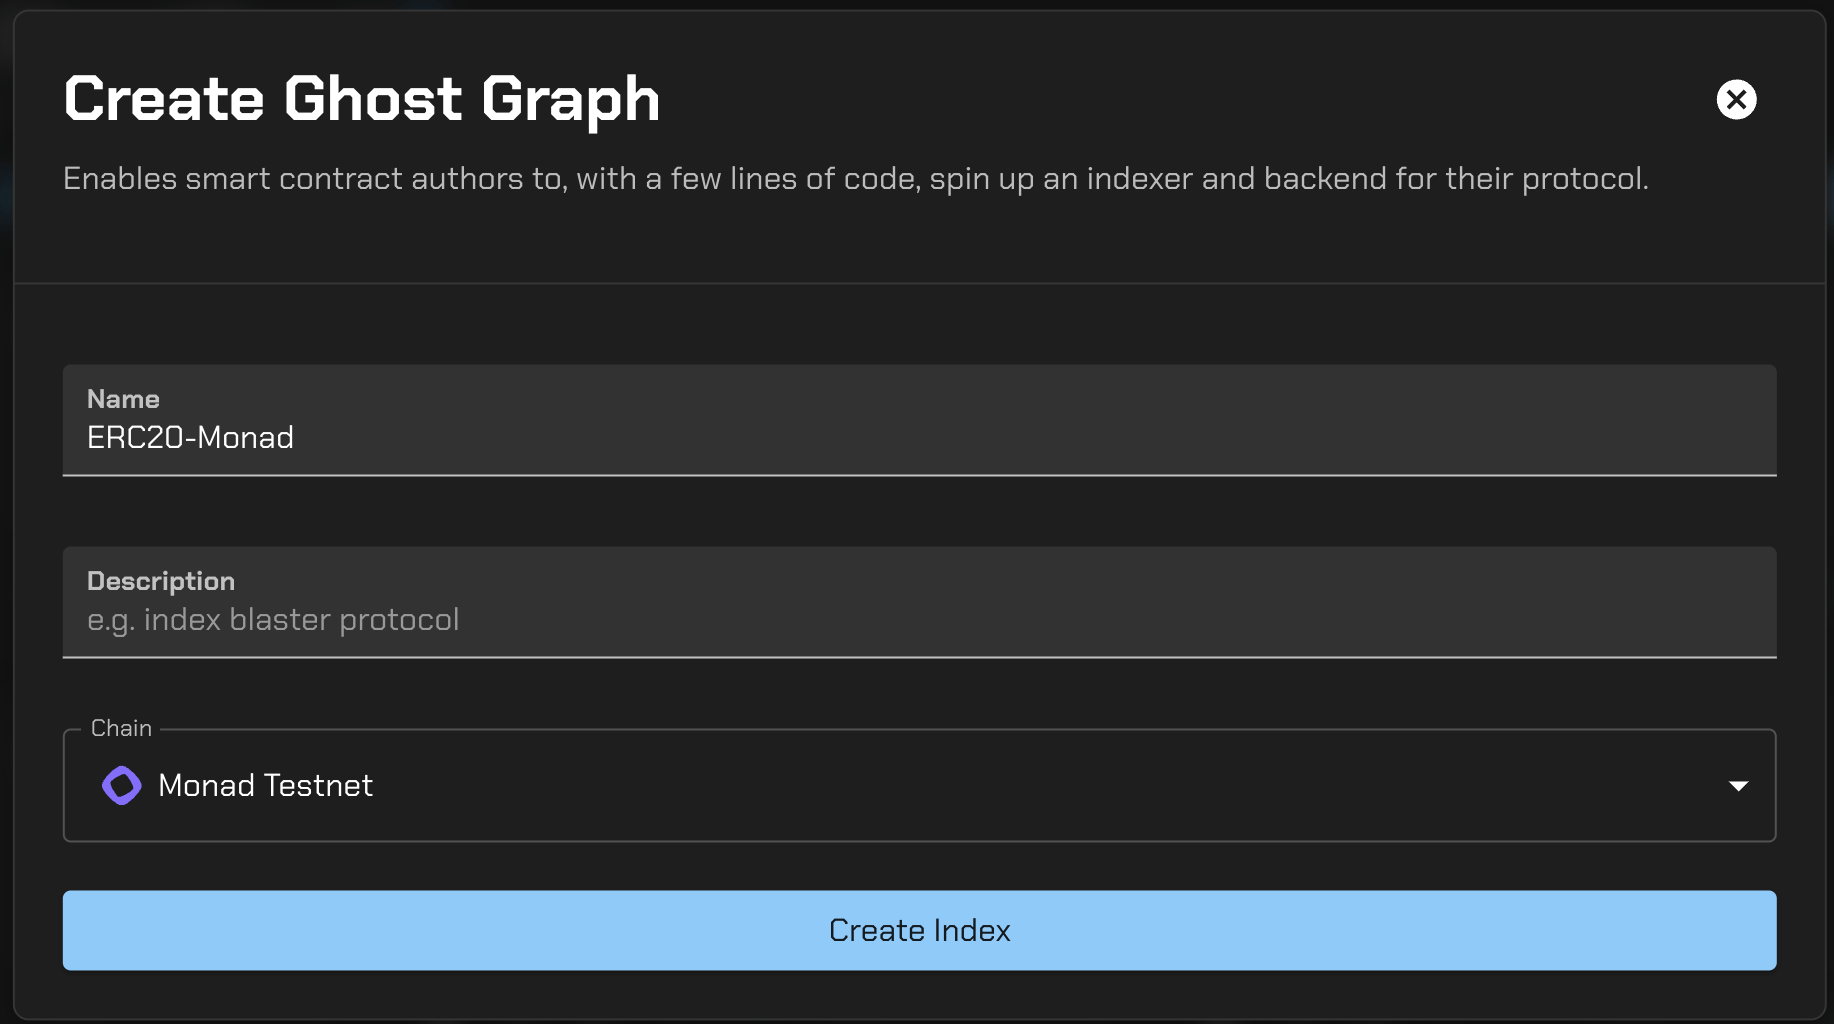
Visit GhostGraph and click sign up for an account
-
Create a new GhostGraph
- Copy and paste this into
events.sol file. We are interested in tracking token flow. Let’s insert this event here. To learn more about events: https://docs.tryghost.xyz/ghostgraph/getting-started/define-events
interface Events {
    event Transfer(address indexed from, address indexed to, uint256 value);
}
- Copy and paste this into
schema.sol file. In this case, we are creating a few struct which we will use to save entity into the Ghost database. To learn more about schema: https://docs.tryghost.xyz/ghostgraph/getting-started/define-schema
struct Global {
    string id;
    uint256 totalHolders;
}

struct User {
    address id;
    uint256 balance;
}

struct Transfer {
    string id;
    address from;
    address to;
    uint256 amount;

    uint64 block;
    address emitter;
    uint32 logIndex;
    bytes32 transactionHash;
    uint32 txIndex;
    uint32 timestamp;
}
-
Click on
generate code button to generate indexer.sol file along with some other readonly files. This file will be where the logic and transformations resides.
-
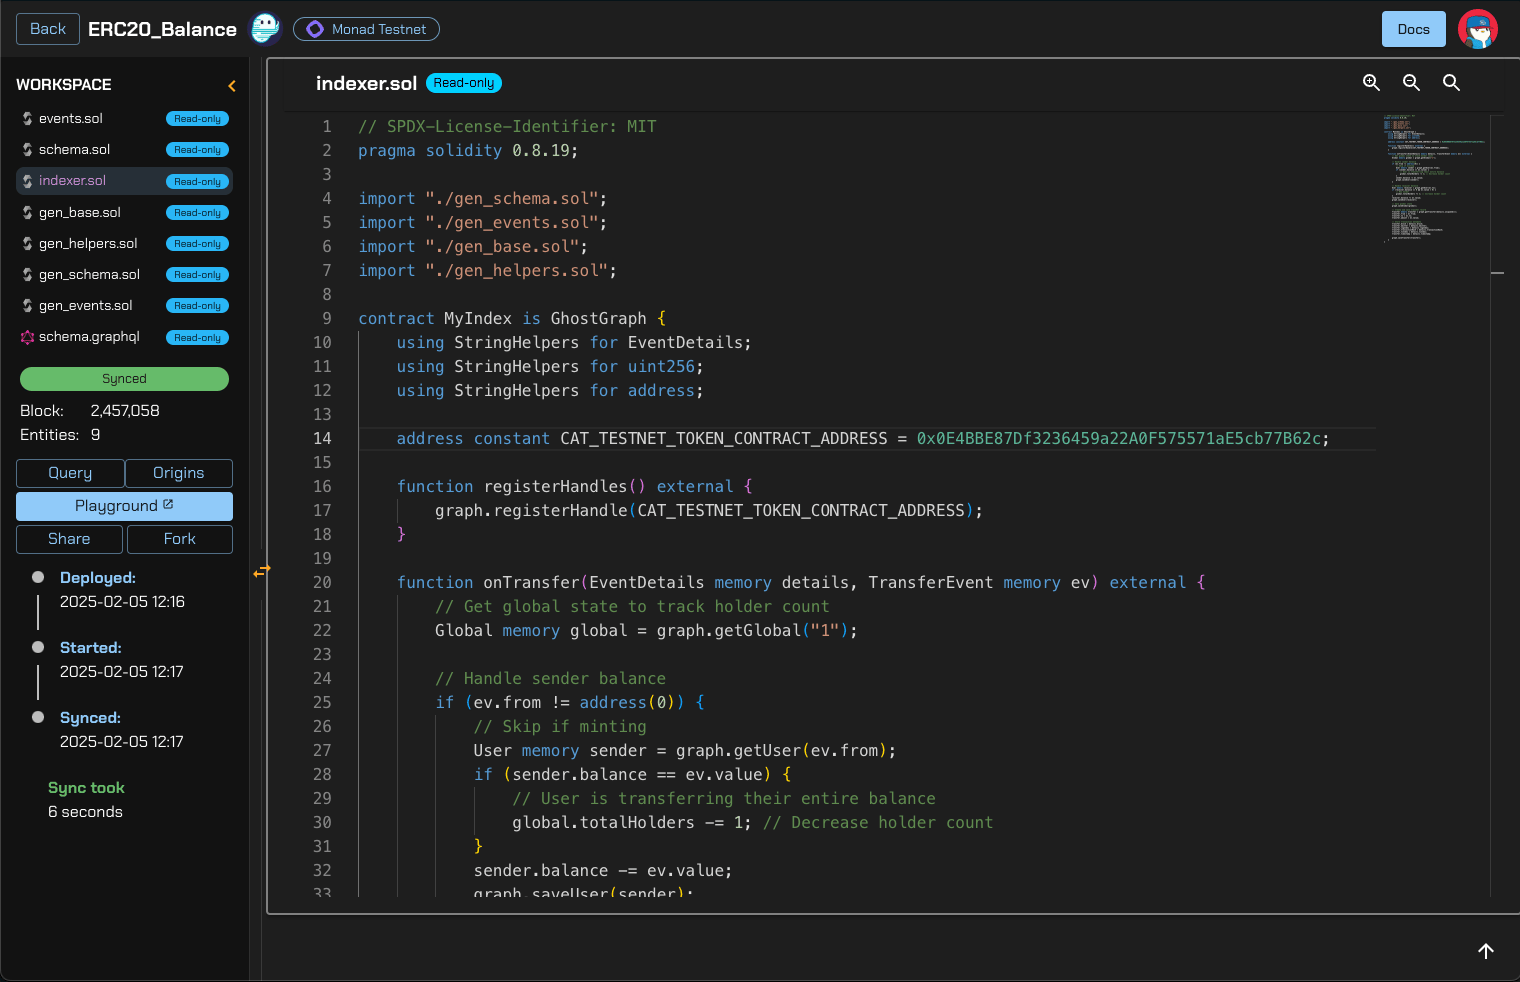
Copy and paste this into
indexer.sol be sure to insert your token address to the CAT_TESTNET_TOKEN_CONTRACT_ADDRESS variable.
// SPDX-License-Identifier: MIT
pragma solidity 0.8.19;

import "./gen_schema.sol";
import "./gen_events.sol";
import "./gen_base.sol";
import "./gen_helpers.sol";

contract MyIndex is GhostGraph {
    using StringHelpers for EventDetails;
    using StringHelpers for uint256;
    using StringHelpers for address;

    address constant CAT_TESTNET_TOKEN_CONTRACT_ADDRESS = <INSERT YOUR TOKEN ADDRESS>;

    function registerHandles() external {
        graph.registerHandle(CAT_TESTNET_TOKEN_CONTRACT_ADDRESS);
    }

    function onTransfer(EventDetails memory details, TransferEvent memory ev) external {
        // Get global state to track holder count
        Global memory global = graph.getGlobal("1");

        // Handle sender balance
        if (ev.from != address(0)) {
            // Skip if minting
            User memory sender = graph.getUser(ev.from);
            if (sender.balance == ev.value) {
                // User is transferring their entire balance
                global.totalHolders -= 1; // Decrease holder count
            }
            sender.balance -= ev.value;
            graph.saveUser(sender);
        }

        // Handle receiver balance
        User memory receiver = graph.getUser(ev.to);
        if (receiver.balance == 0 && ev.value > 0) {
            // New holder
            global.totalHolders += 1; // Increase holder count
        }
        receiver.balance += ev.value;
        graph.saveUser(receiver);

        // Save global state
        graph.saveGlobal(global);

        // Create and save transfer record
        Transfer memory transfer = graph.getTransfer(details.uniqueId());
        transfer.from = ev.from;
        transfer.to = ev.to;
        transfer.amount = ev.value;

        // Store transaction metadata
        transfer.block = details.block;
        transfer.emitter = details.emitter;
        transfer.logIndex = details.logIndex;
        transfer.transactionHash = details.transactionHash;
        transfer.txIndex = details.txIndex;
        transfer.timestamp = details.timestamp;

        graph.saveTransfer(transfer);
    }
}
- Compile and deploy your GhostGraph. After a few seconds, you should see GhostGraph has successfully indexed your contract.
- Clicking on the playground will take you to the GraphQL playground, where you can ensure the data is indexed correctly. Let’s copy and paste this into our playground and click the play button to fetch the data from GhostGraph.
query FetchRecentTransfers {
  transfers(
    orderBy: "block",
    orderDirection: "desc"
    limit: 50
  ) {
    items {
      amount
      block
      emitter
      from
      id
      logIndex
      timestamp
      to
      transactionHash
      txIndex
    }
  }
}
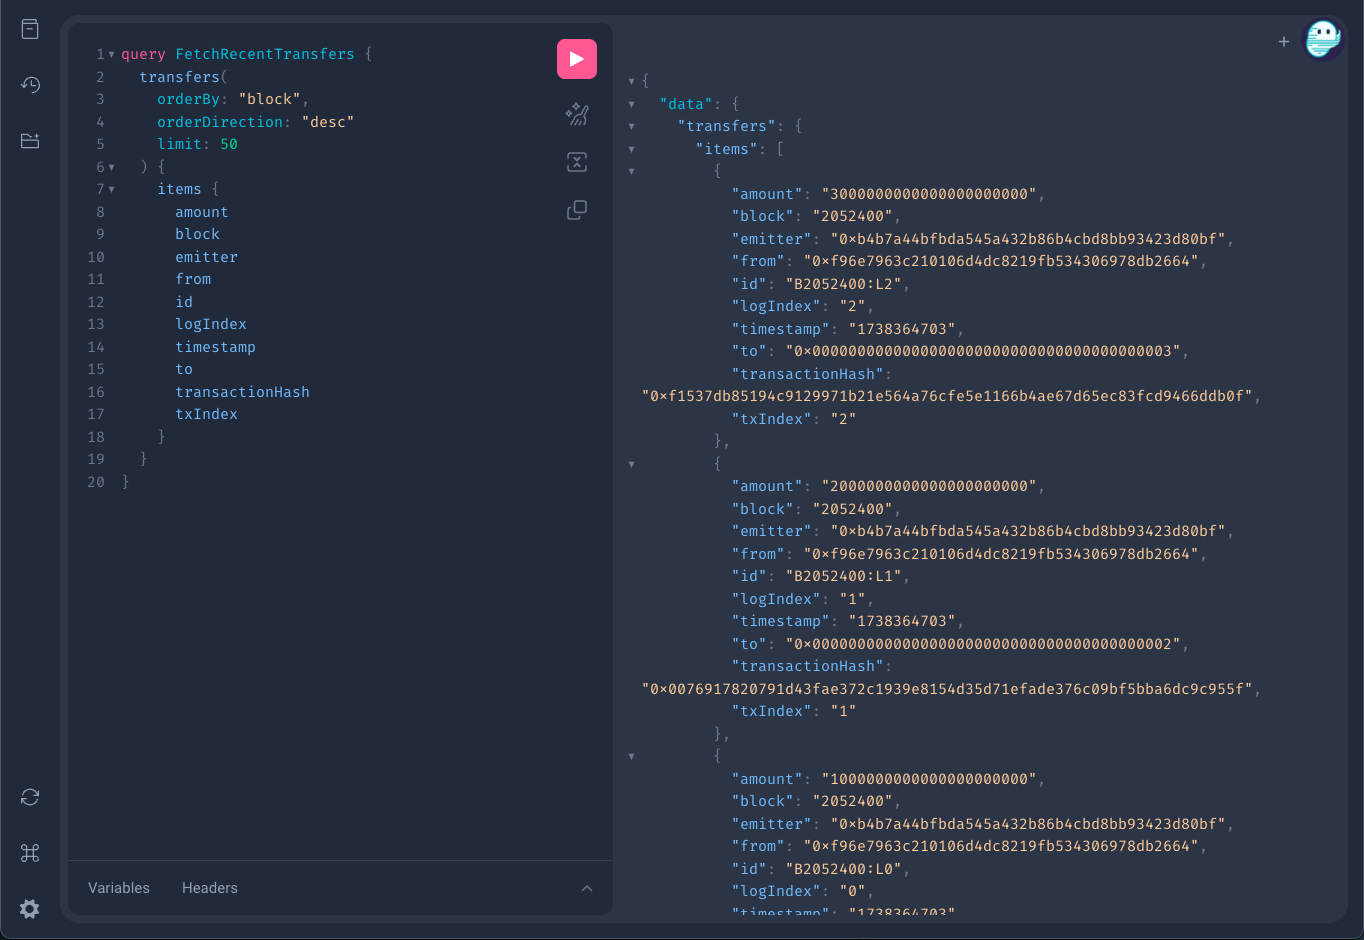
Try submitting additional transactions by running the transfer script again. You should see that GhostGraph automatically indexes the new transactions.
Conclusion
You have now successfully created a GhostGraph to track onchain data for your contract. The next step is to connect it to your frontend.
The Ghost team has created end-to-end tutorials on how to do just that here